
Dune Baby Bump
With the Dune 2 premiere turning heads, the whole cast has pulled out a series of looks that are just too good not to try and sew! And with my pregnancy in its 3rd trimester, I have challenged myself to sew one last crazy project, tackling -
this look -

this look -

… and yes, this look.

What do these have in common?
Well, for starters, they are Zendaya at various Dune 2 premieres wearing clothing I cannot afford, nor do I have the body shape to match (although Dune 2 does feature a pregnant person so this fits somewhere in the narrative, right?)
These are also the perfect looks to touch on the different main themes in the movie - Spice, sand and machinery.
A few days (or weeks) ago, I picked up all the fabric which, I’m scared to say, came to nearly $300!
Here’s what I got…
Materials
Shop the Fashionary sketch tools: (use WENDY_10 for 10% off)
Shop Lutterloh kits: (use Wendy10 for 10% off)
Look 1: Bottega Veneta
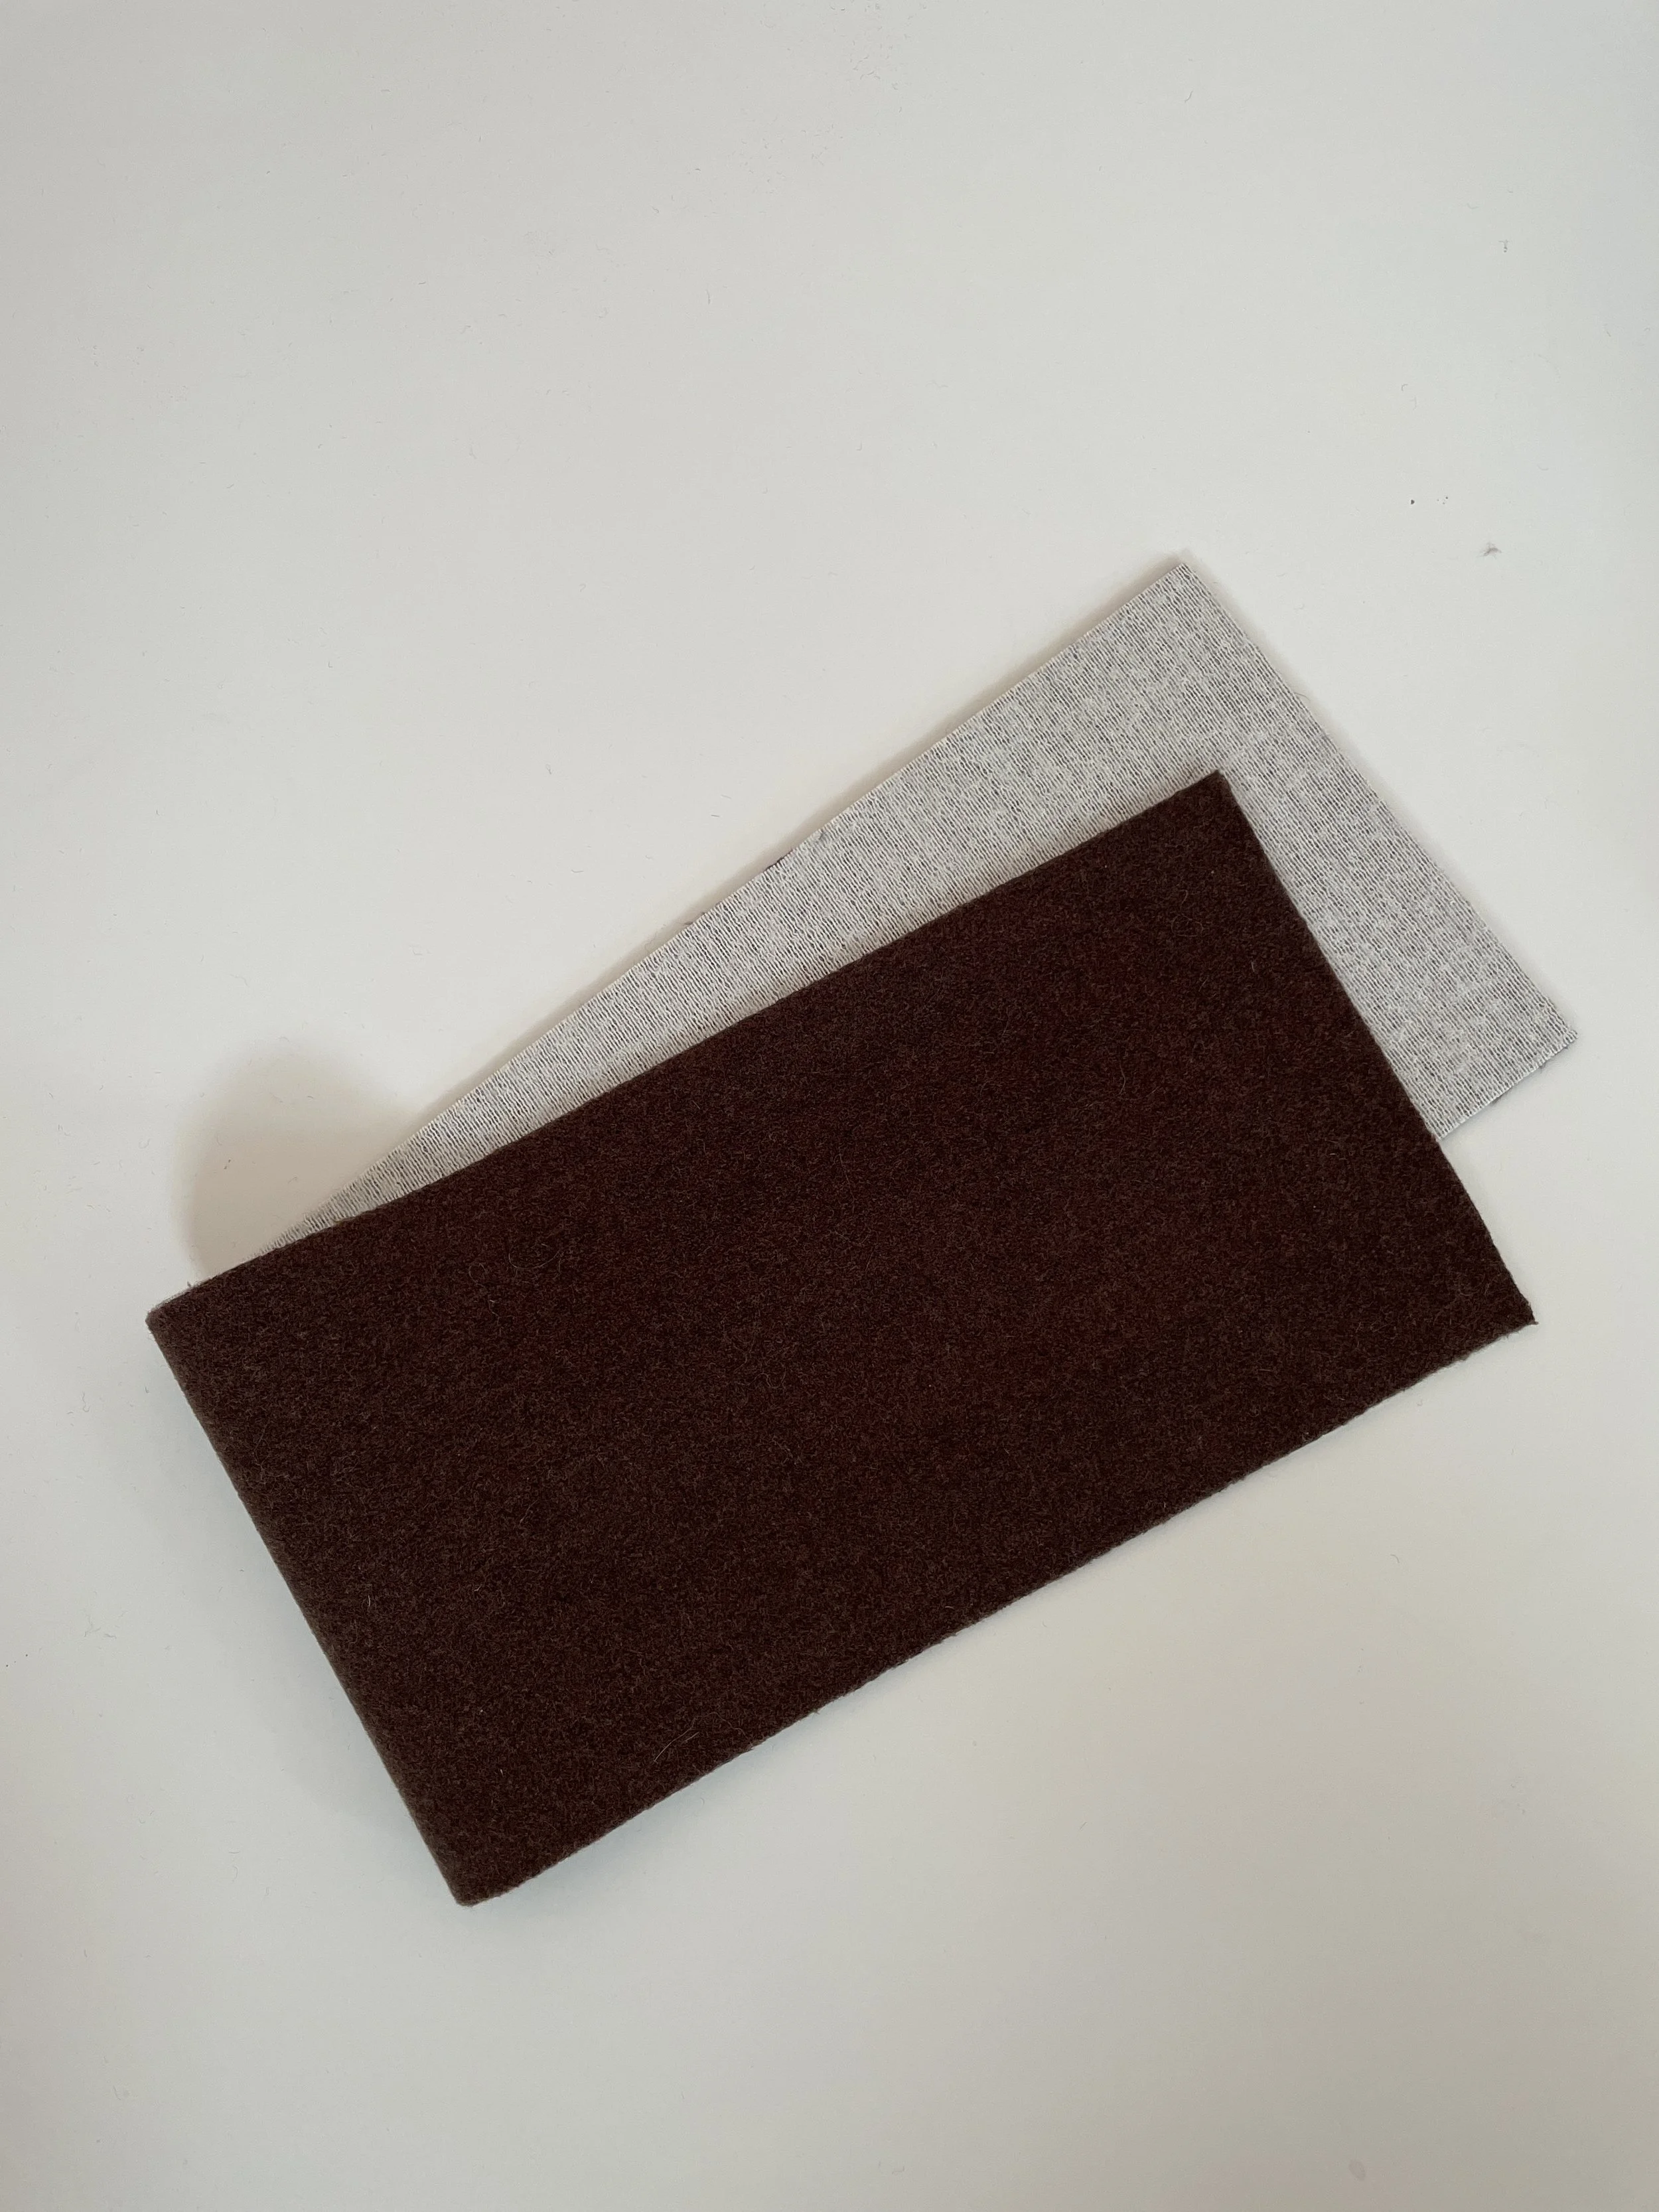
1.5 yards Brown wool (I splurged on this one!)
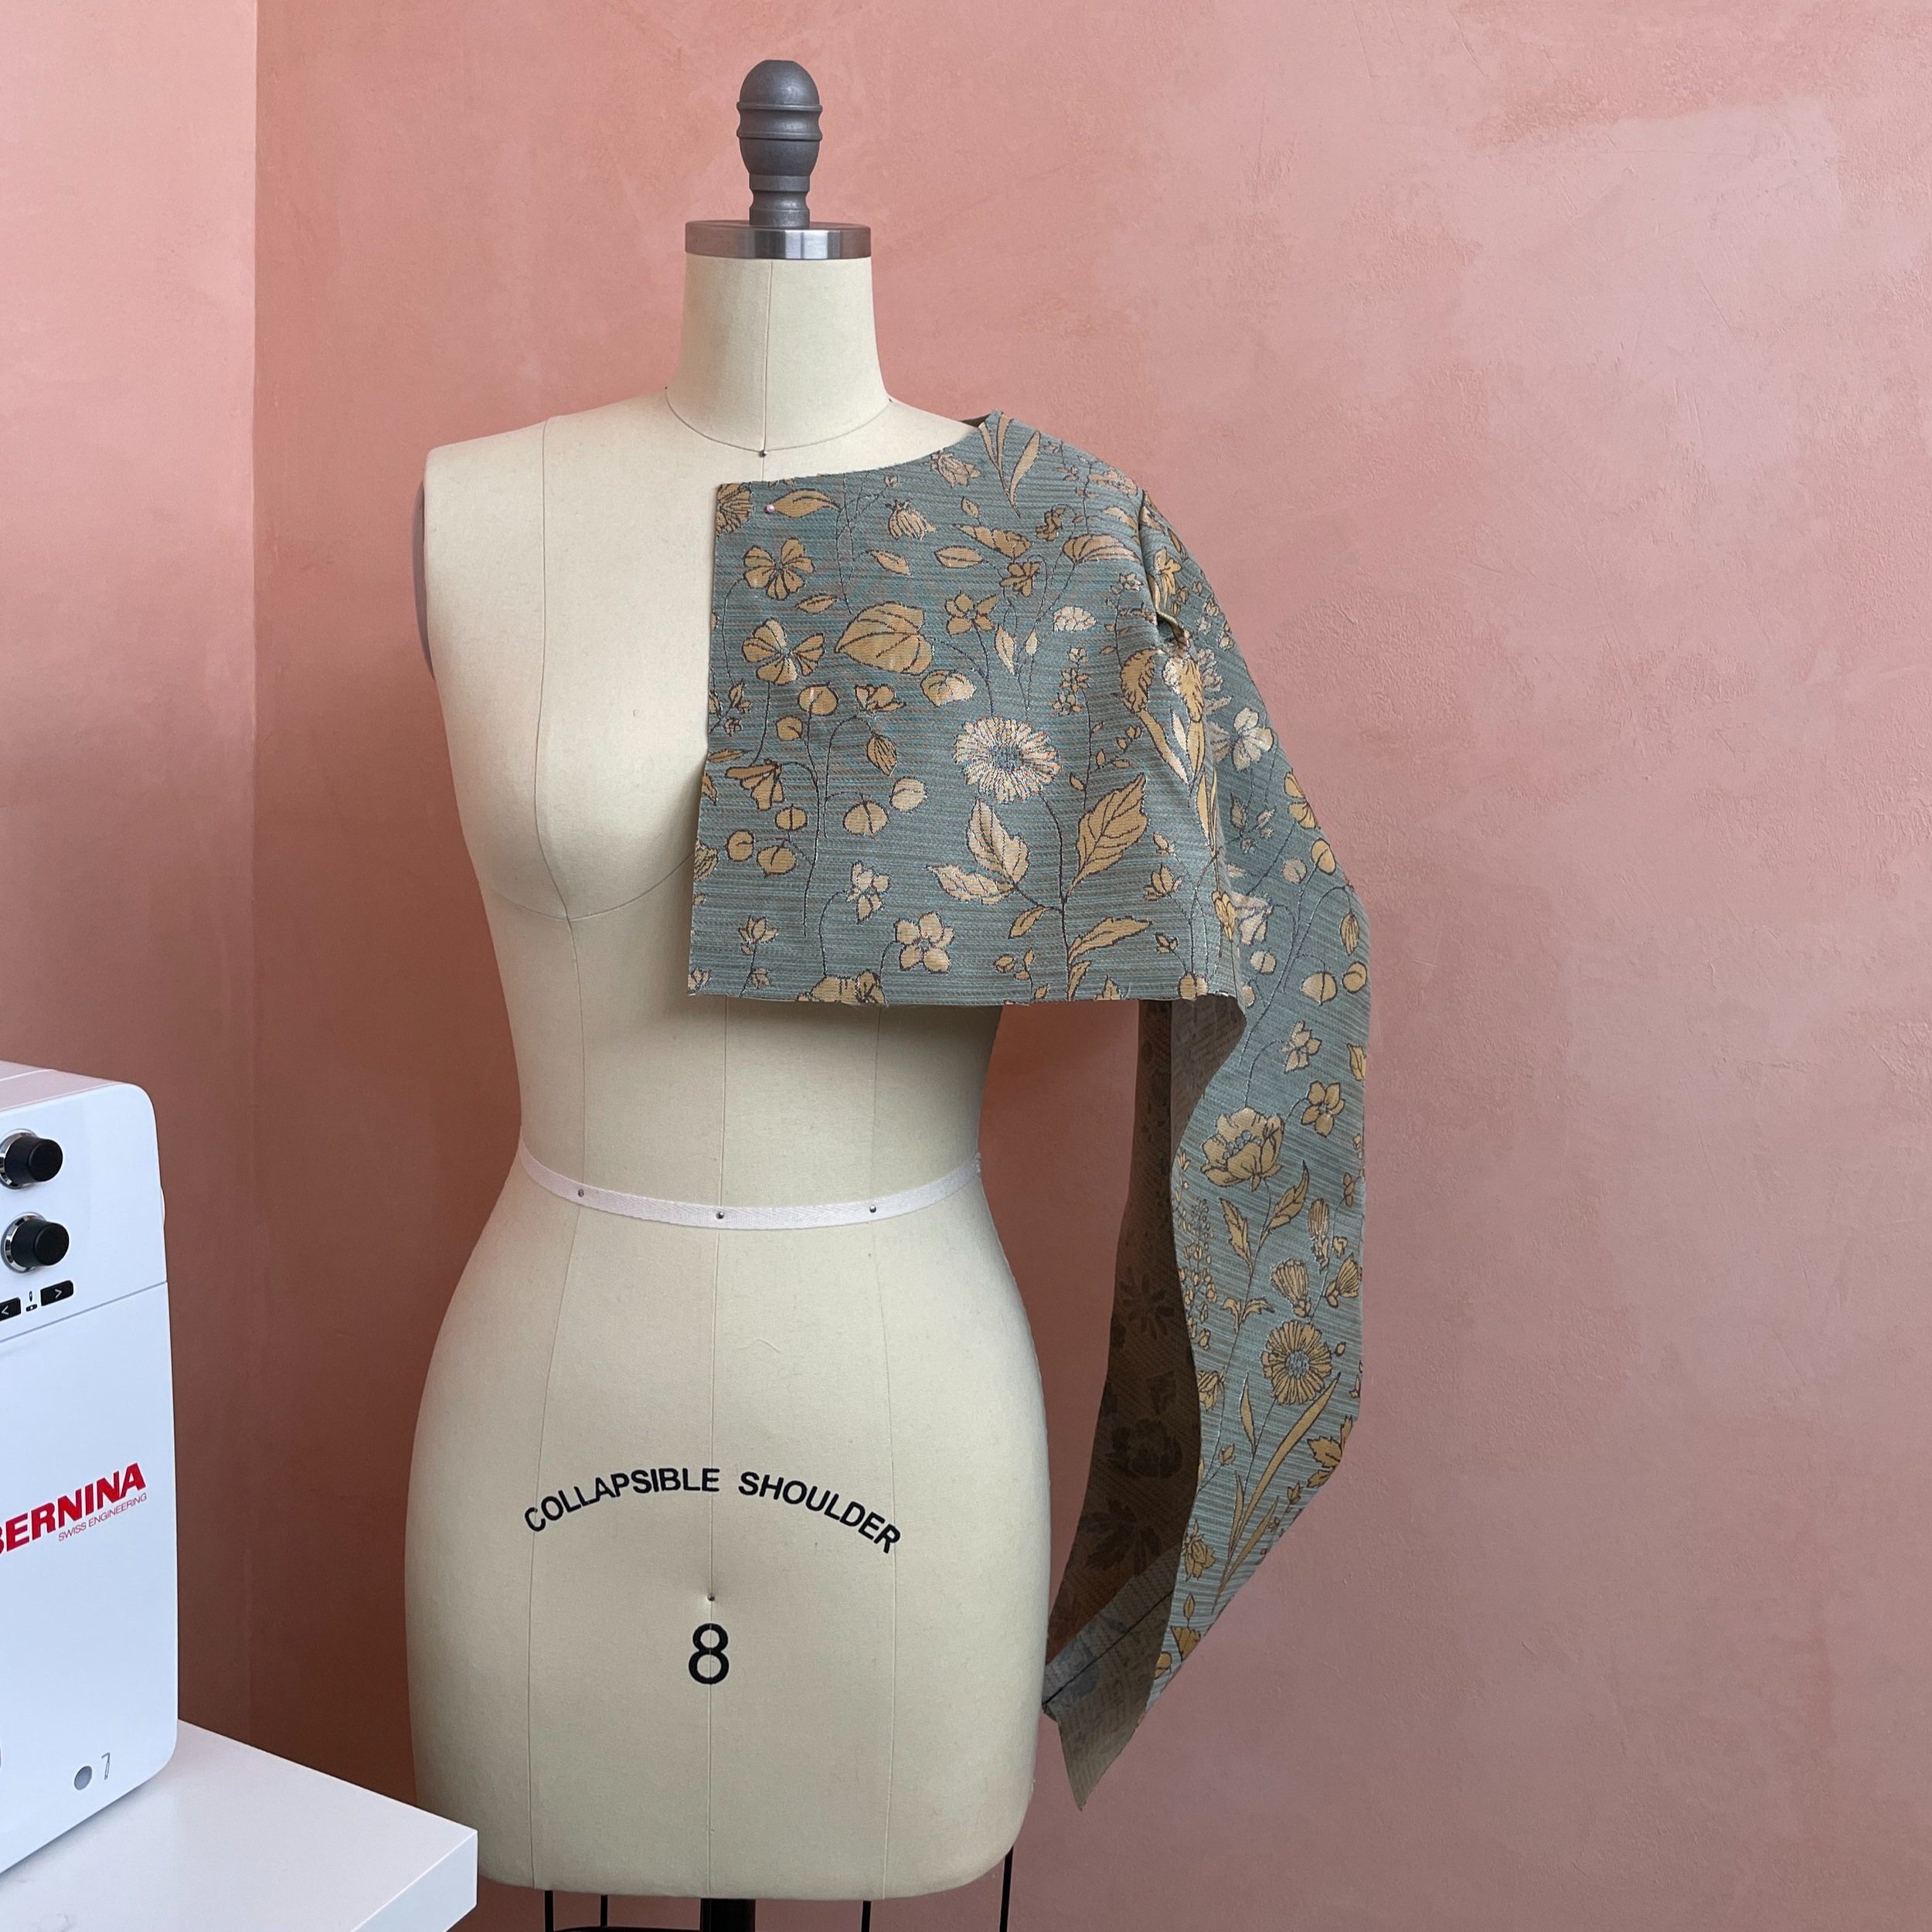
Look 2: Louis Vuitton
1 yard Brocade
Look 3: Thierry Mugler
.75 yards of Glossy Chrome Vinyl (PVC or Pleather)
Tape
Let’s get started …
Look 1
Bottega Veneta
* All pressing in this project is done using a cloth over top to protect the wool and prevent napping in the fibres. *
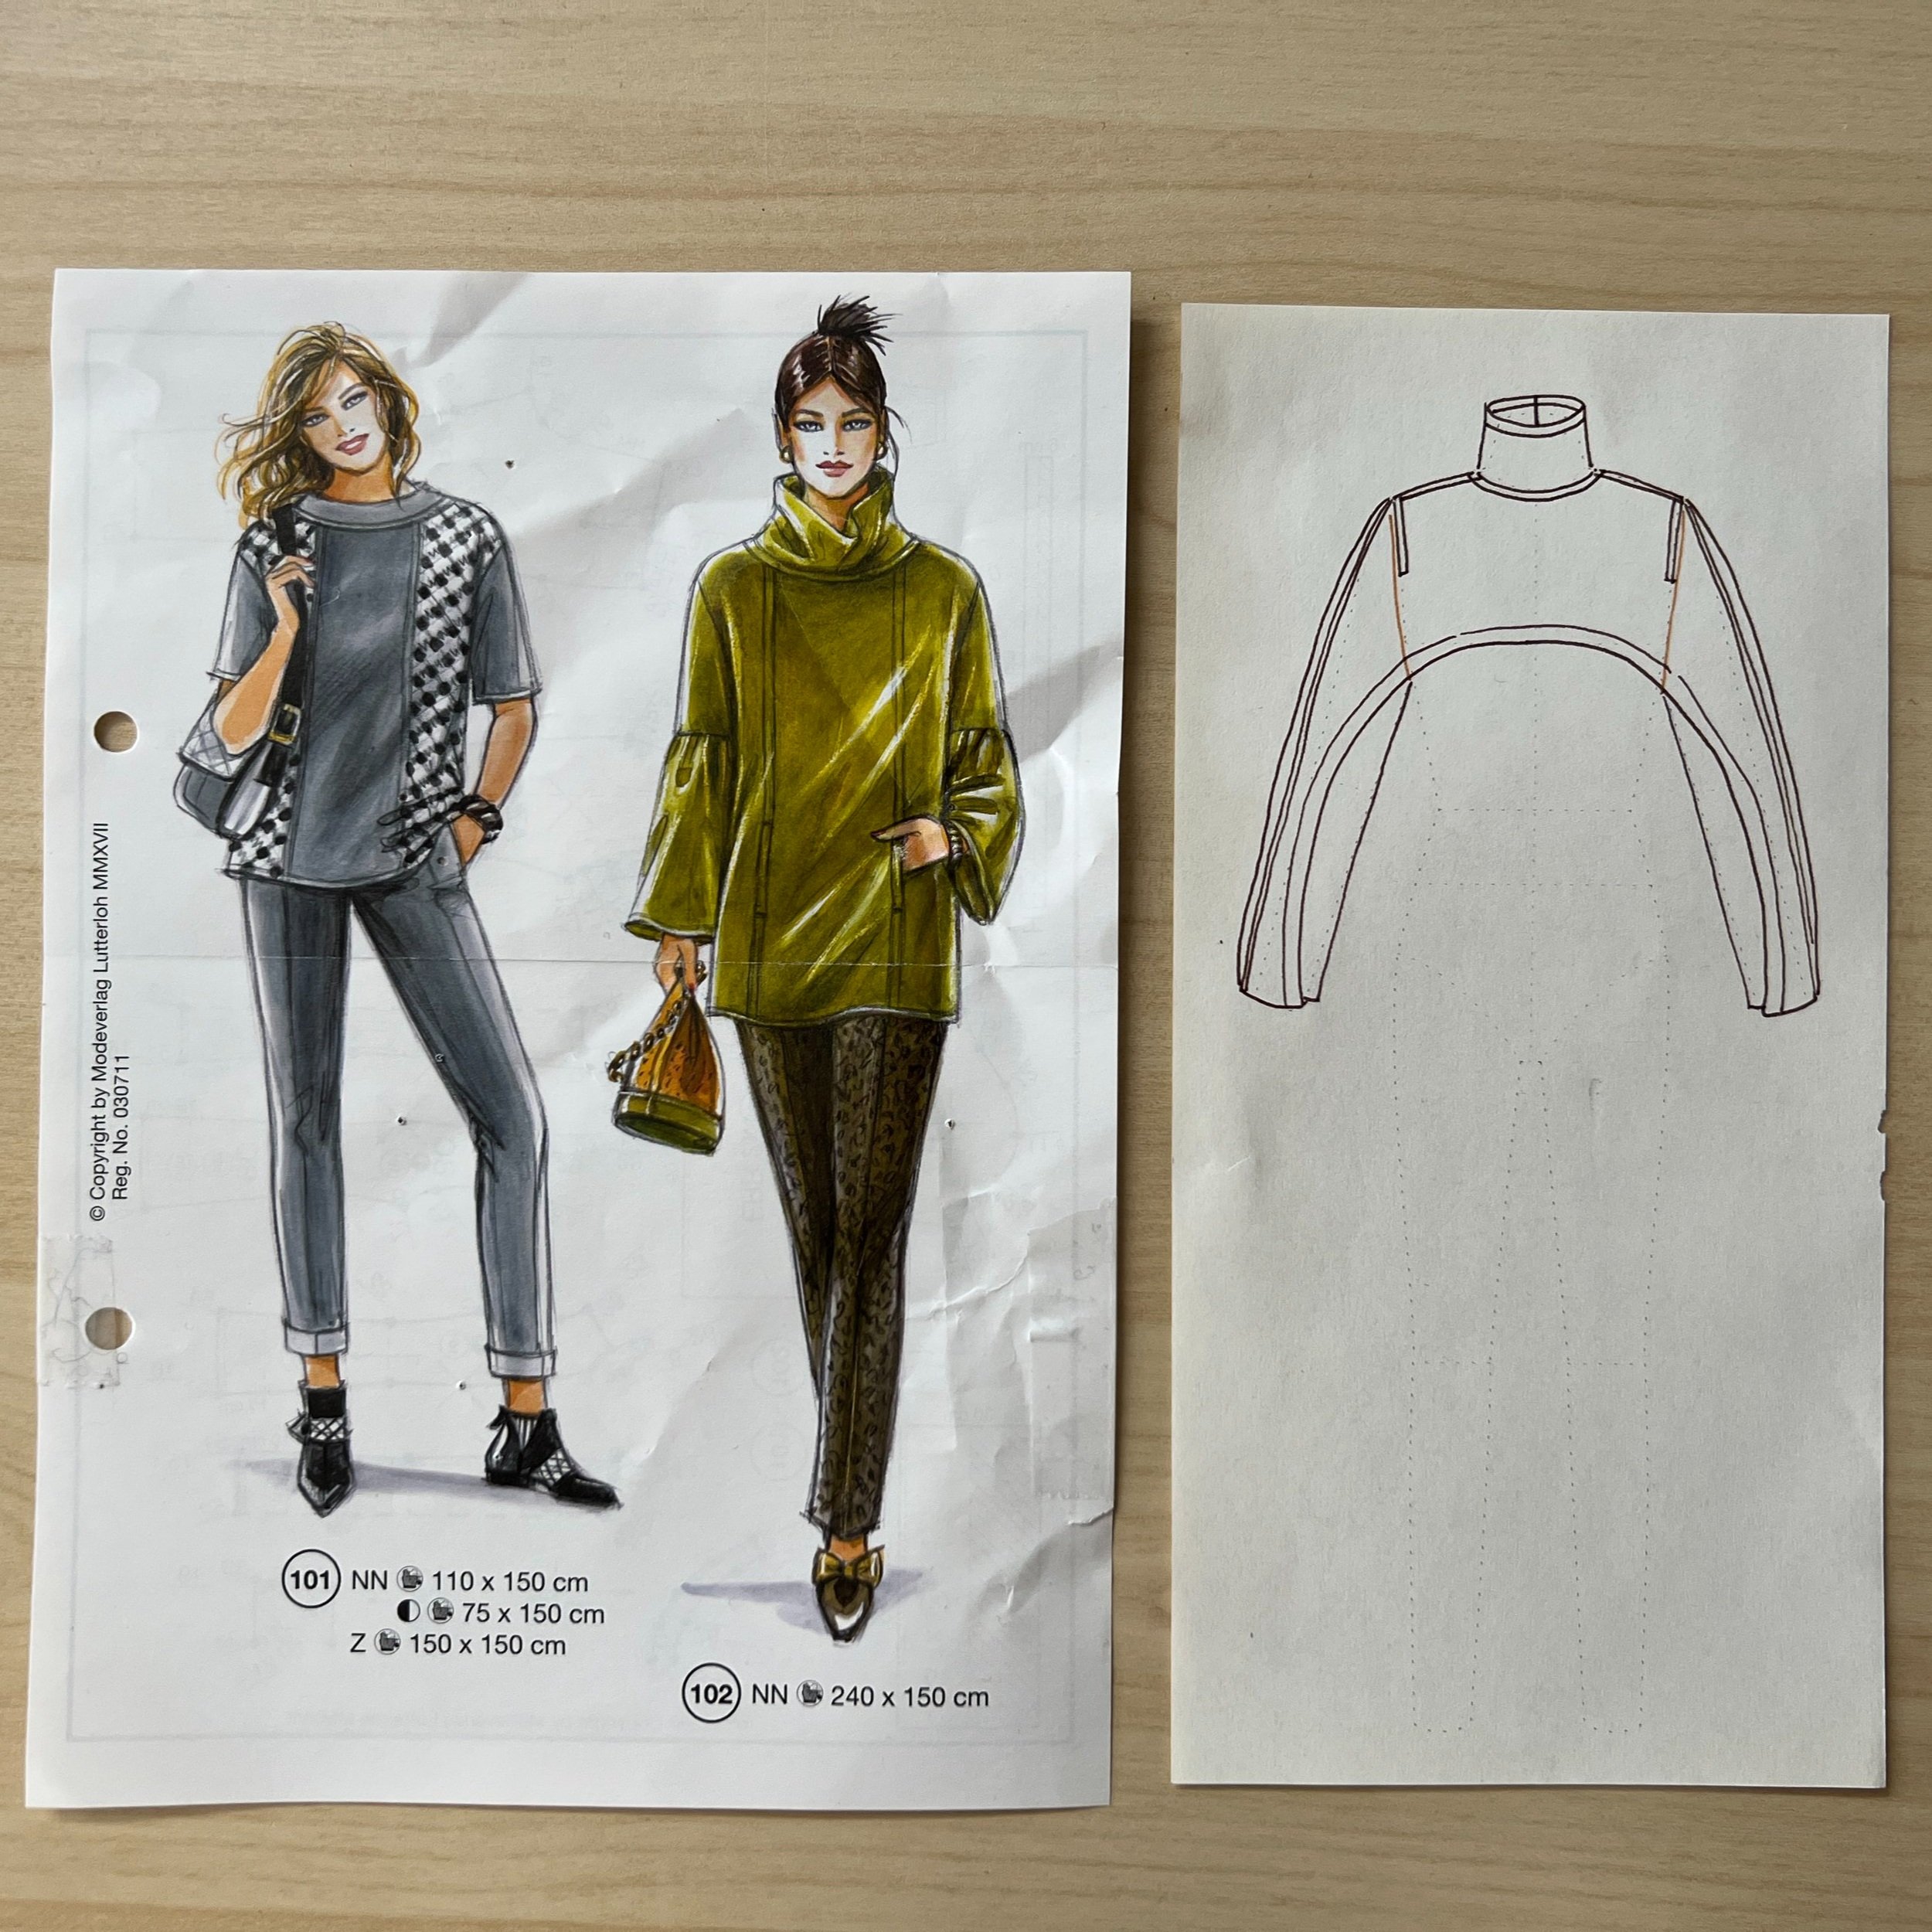
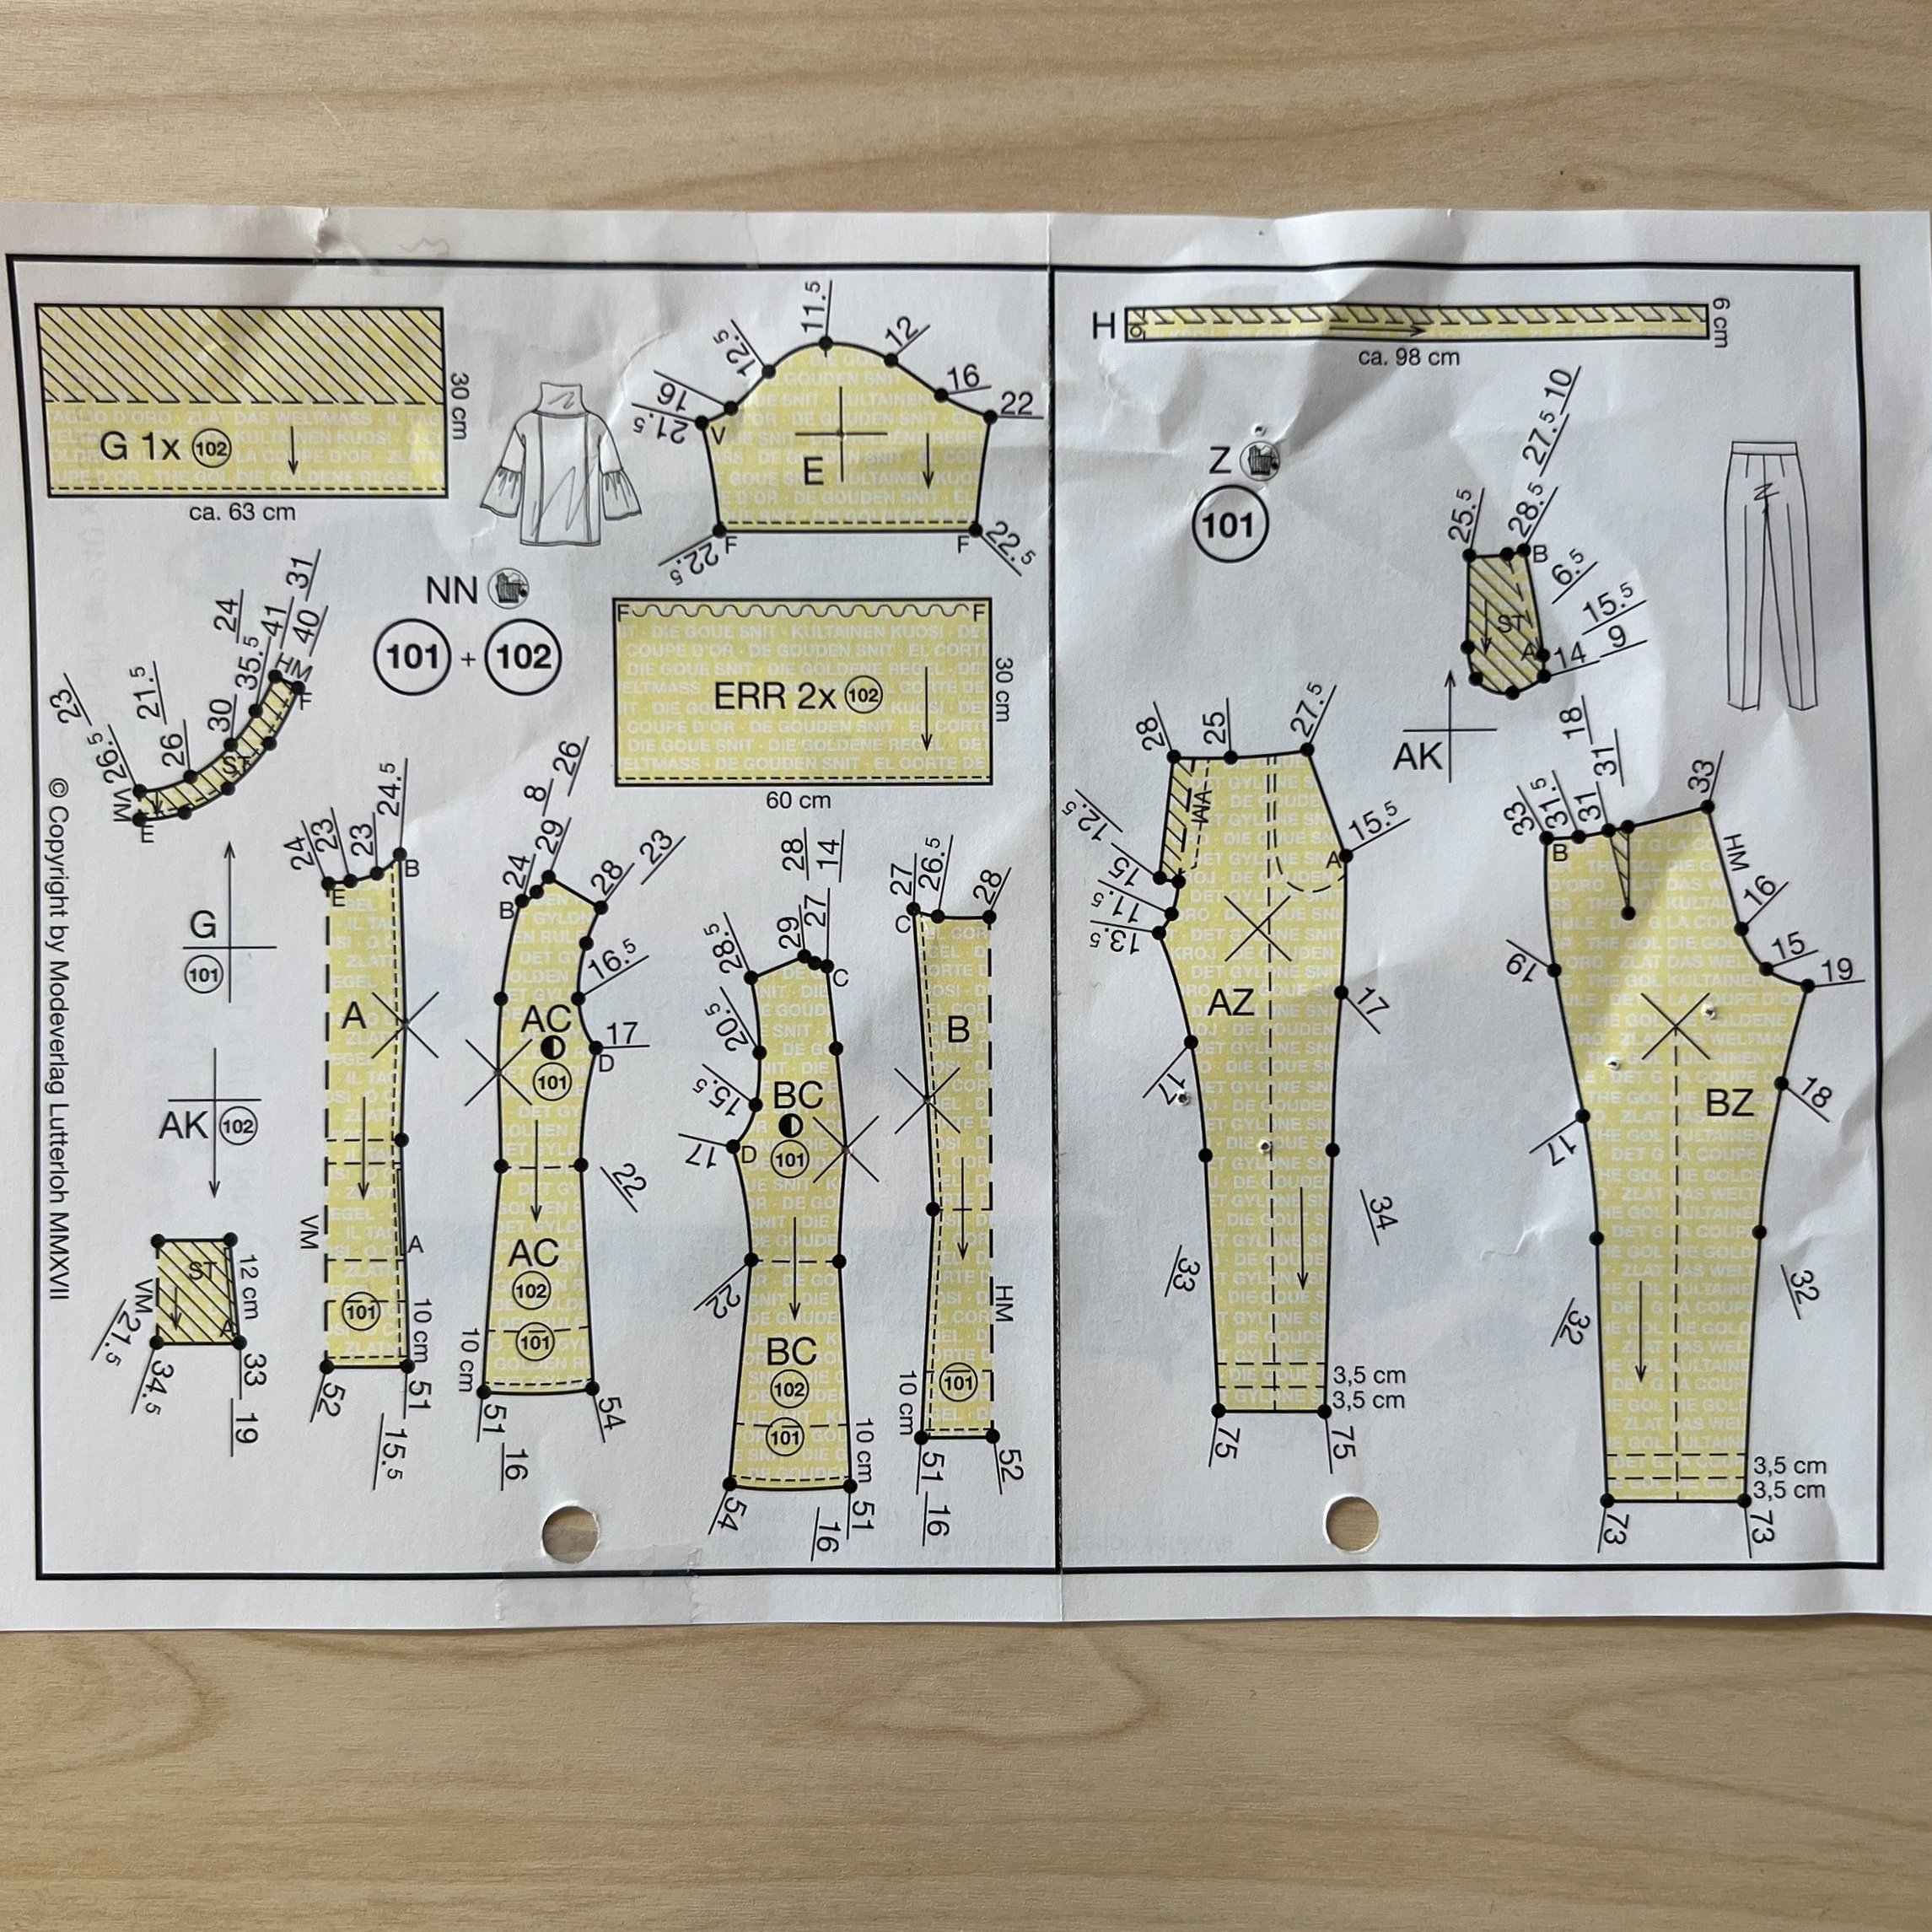
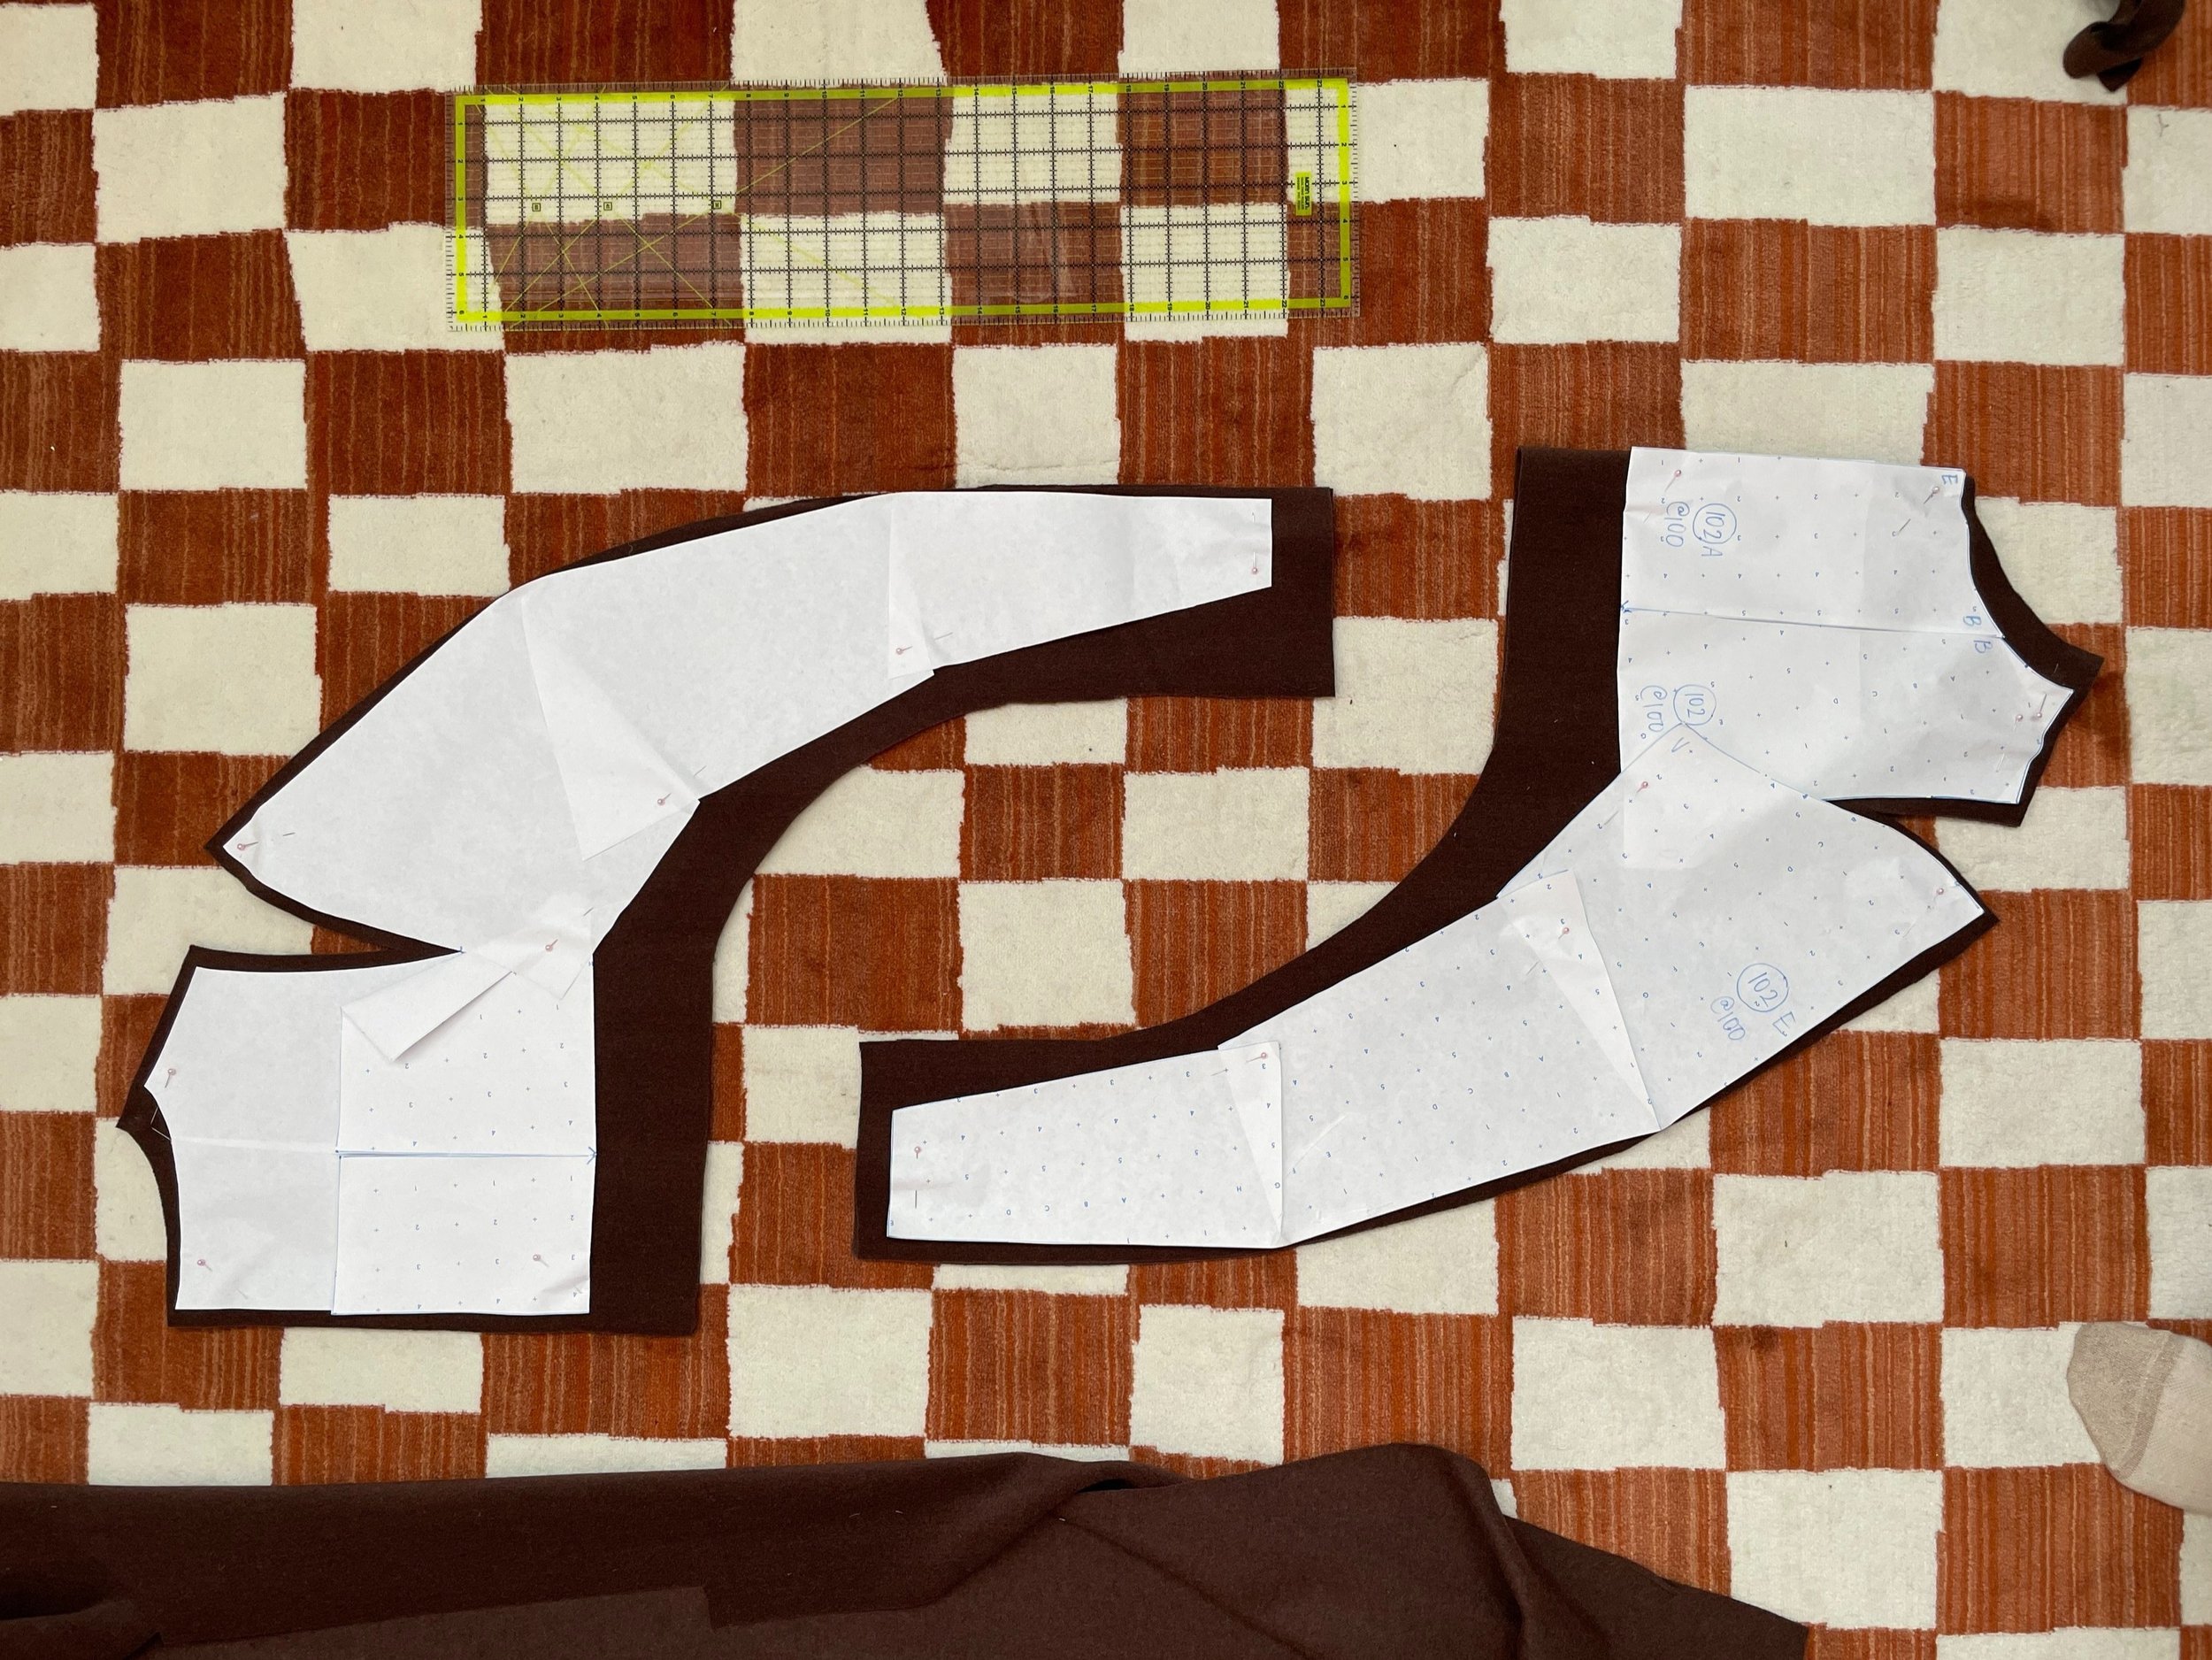
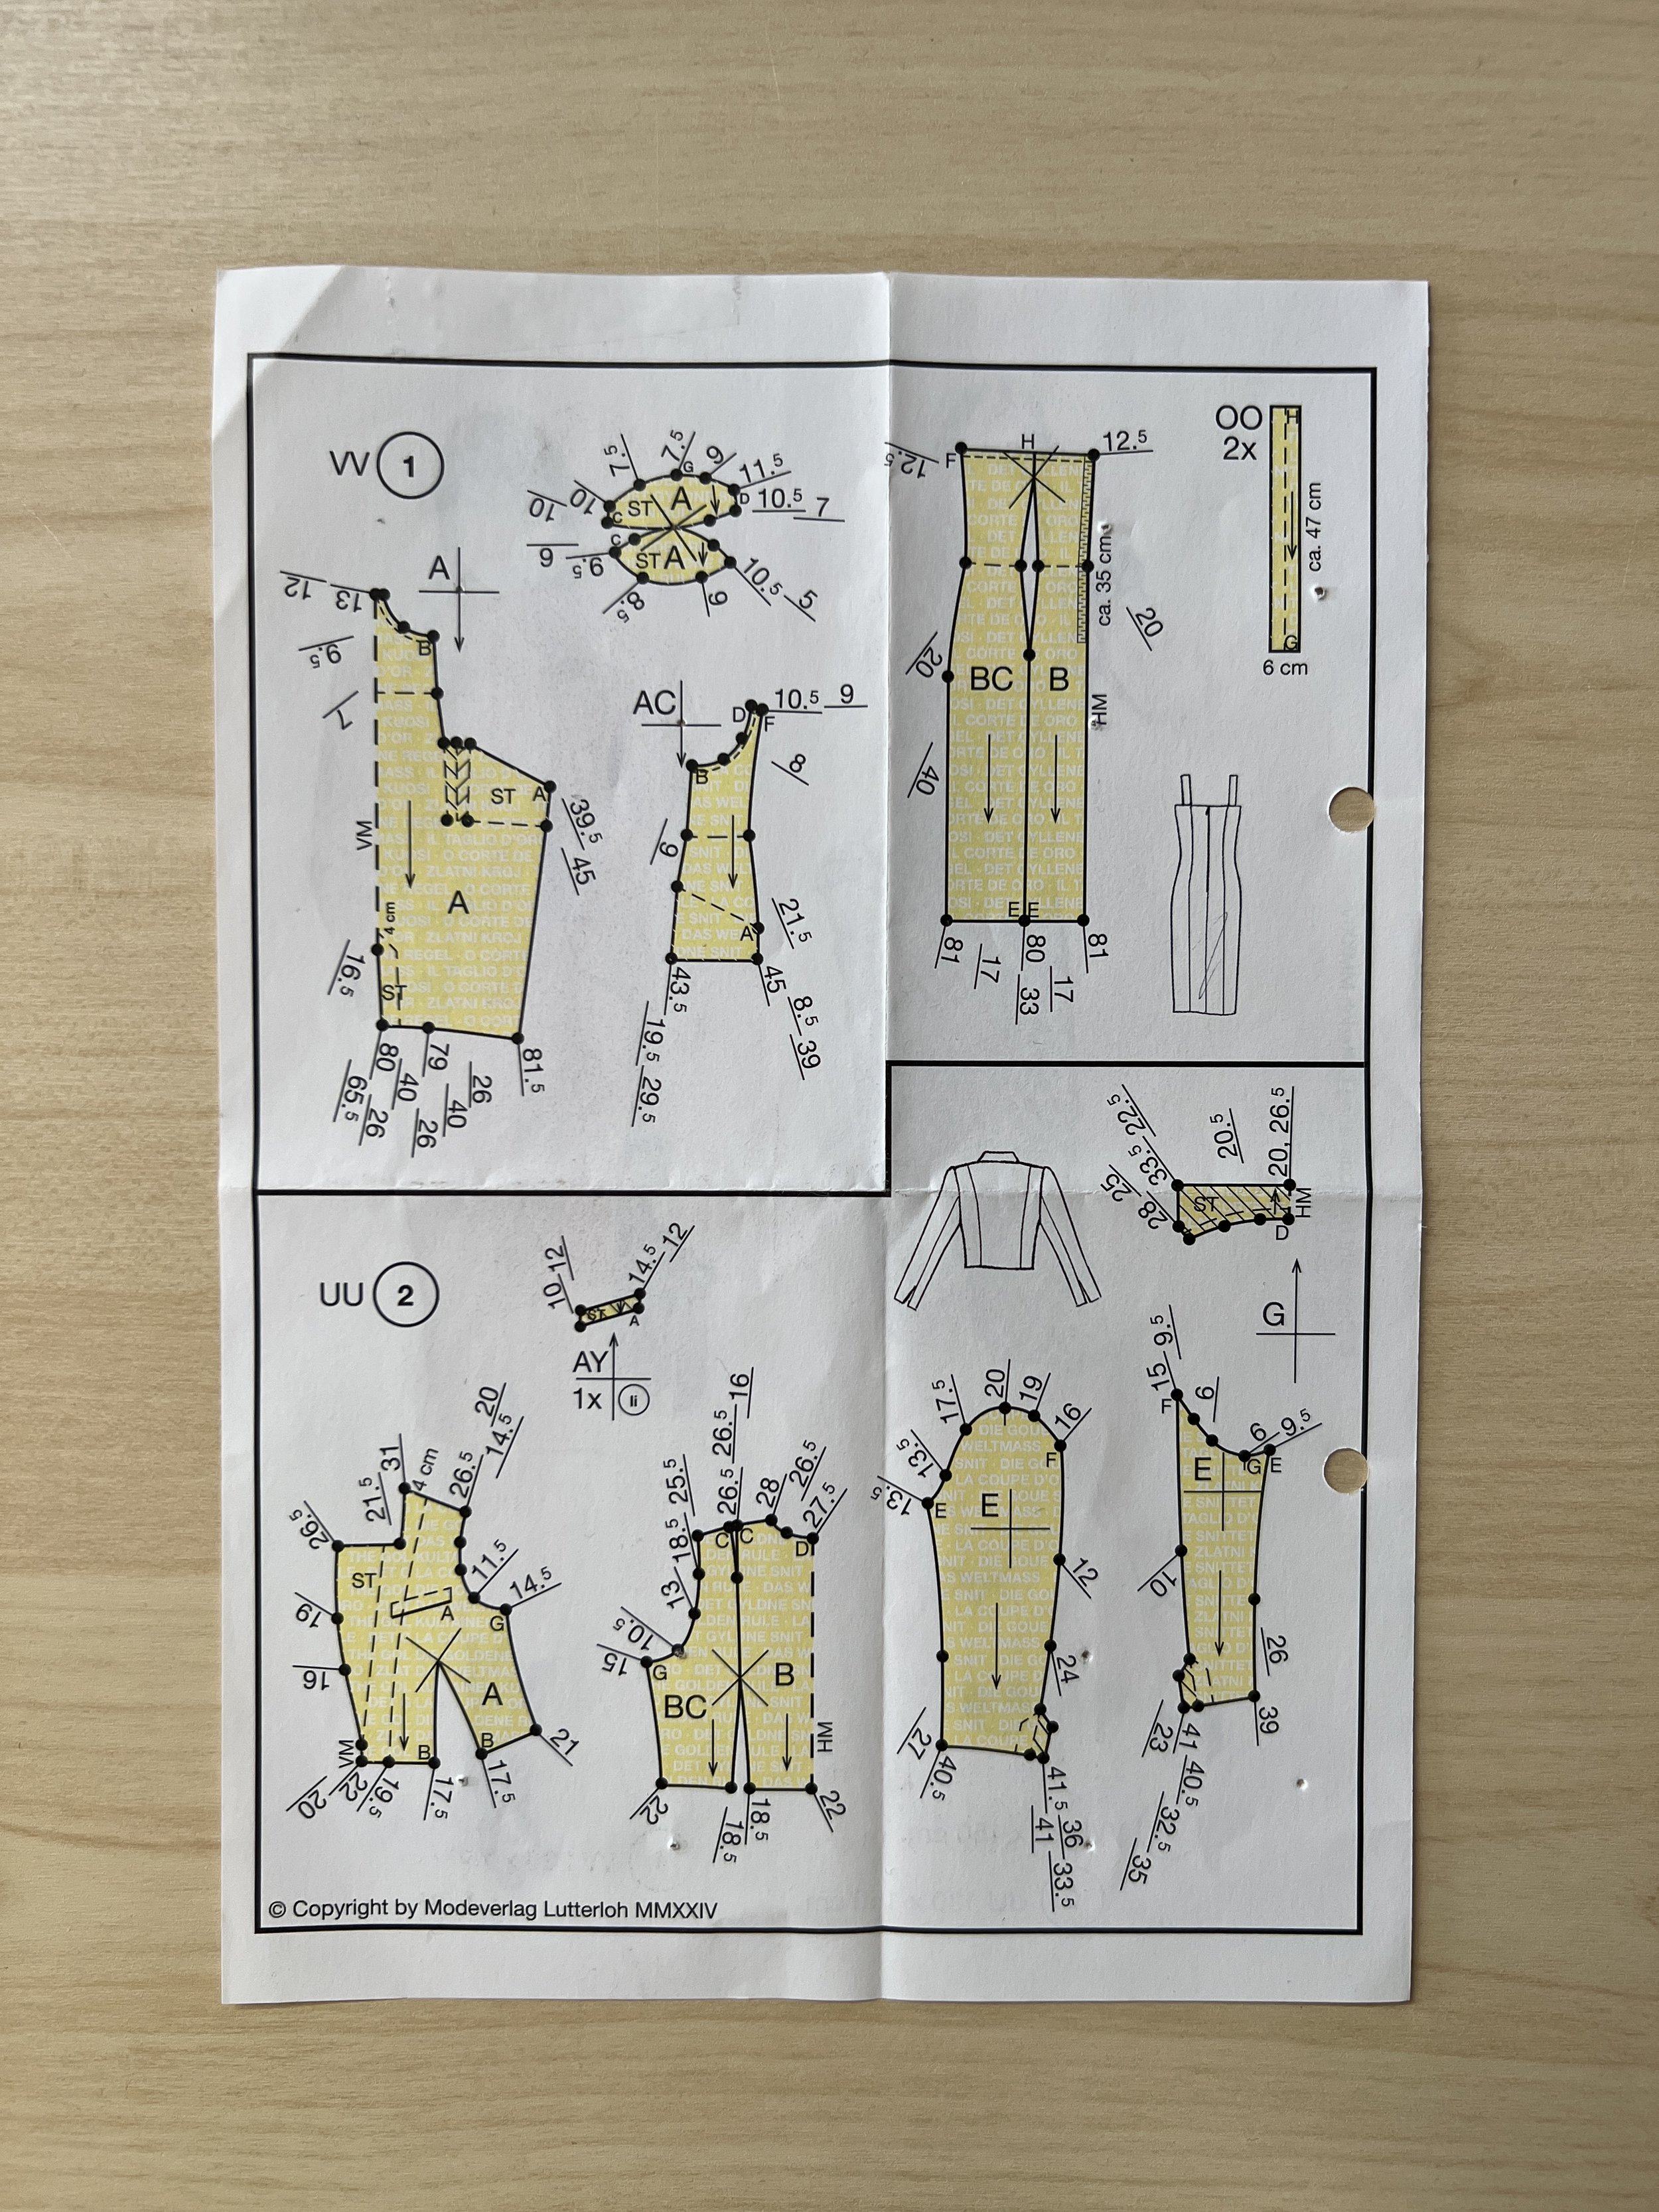
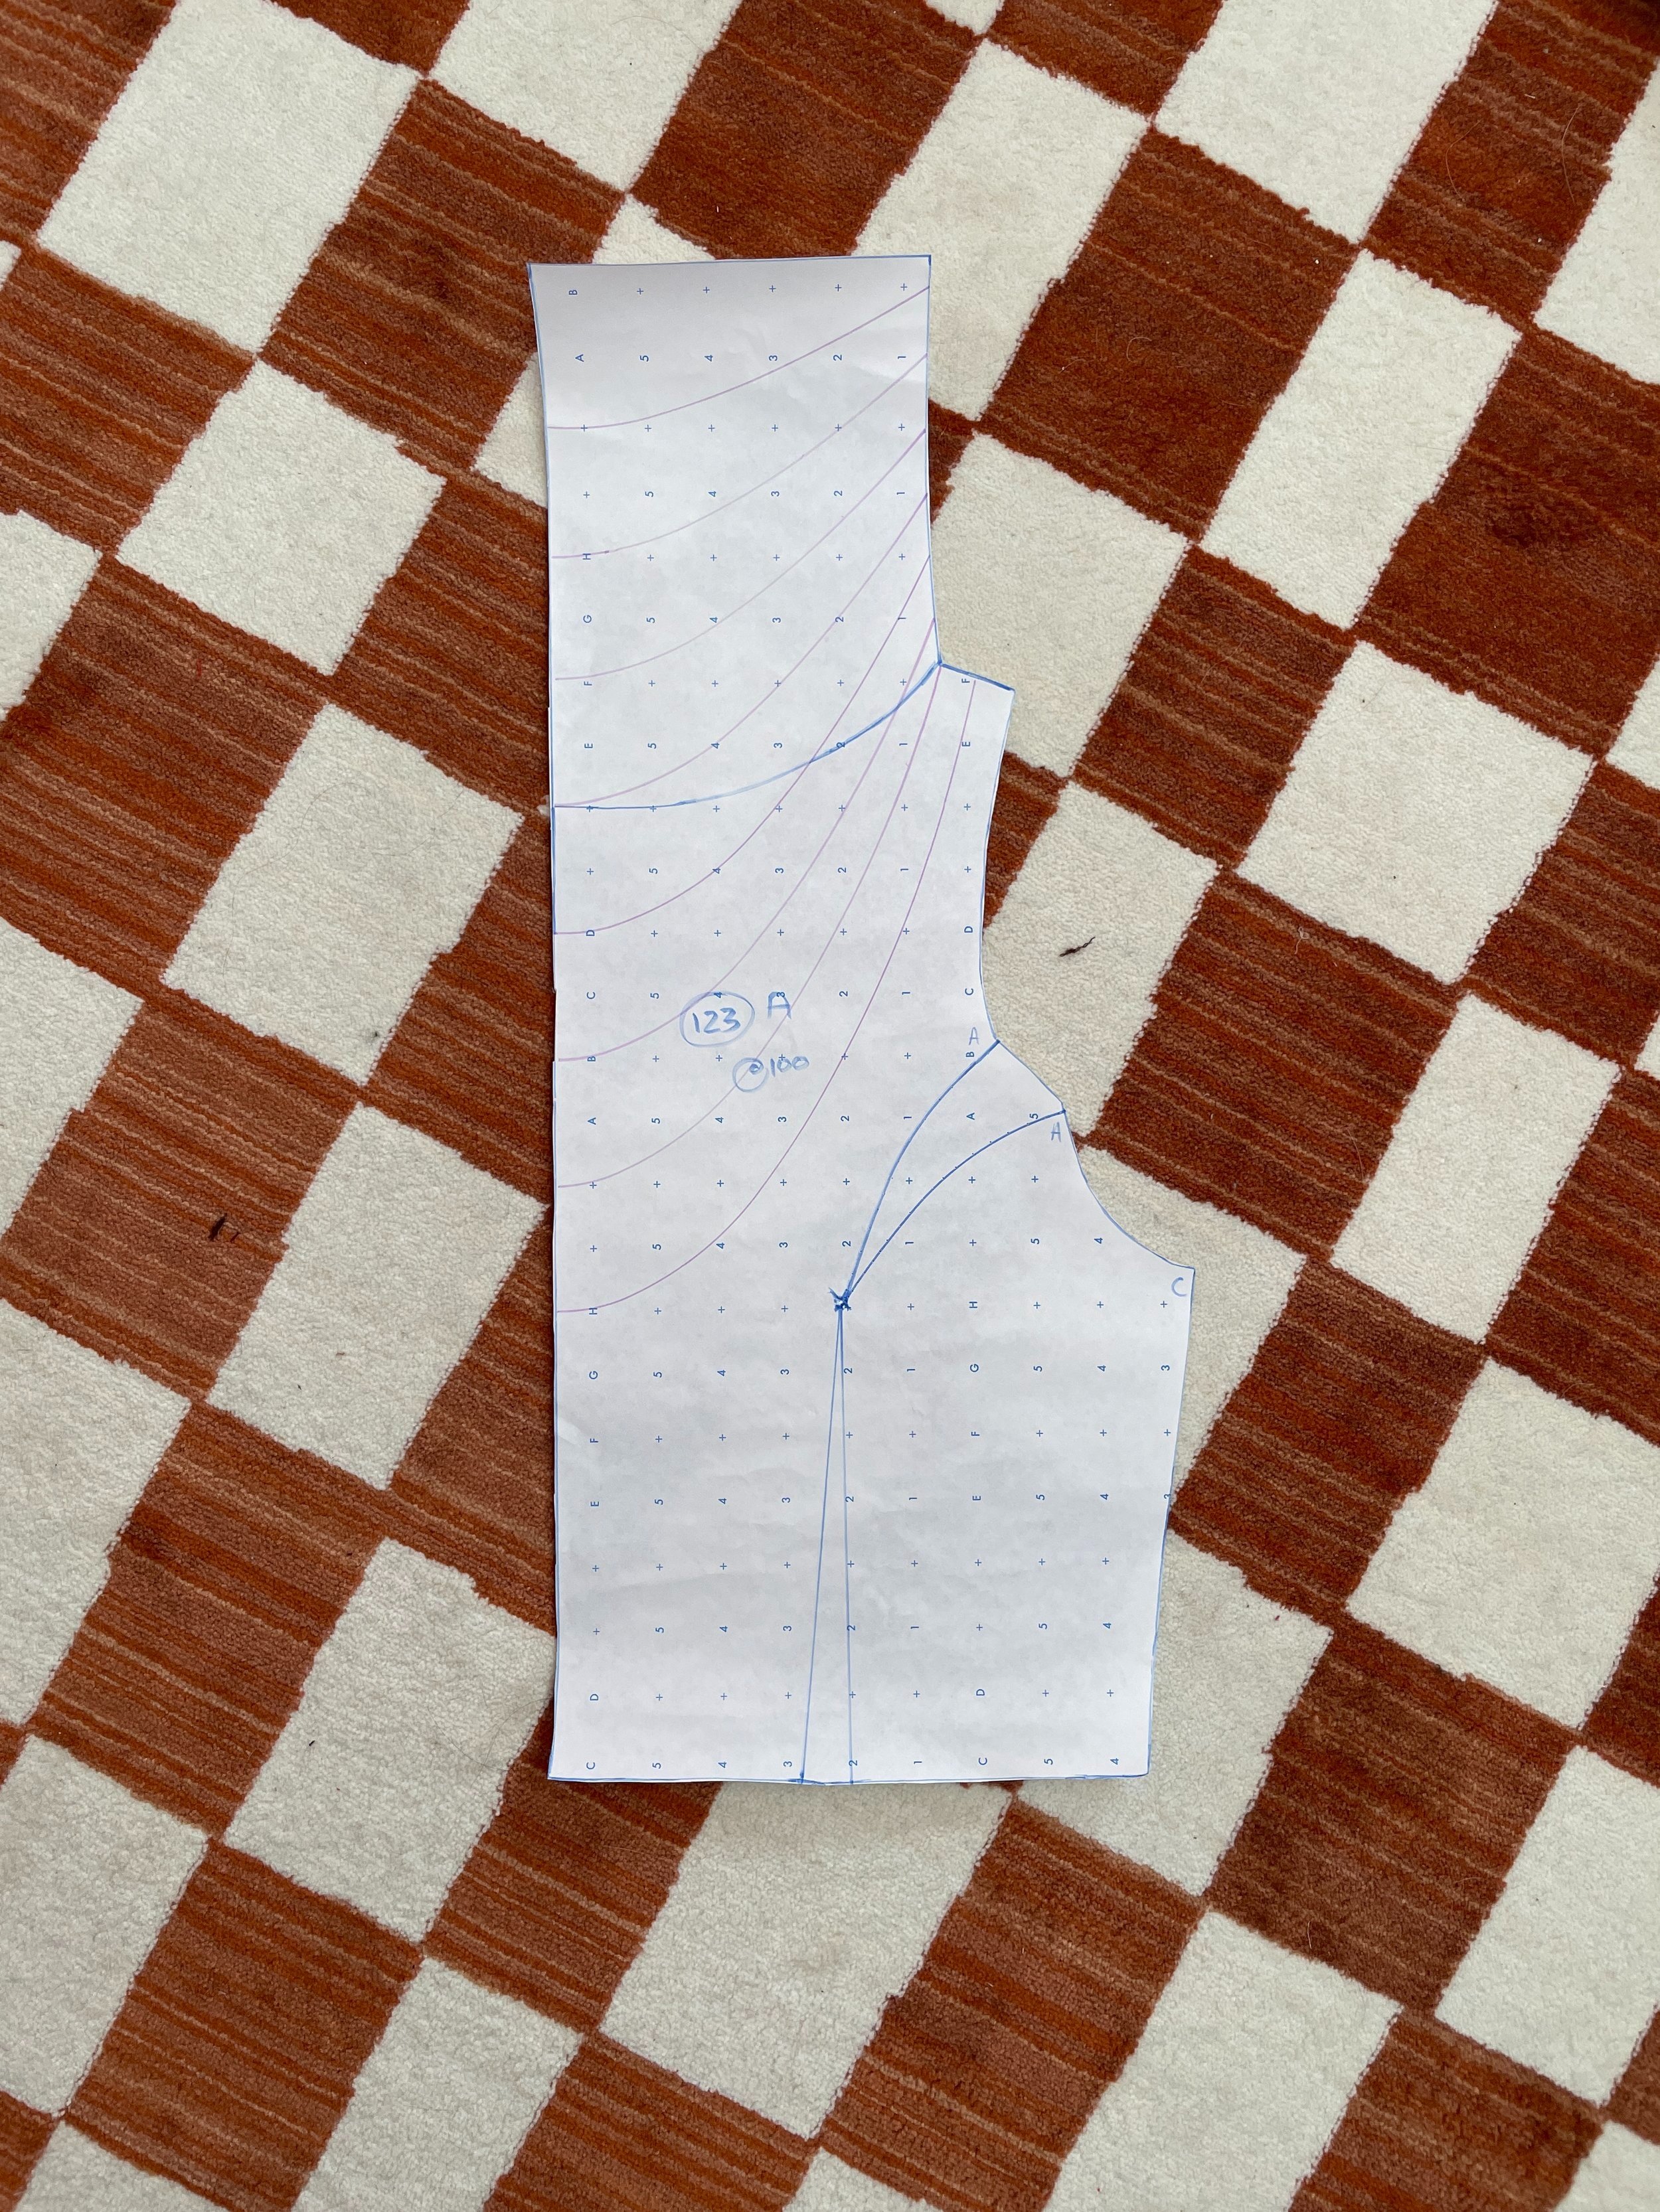
1. Taking a pattern from my Lutterloh to help get a base we can use for some pattern manipulation. Take this green sweater pattern.
2. Cut the patterns out.
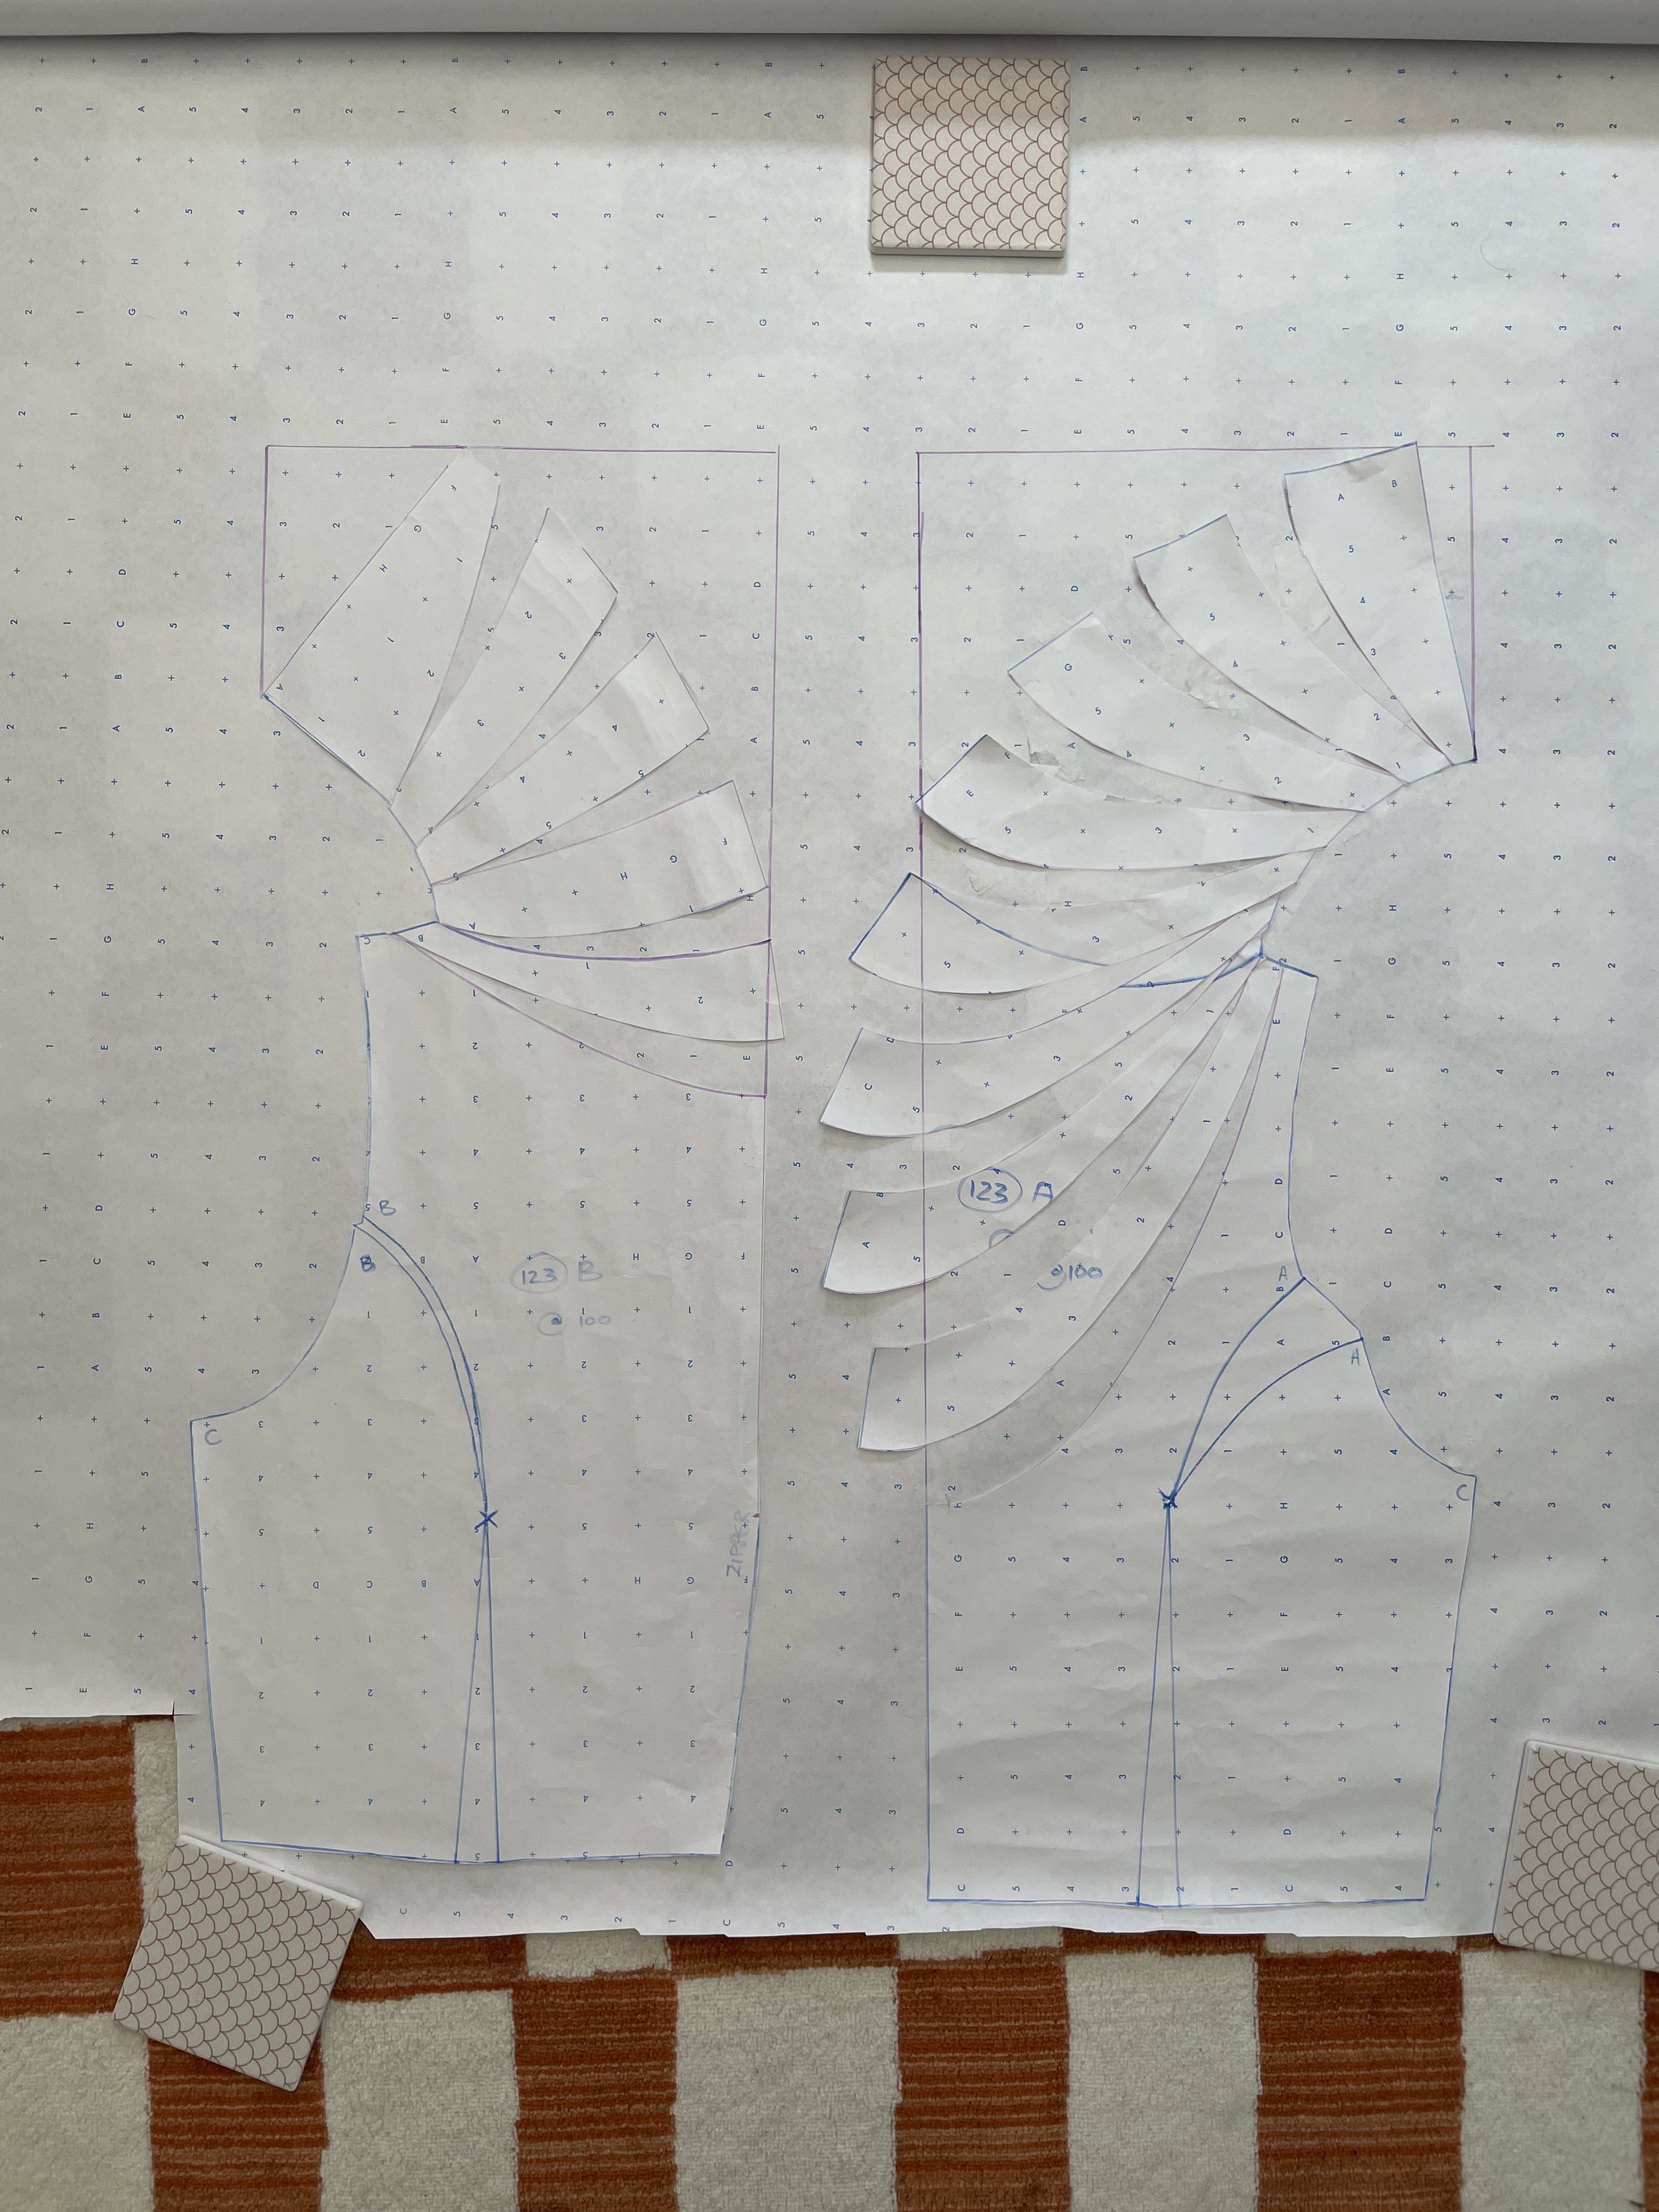
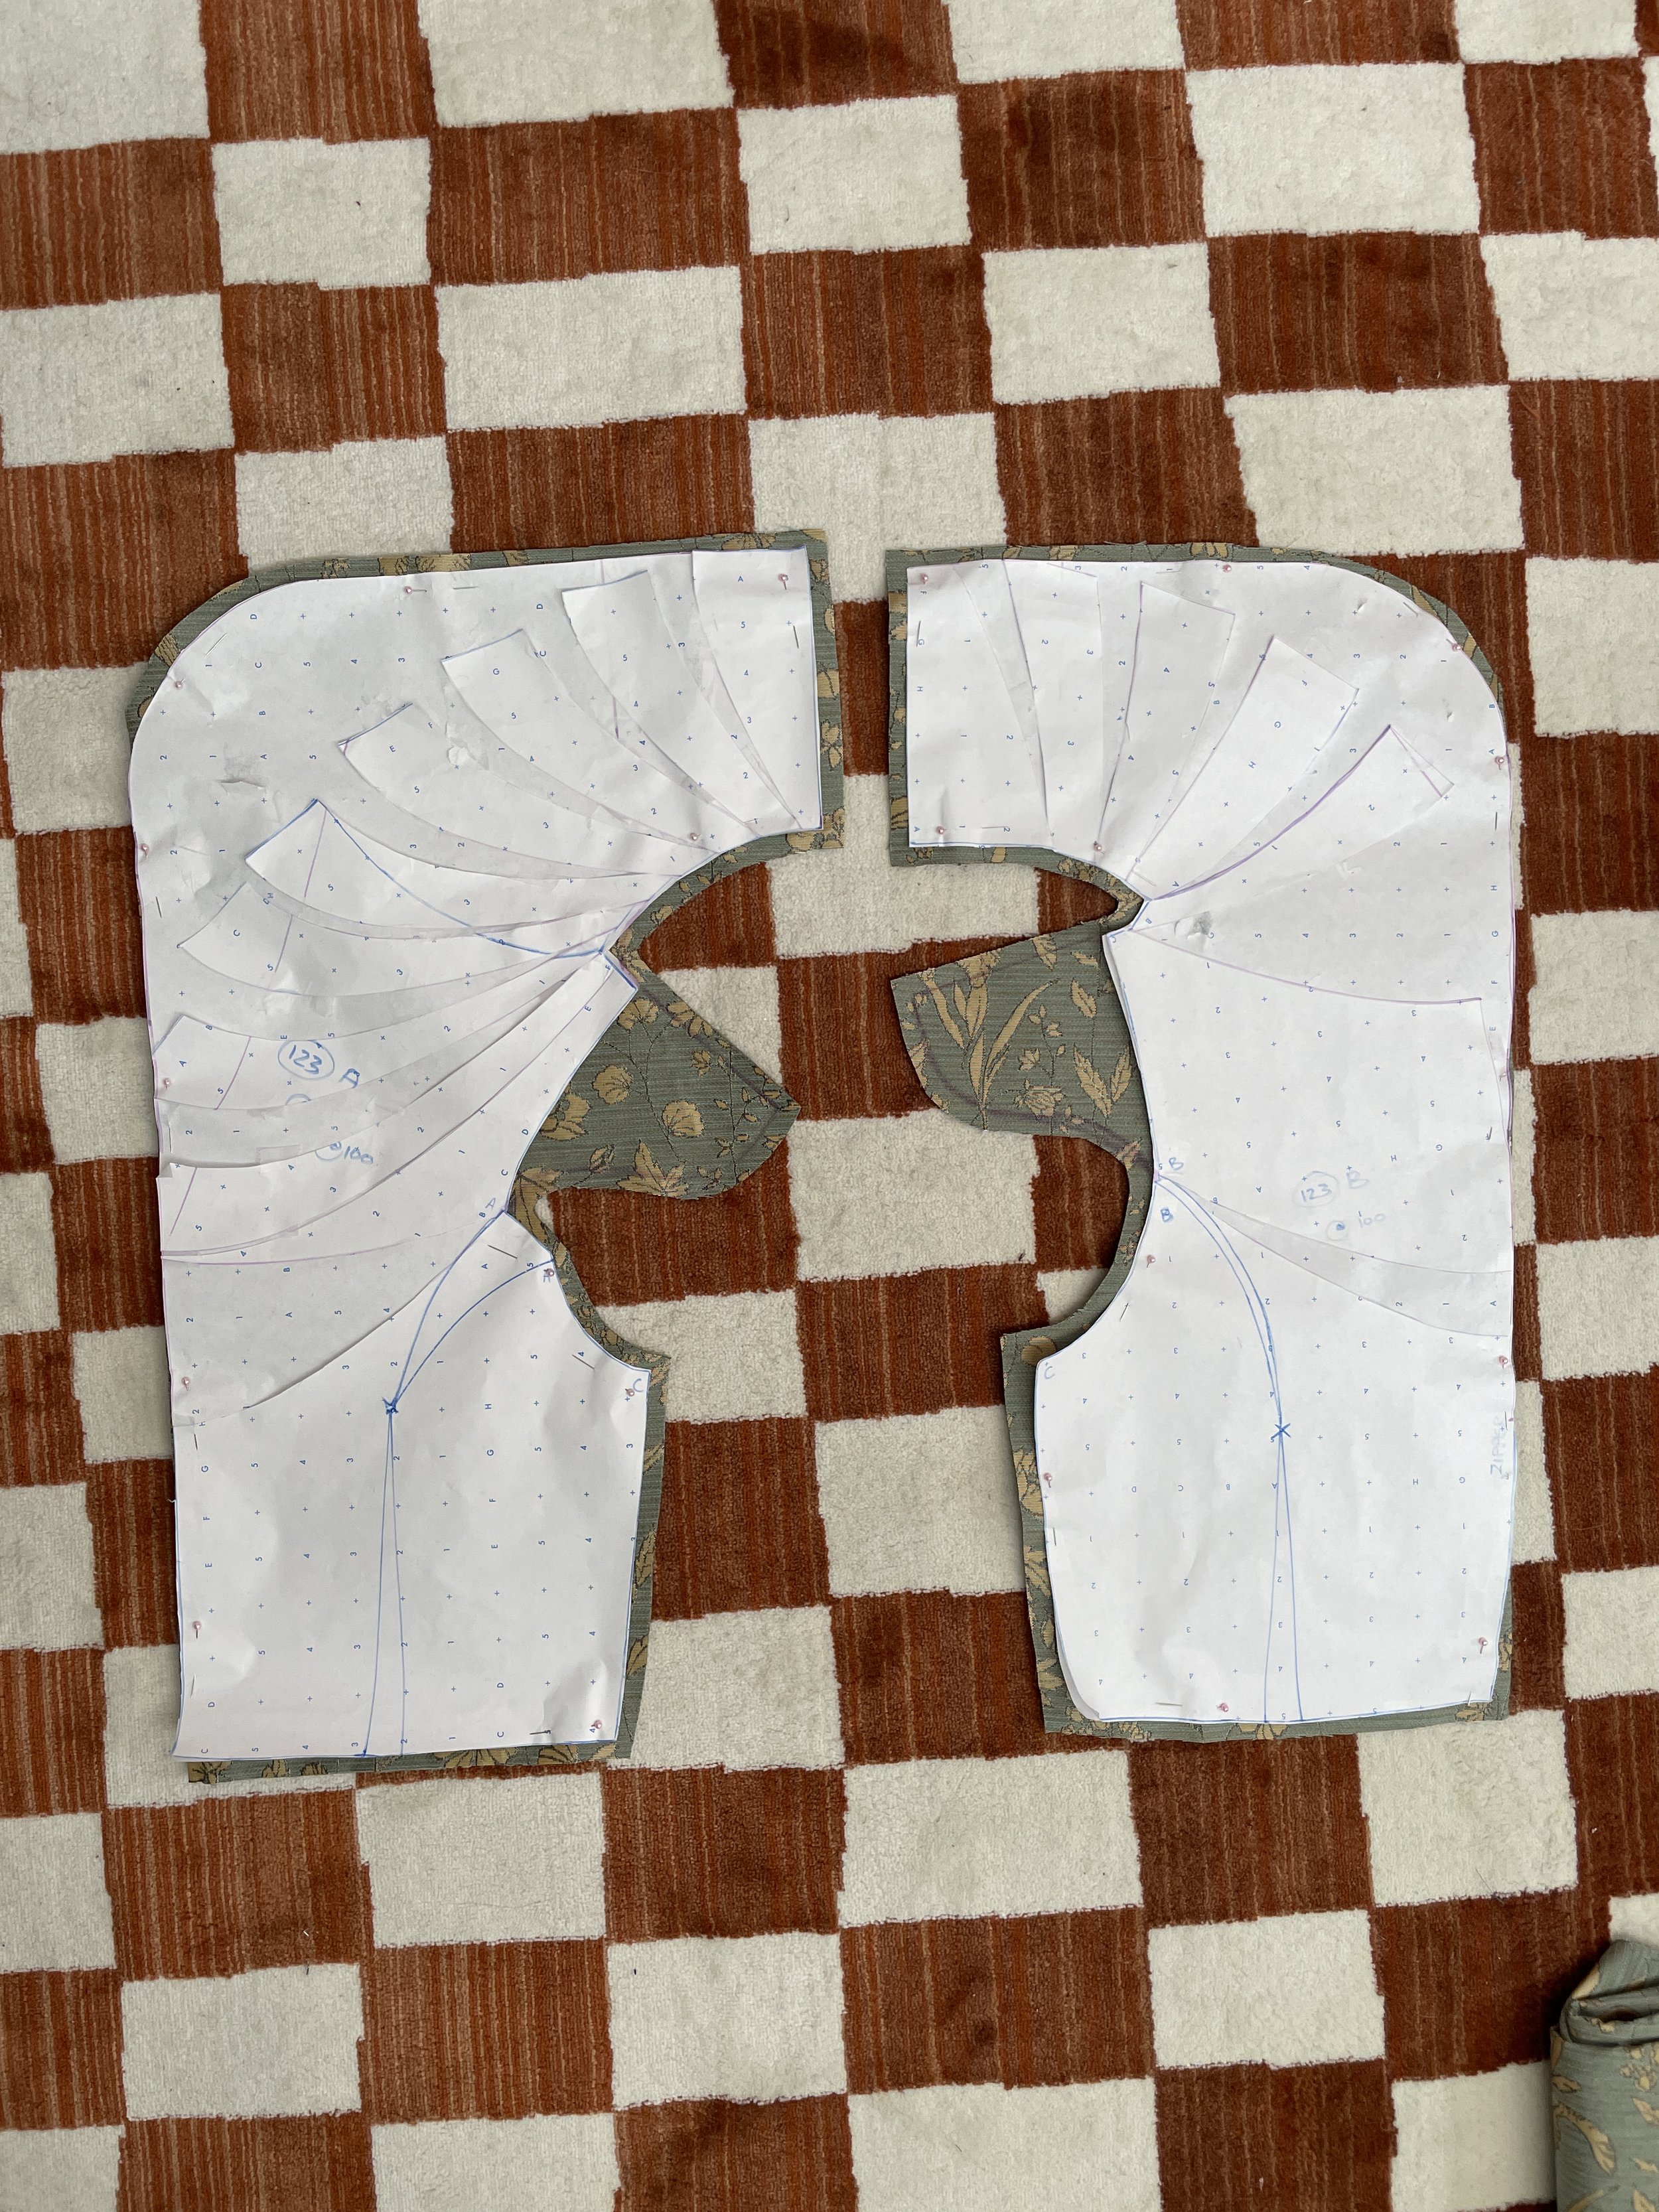
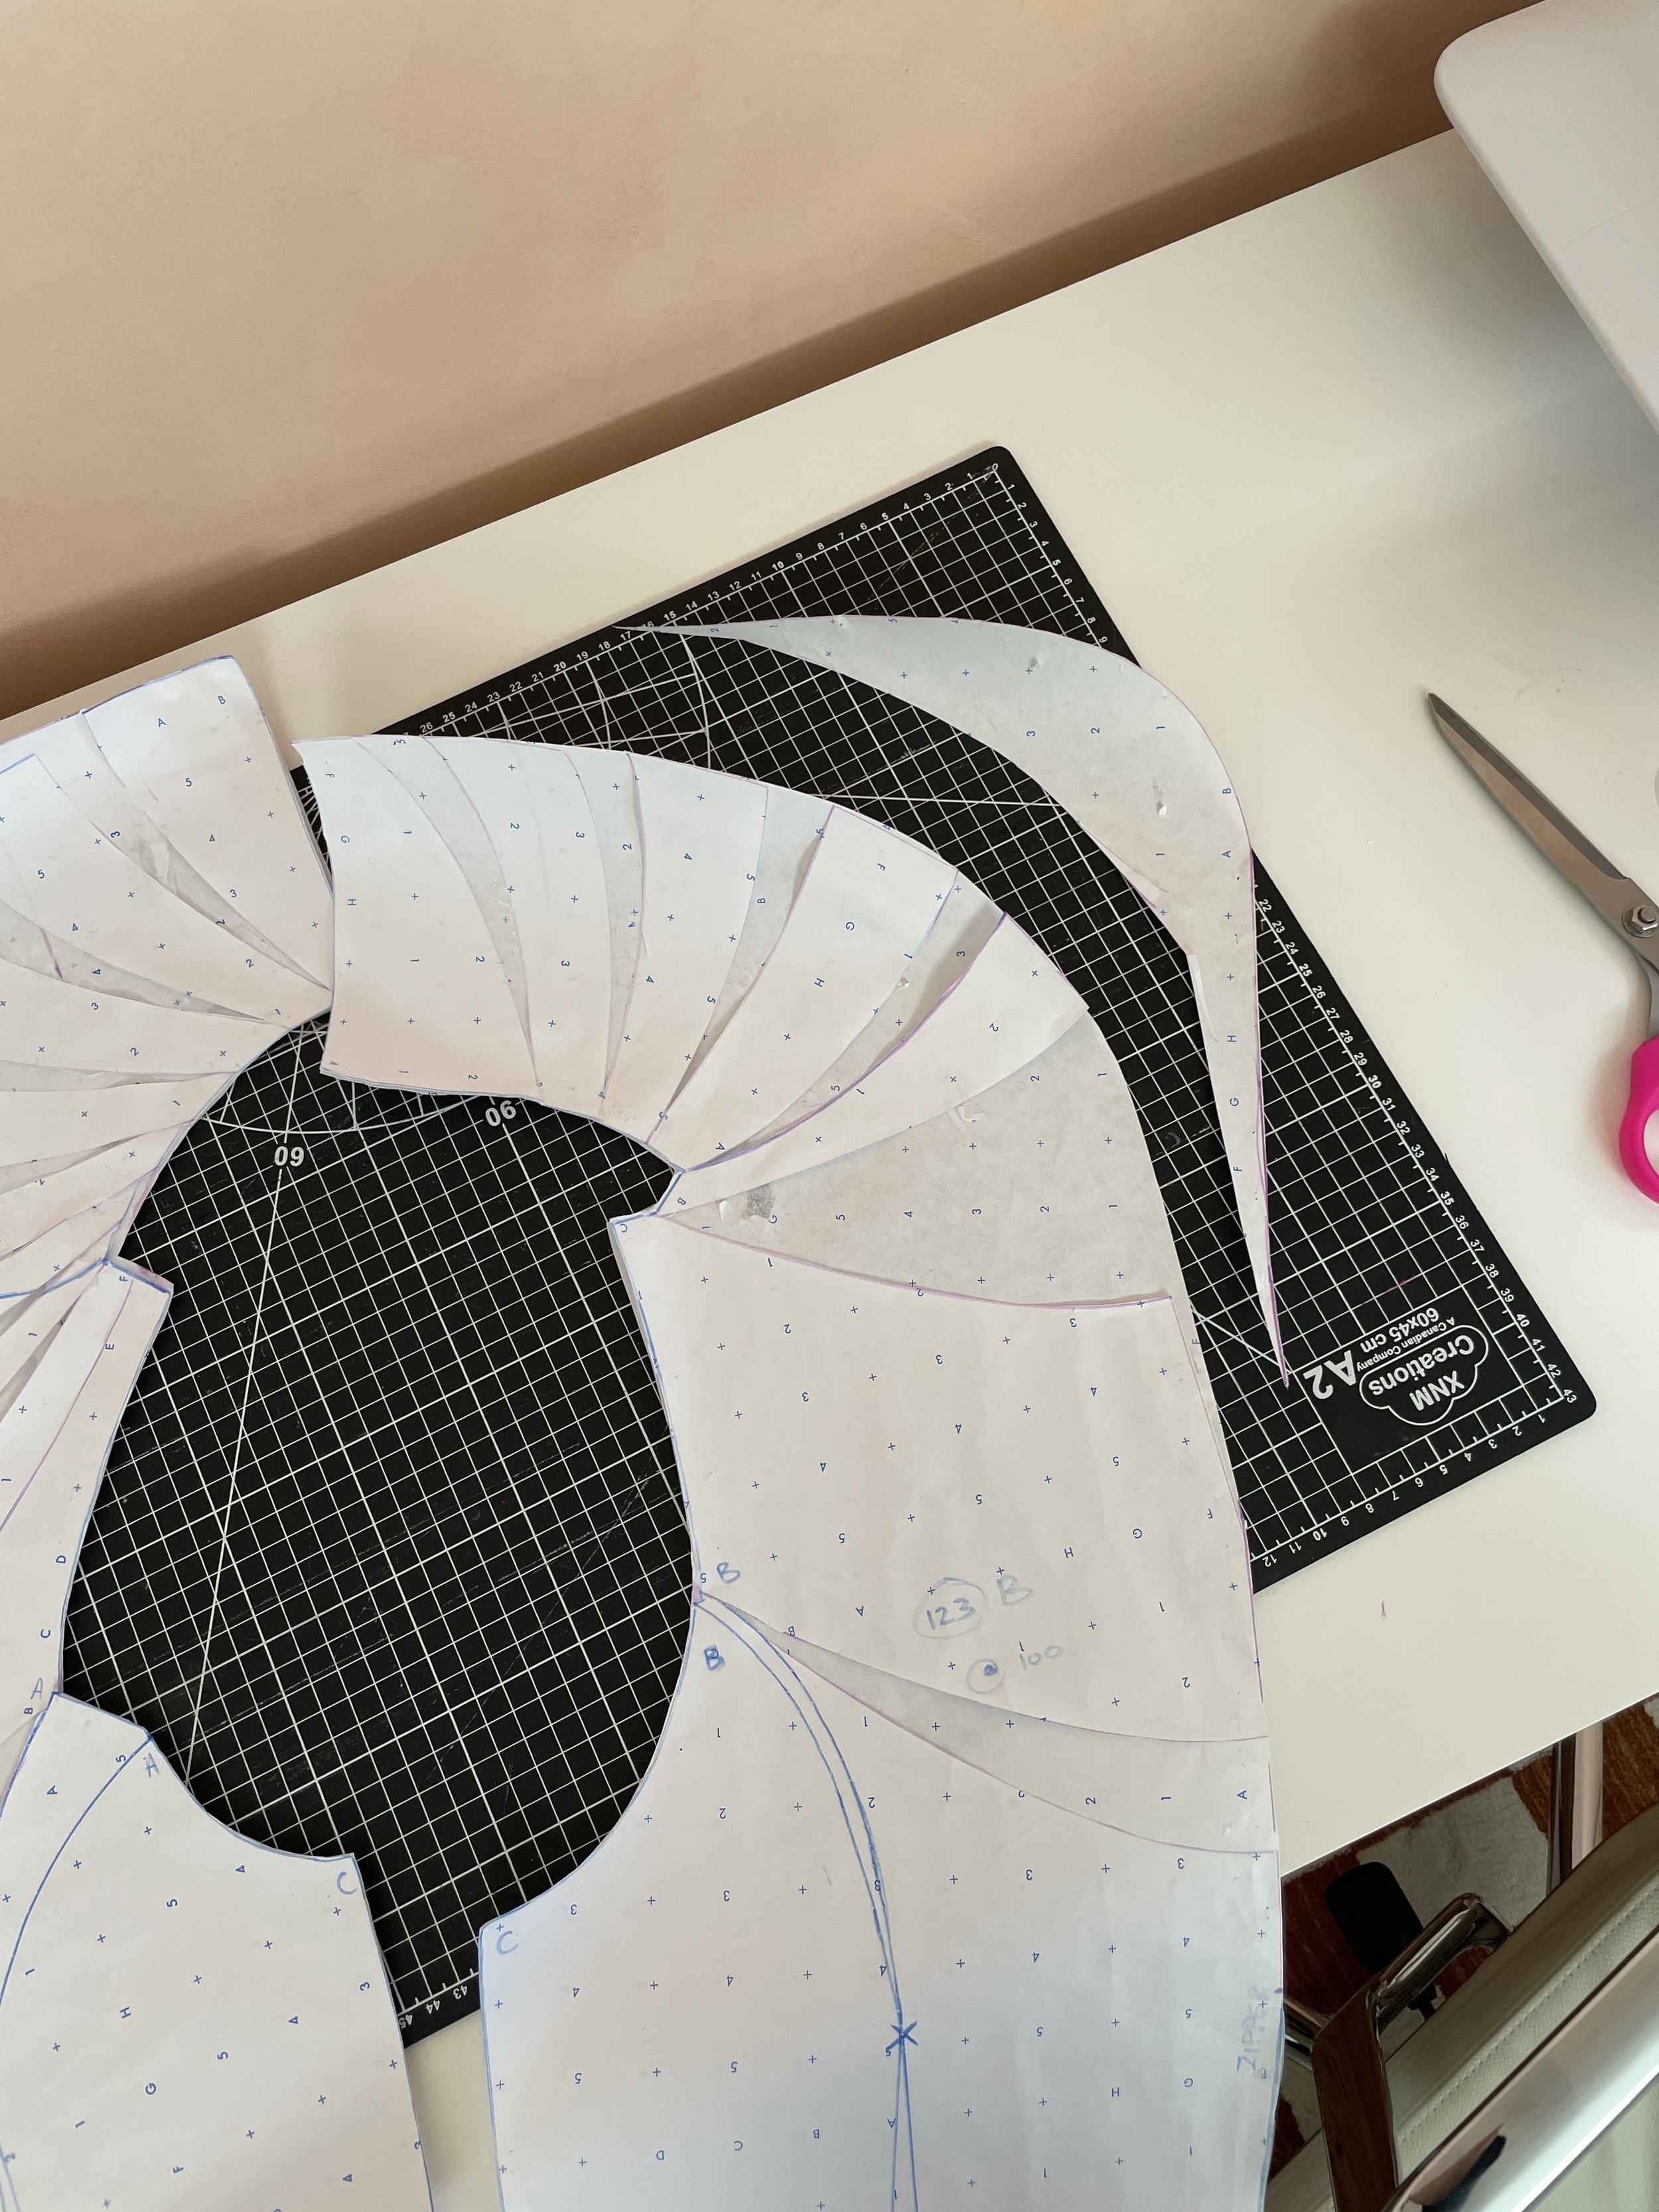
Pattern Manipulation
I taped the bust point to the neck hole on both the front and back patterns to clean everything up and get rid of the centre seam lines the pattern was showing (our top has seams running along the centre shoulder making these original seam lines in the pattern not ideal).
I folded the excess material in the bust away, cropping the length and cut the sleeve pattern in half so that half of it could go to the front and the other half to the back.
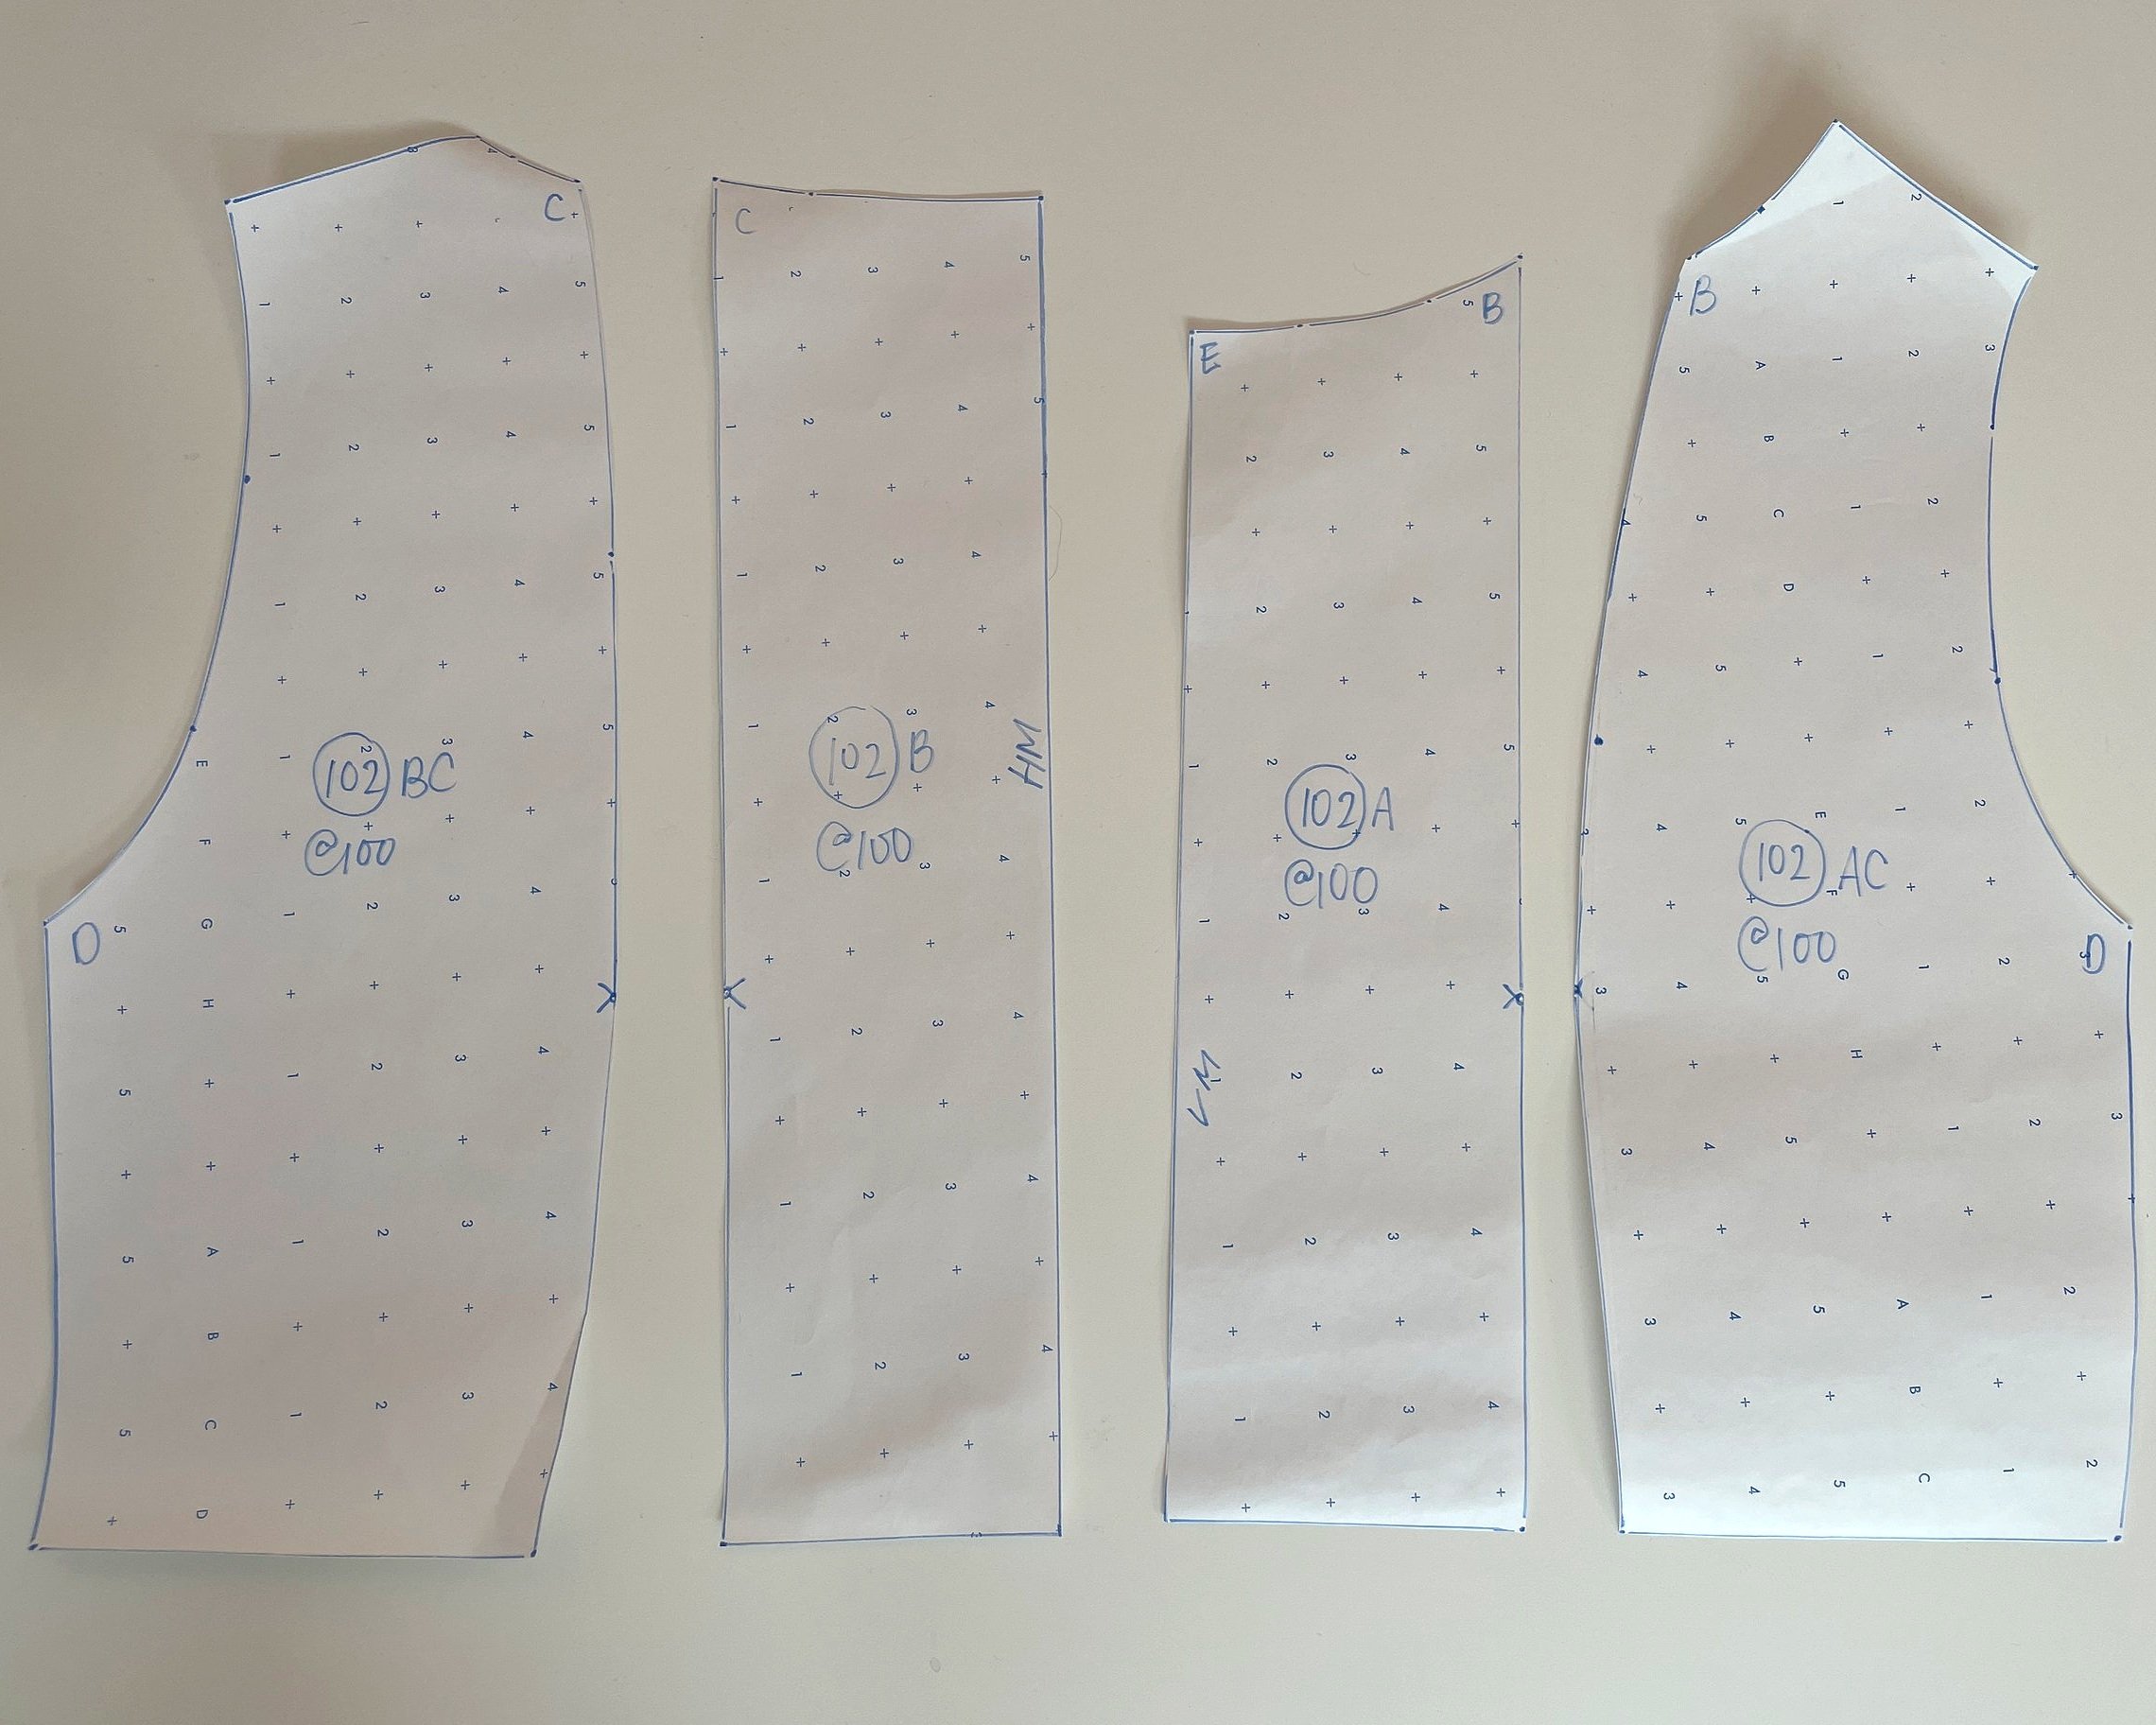
3. Cut the pattern out of draft material similar to the material you are using for the final piece.
4. Sew the seams together, assembling your first draft to work out any areas that need fixing.
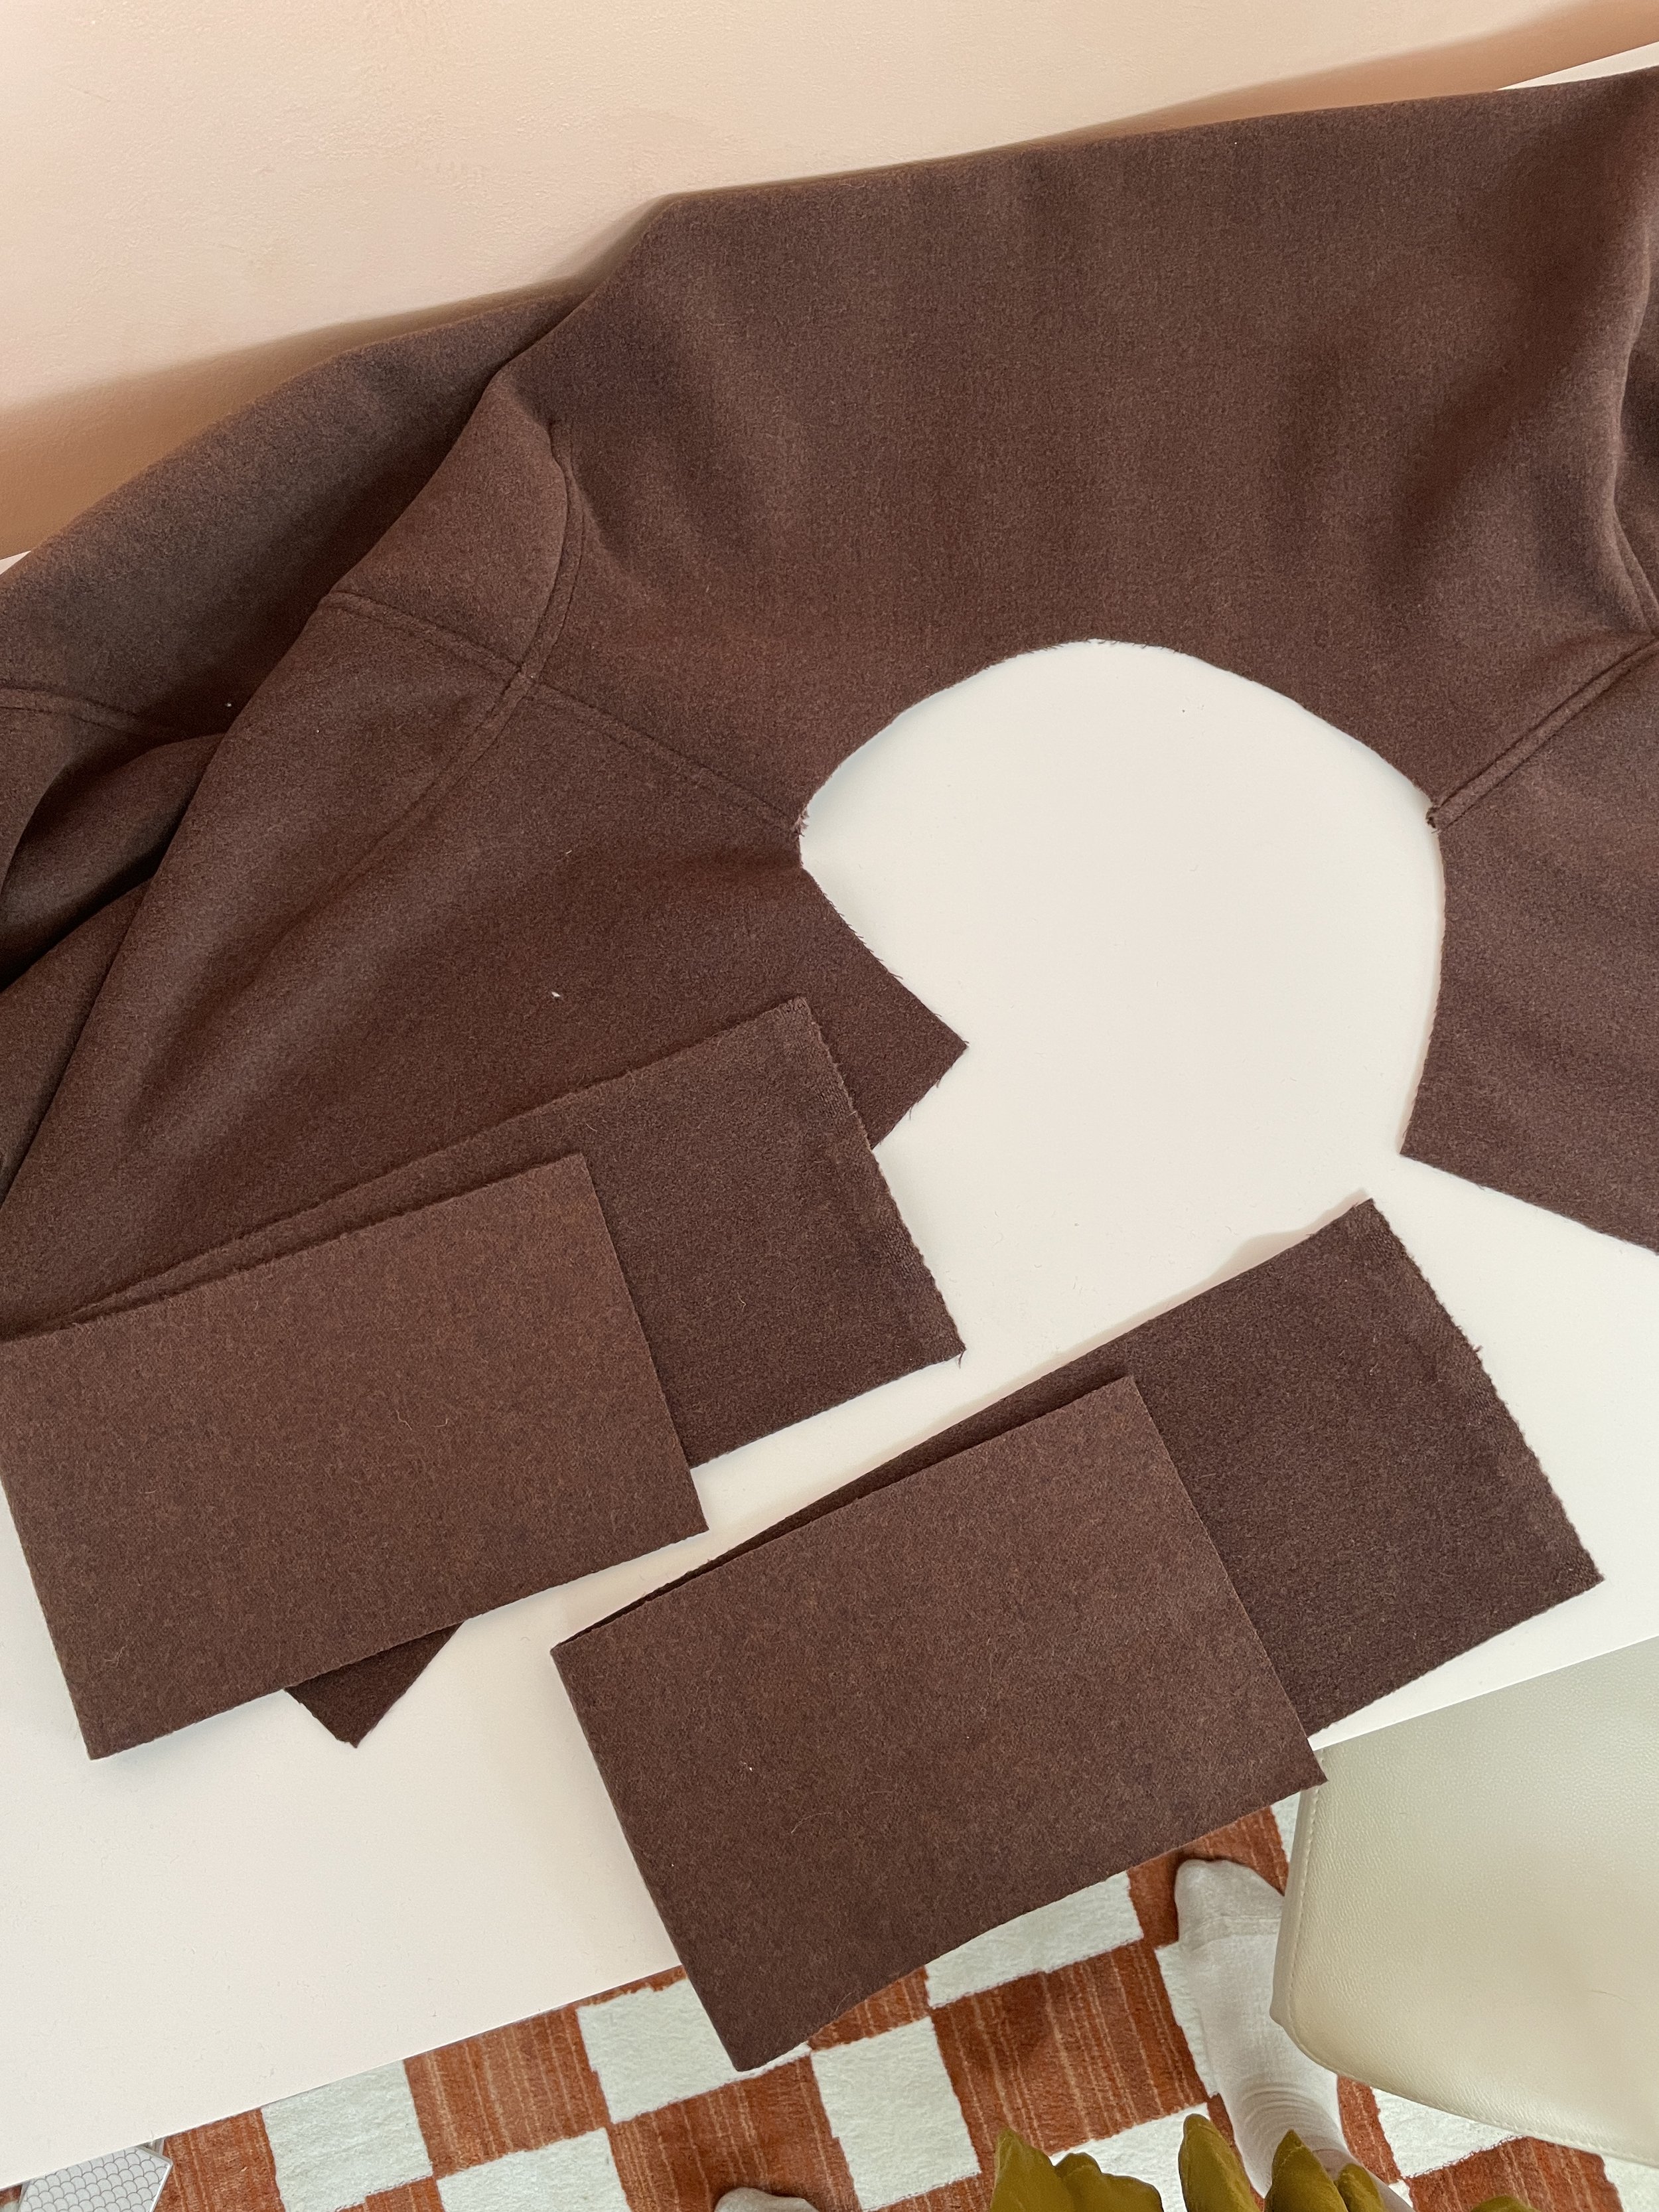
I changed my shoulder gap from 5cm to 8cm apart, smoothed out the curve of the sleeve on the front and the back, lengthened the shoulder seam by 2cm and added a spot in the back of the neck for a zipper for easy wear and extended the length of the sleeves for room to hem.
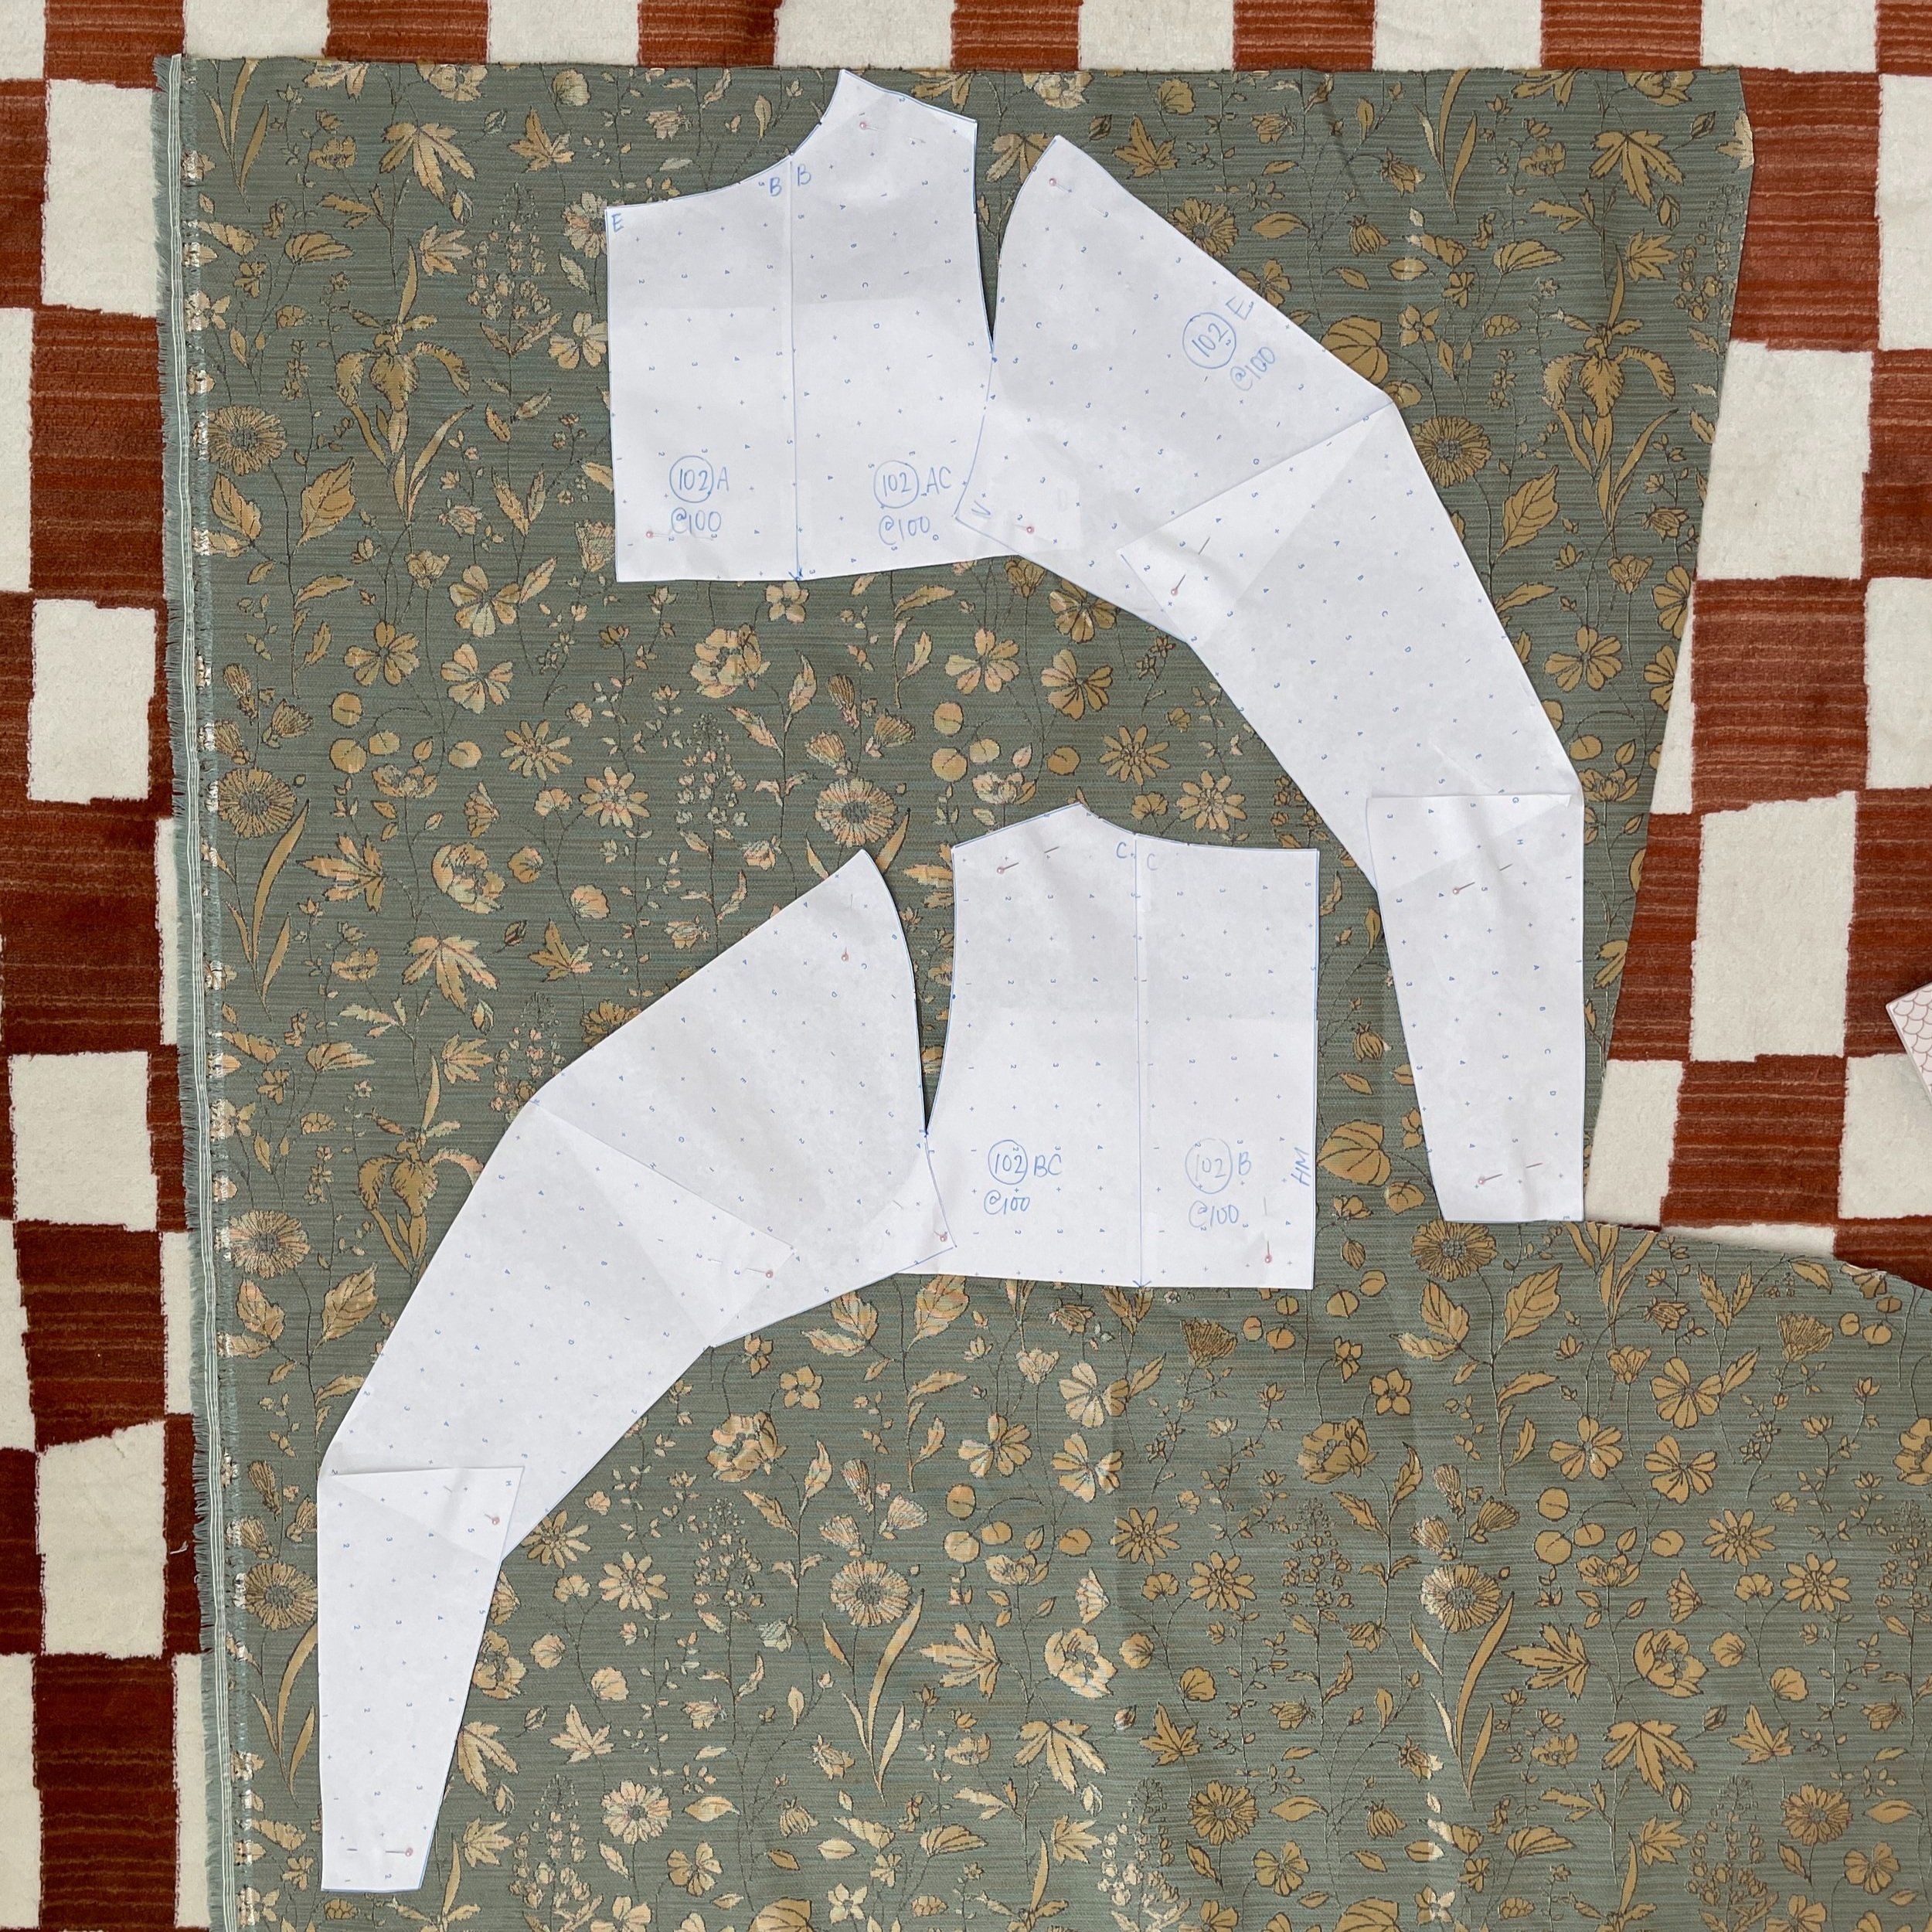
5. After making adjustments to the pattern, lay it out on your material and cut it out.
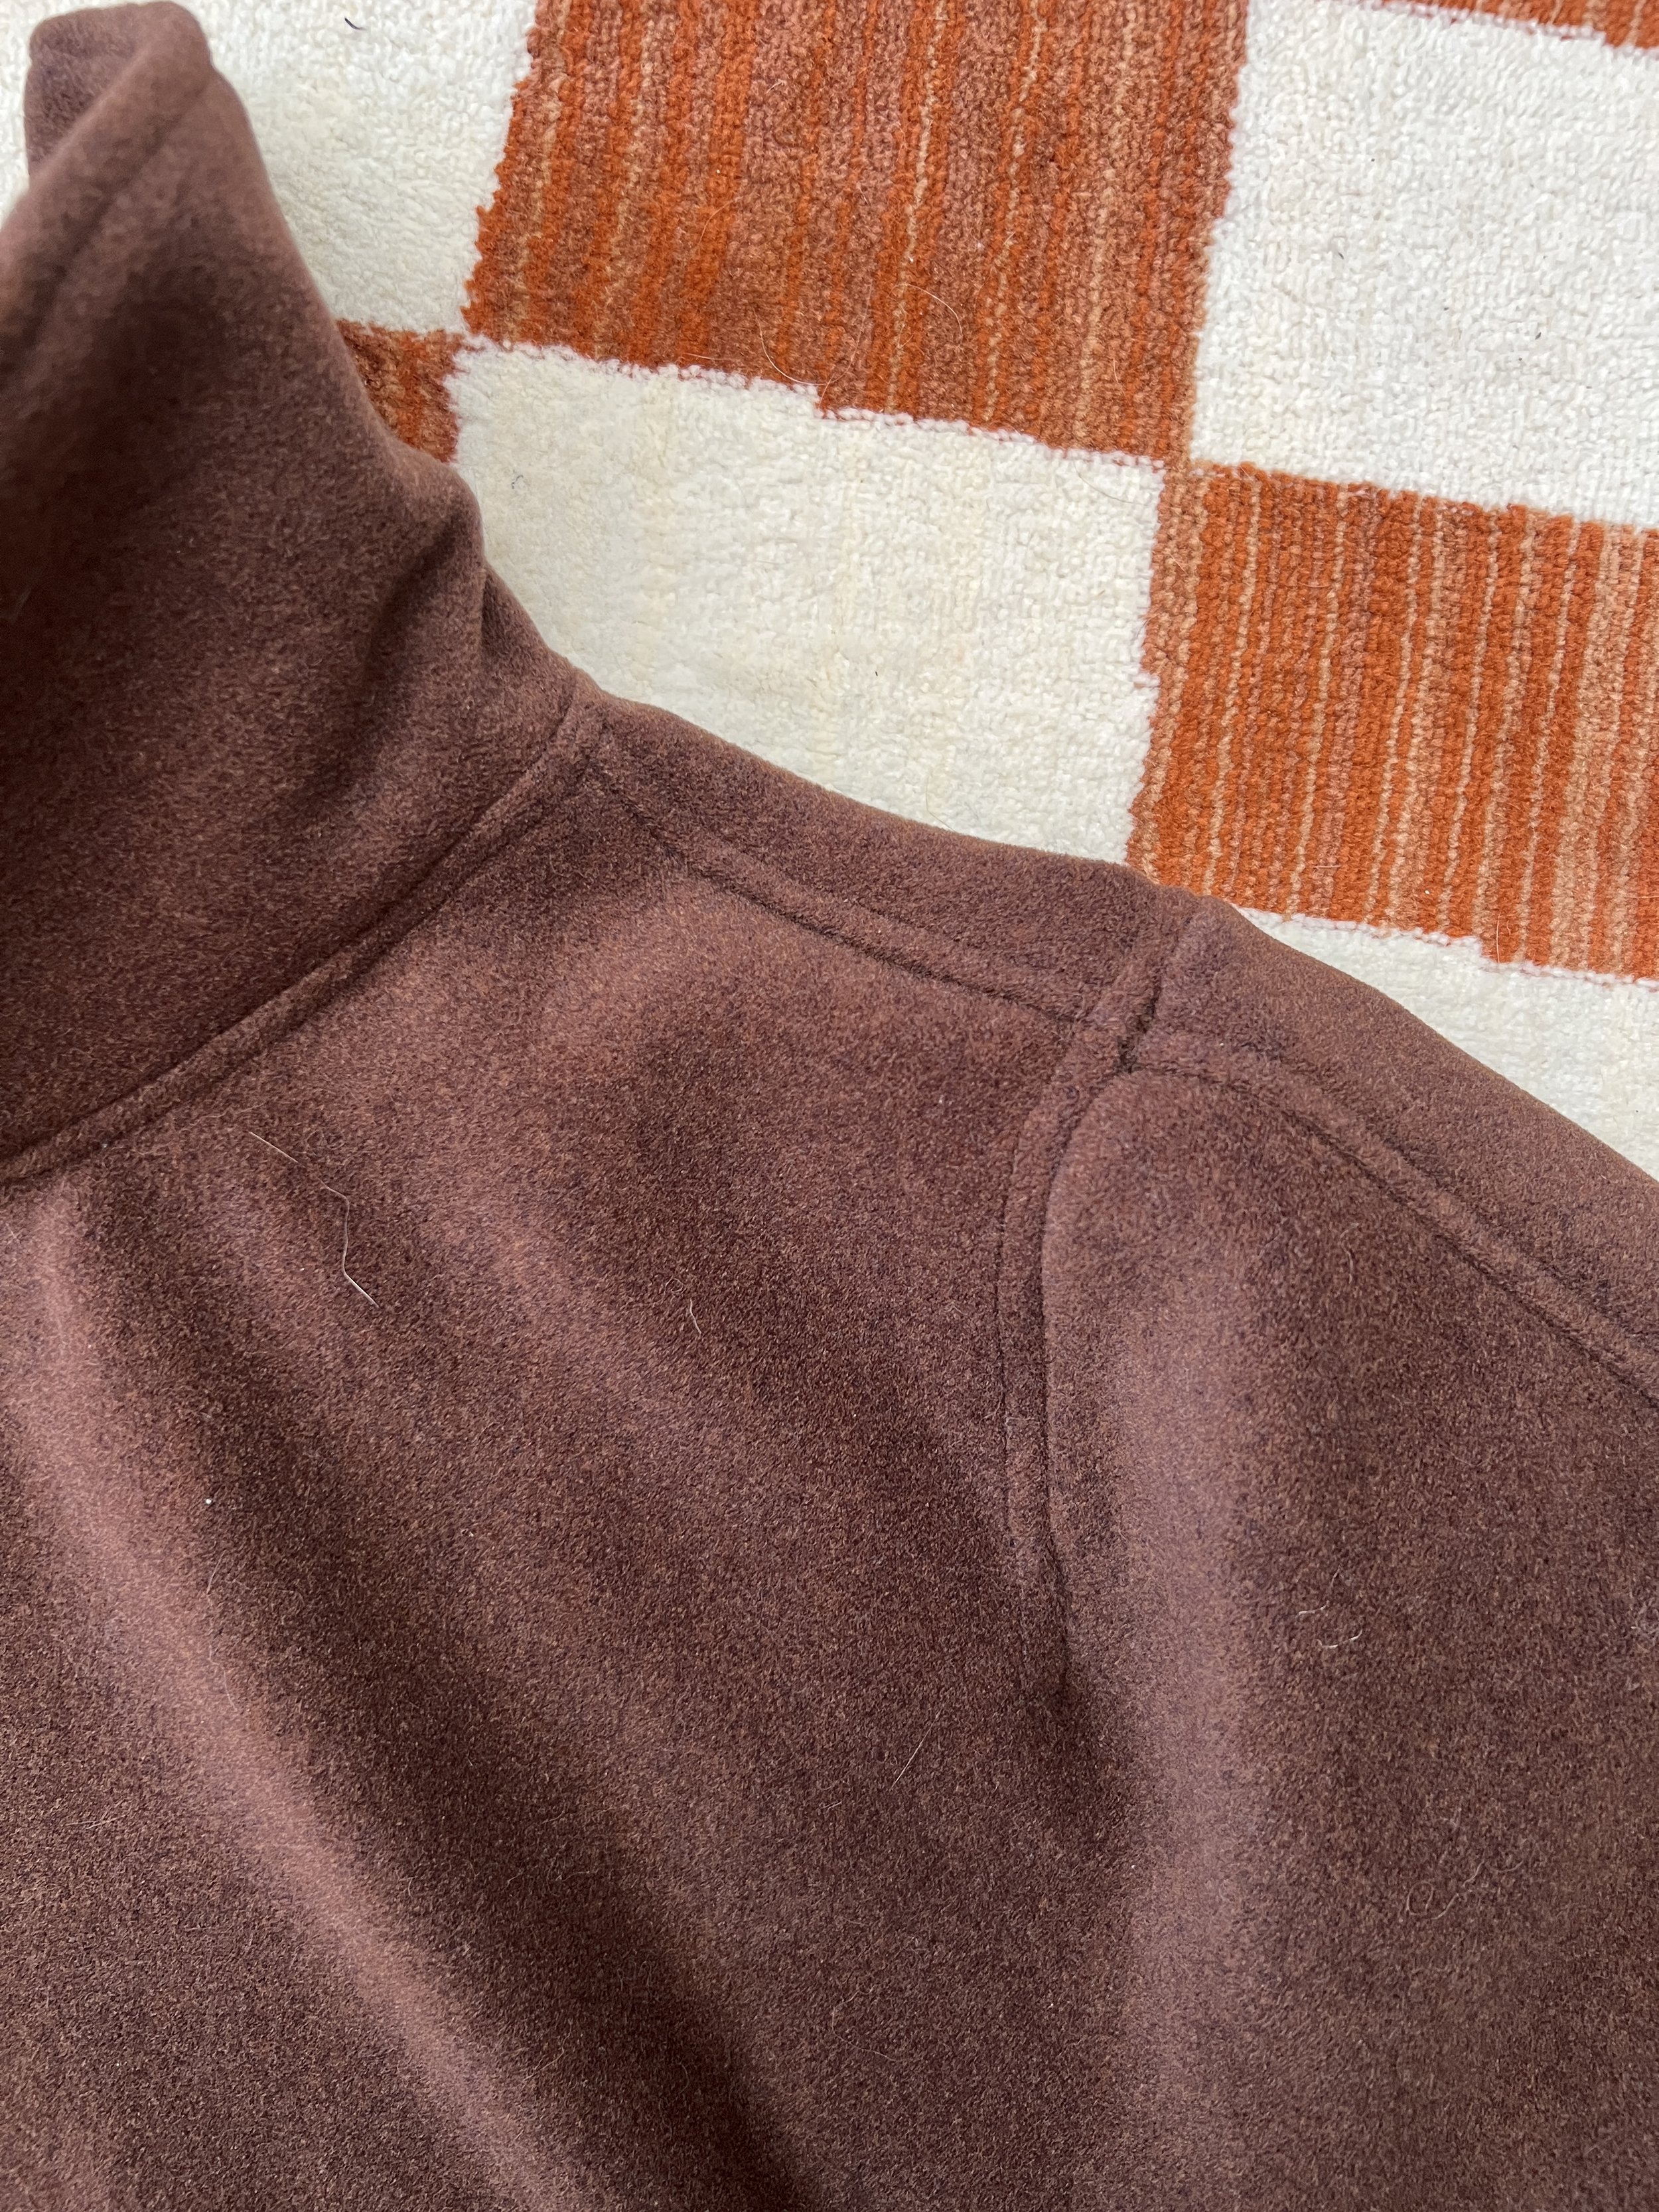
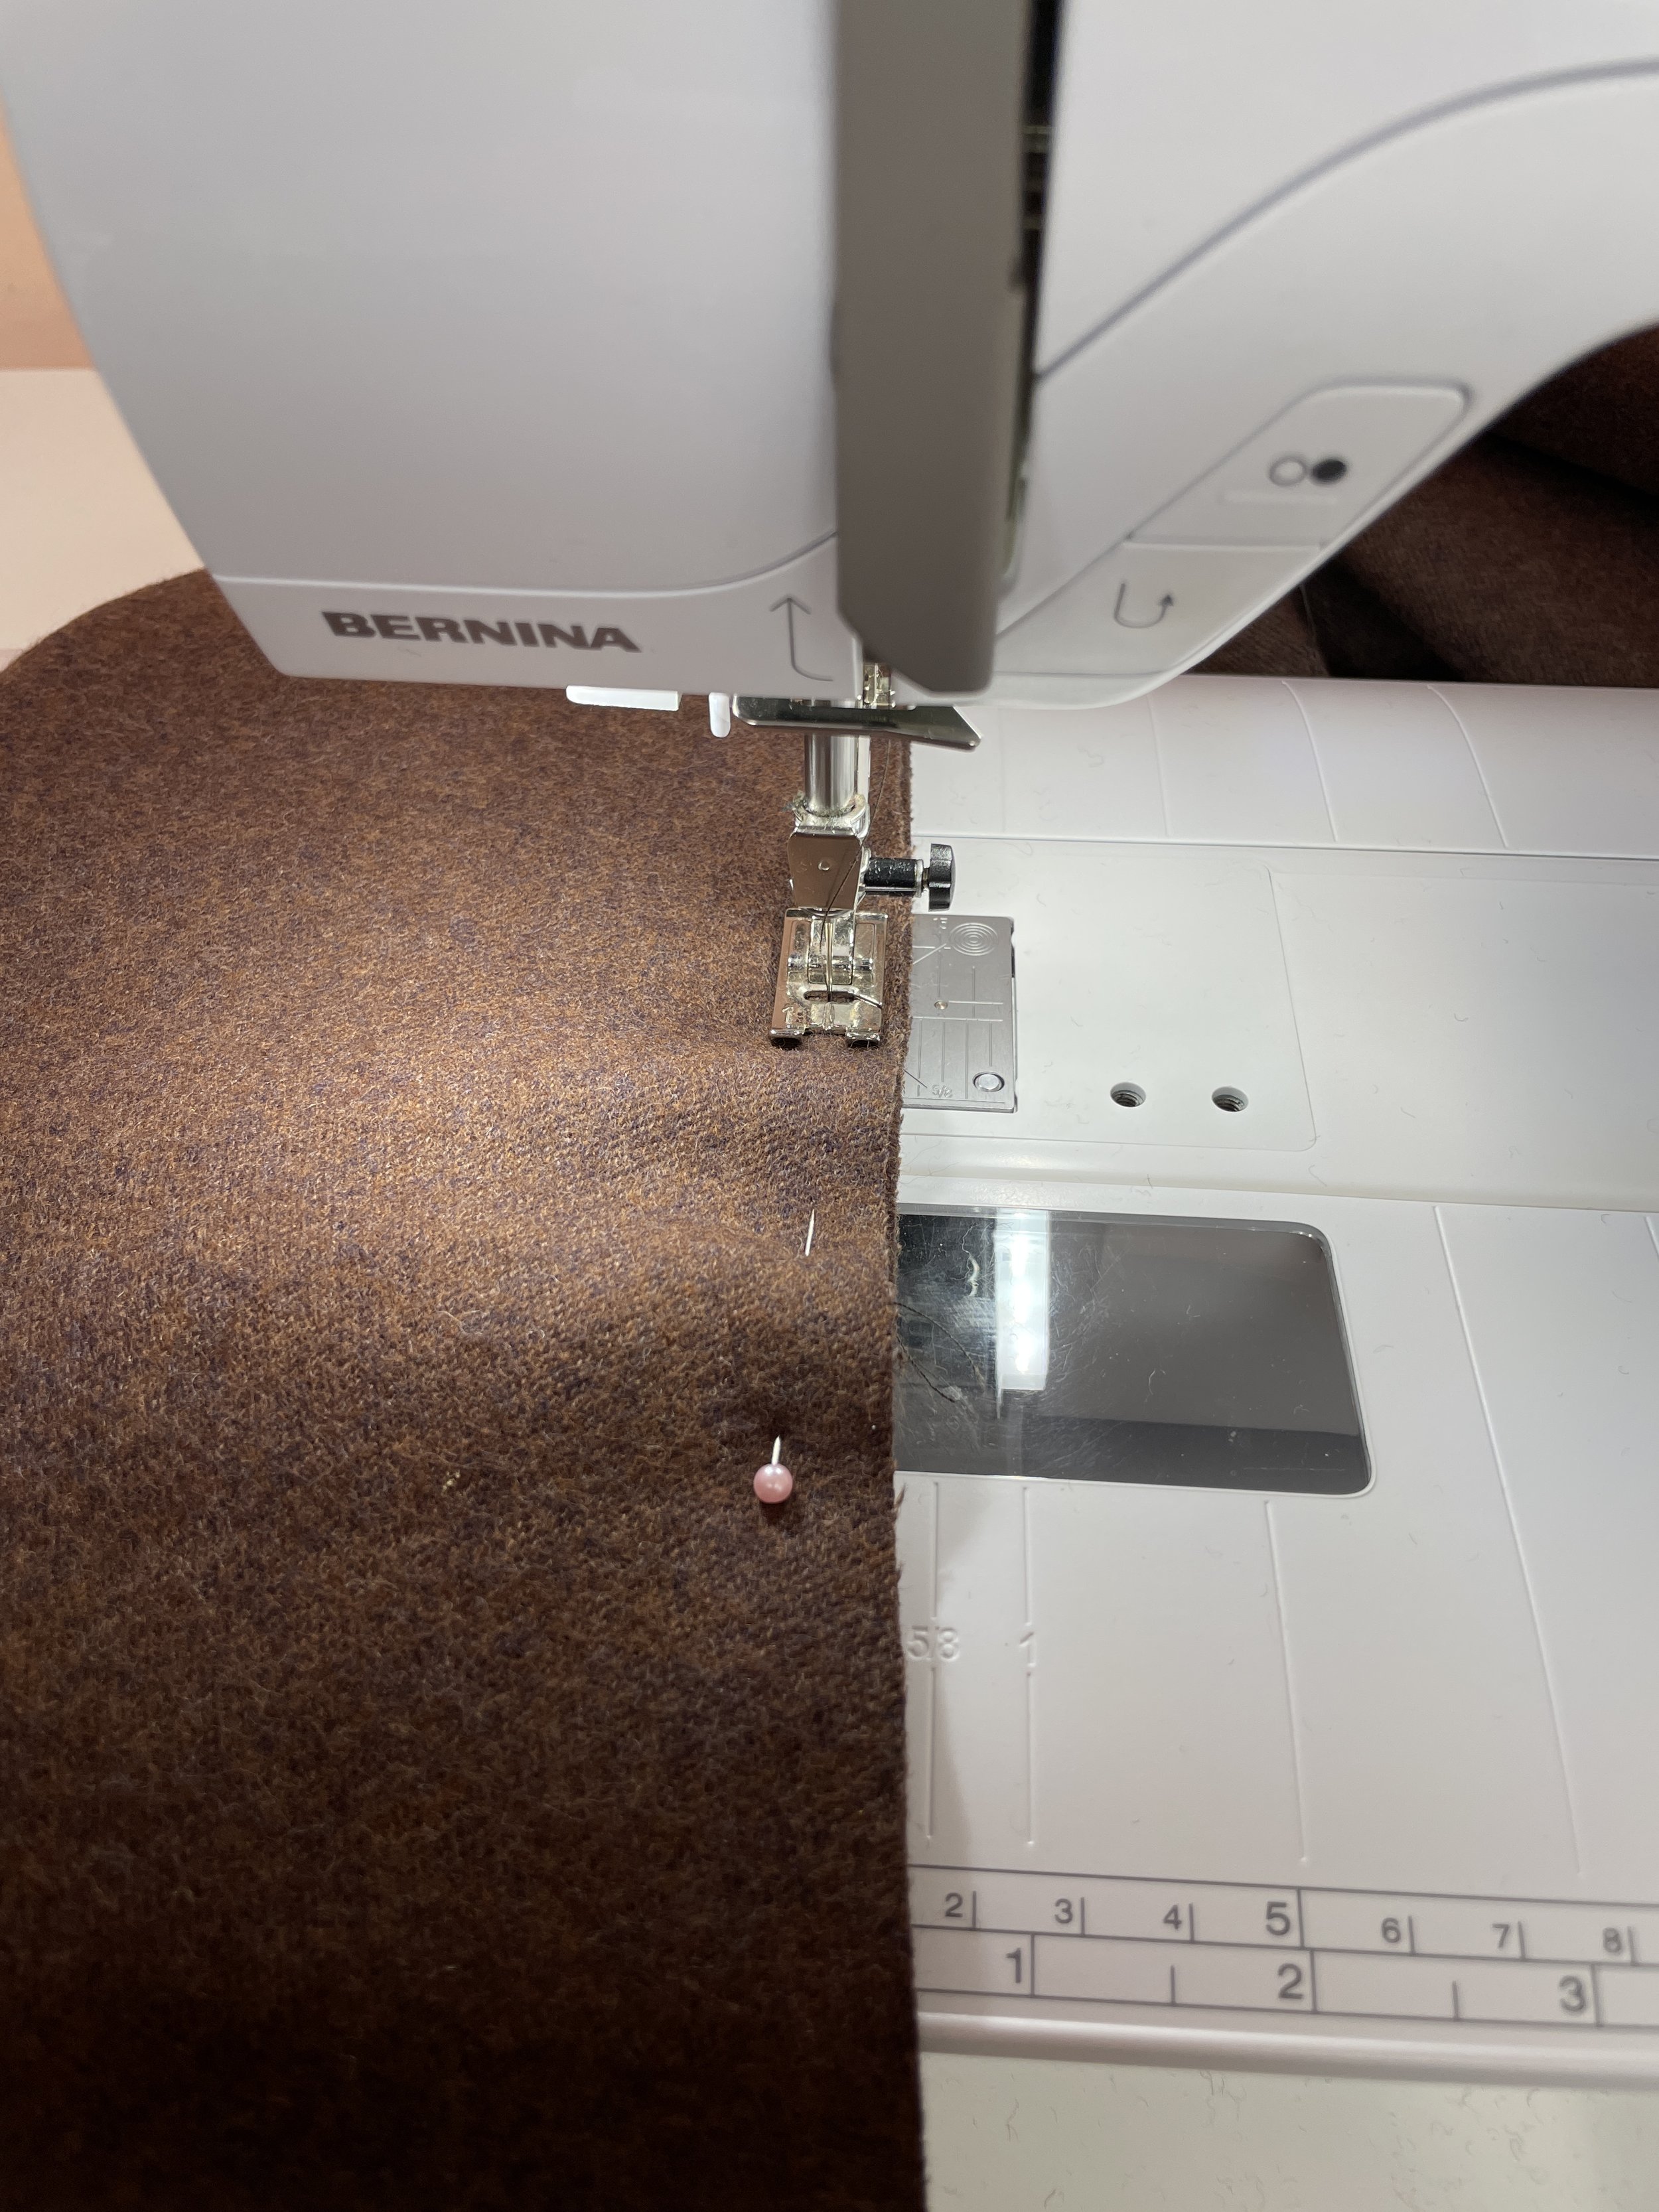
6. Sew the shoulder seam, running up the arm, right sides together.
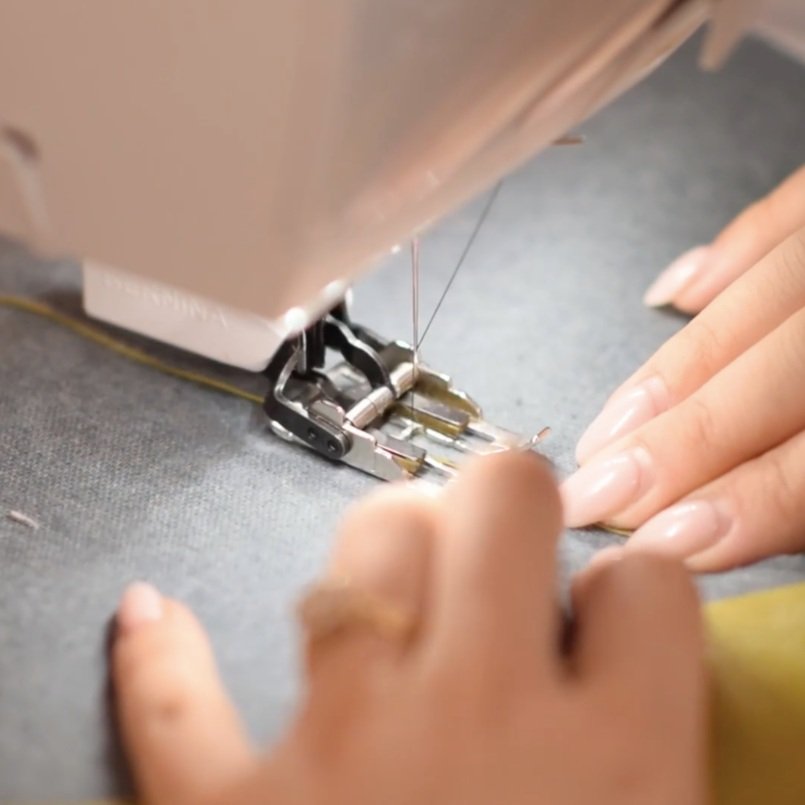
7. Sew the flat felled seams.
Push all the raw material towards the back of the top, locking it in with a straight stitch. Since this wool doesn’t fray and it is quite thick, we can get away with not having to tuck in the raw edges which would just provide more bulk.
8. Bring the shoulders right sides together and close the opening by lining up the flat felled seams on either side and distributing the ease to sit flat.
9. Press the seams.
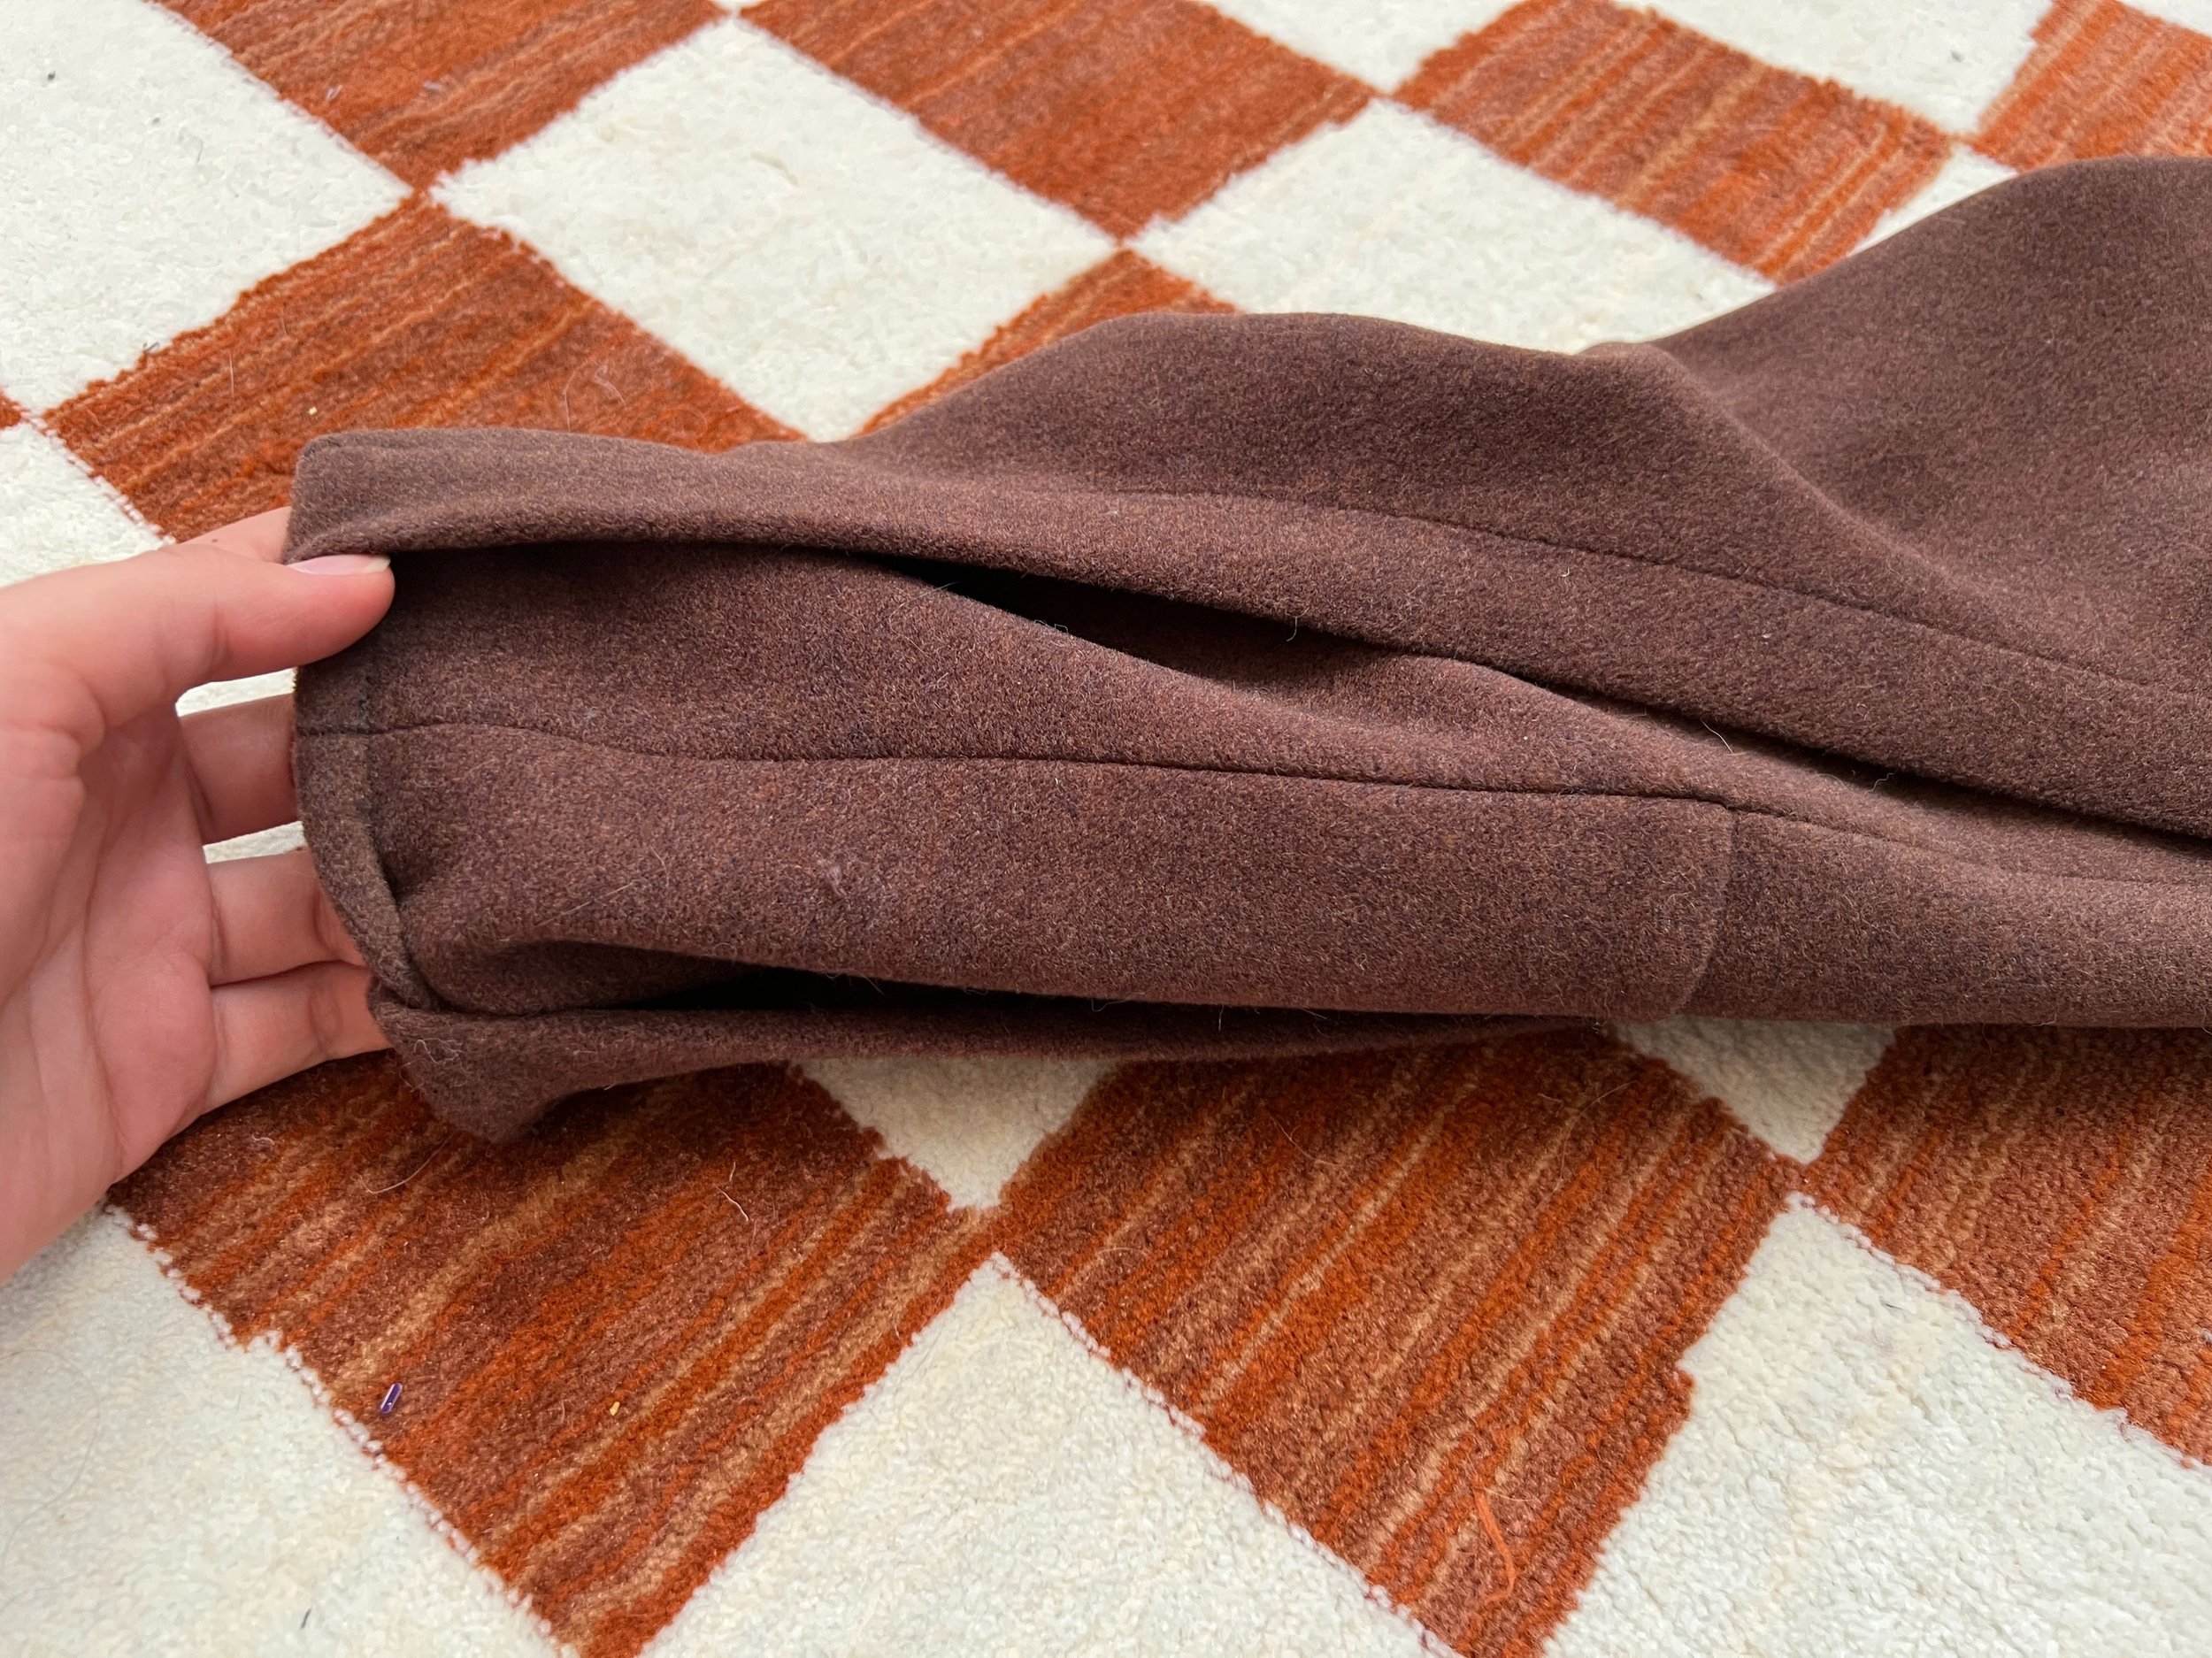
10. Putting a lot of tension in the collar so that it can stand straight up, and giving more ease into the body of the top, pin and sew the collar to the neckline, right sides together.
11. Add interfacing into the inner collar.
12. Sew the outer collar and the inner collar, right sides together at the top of the collar opening.
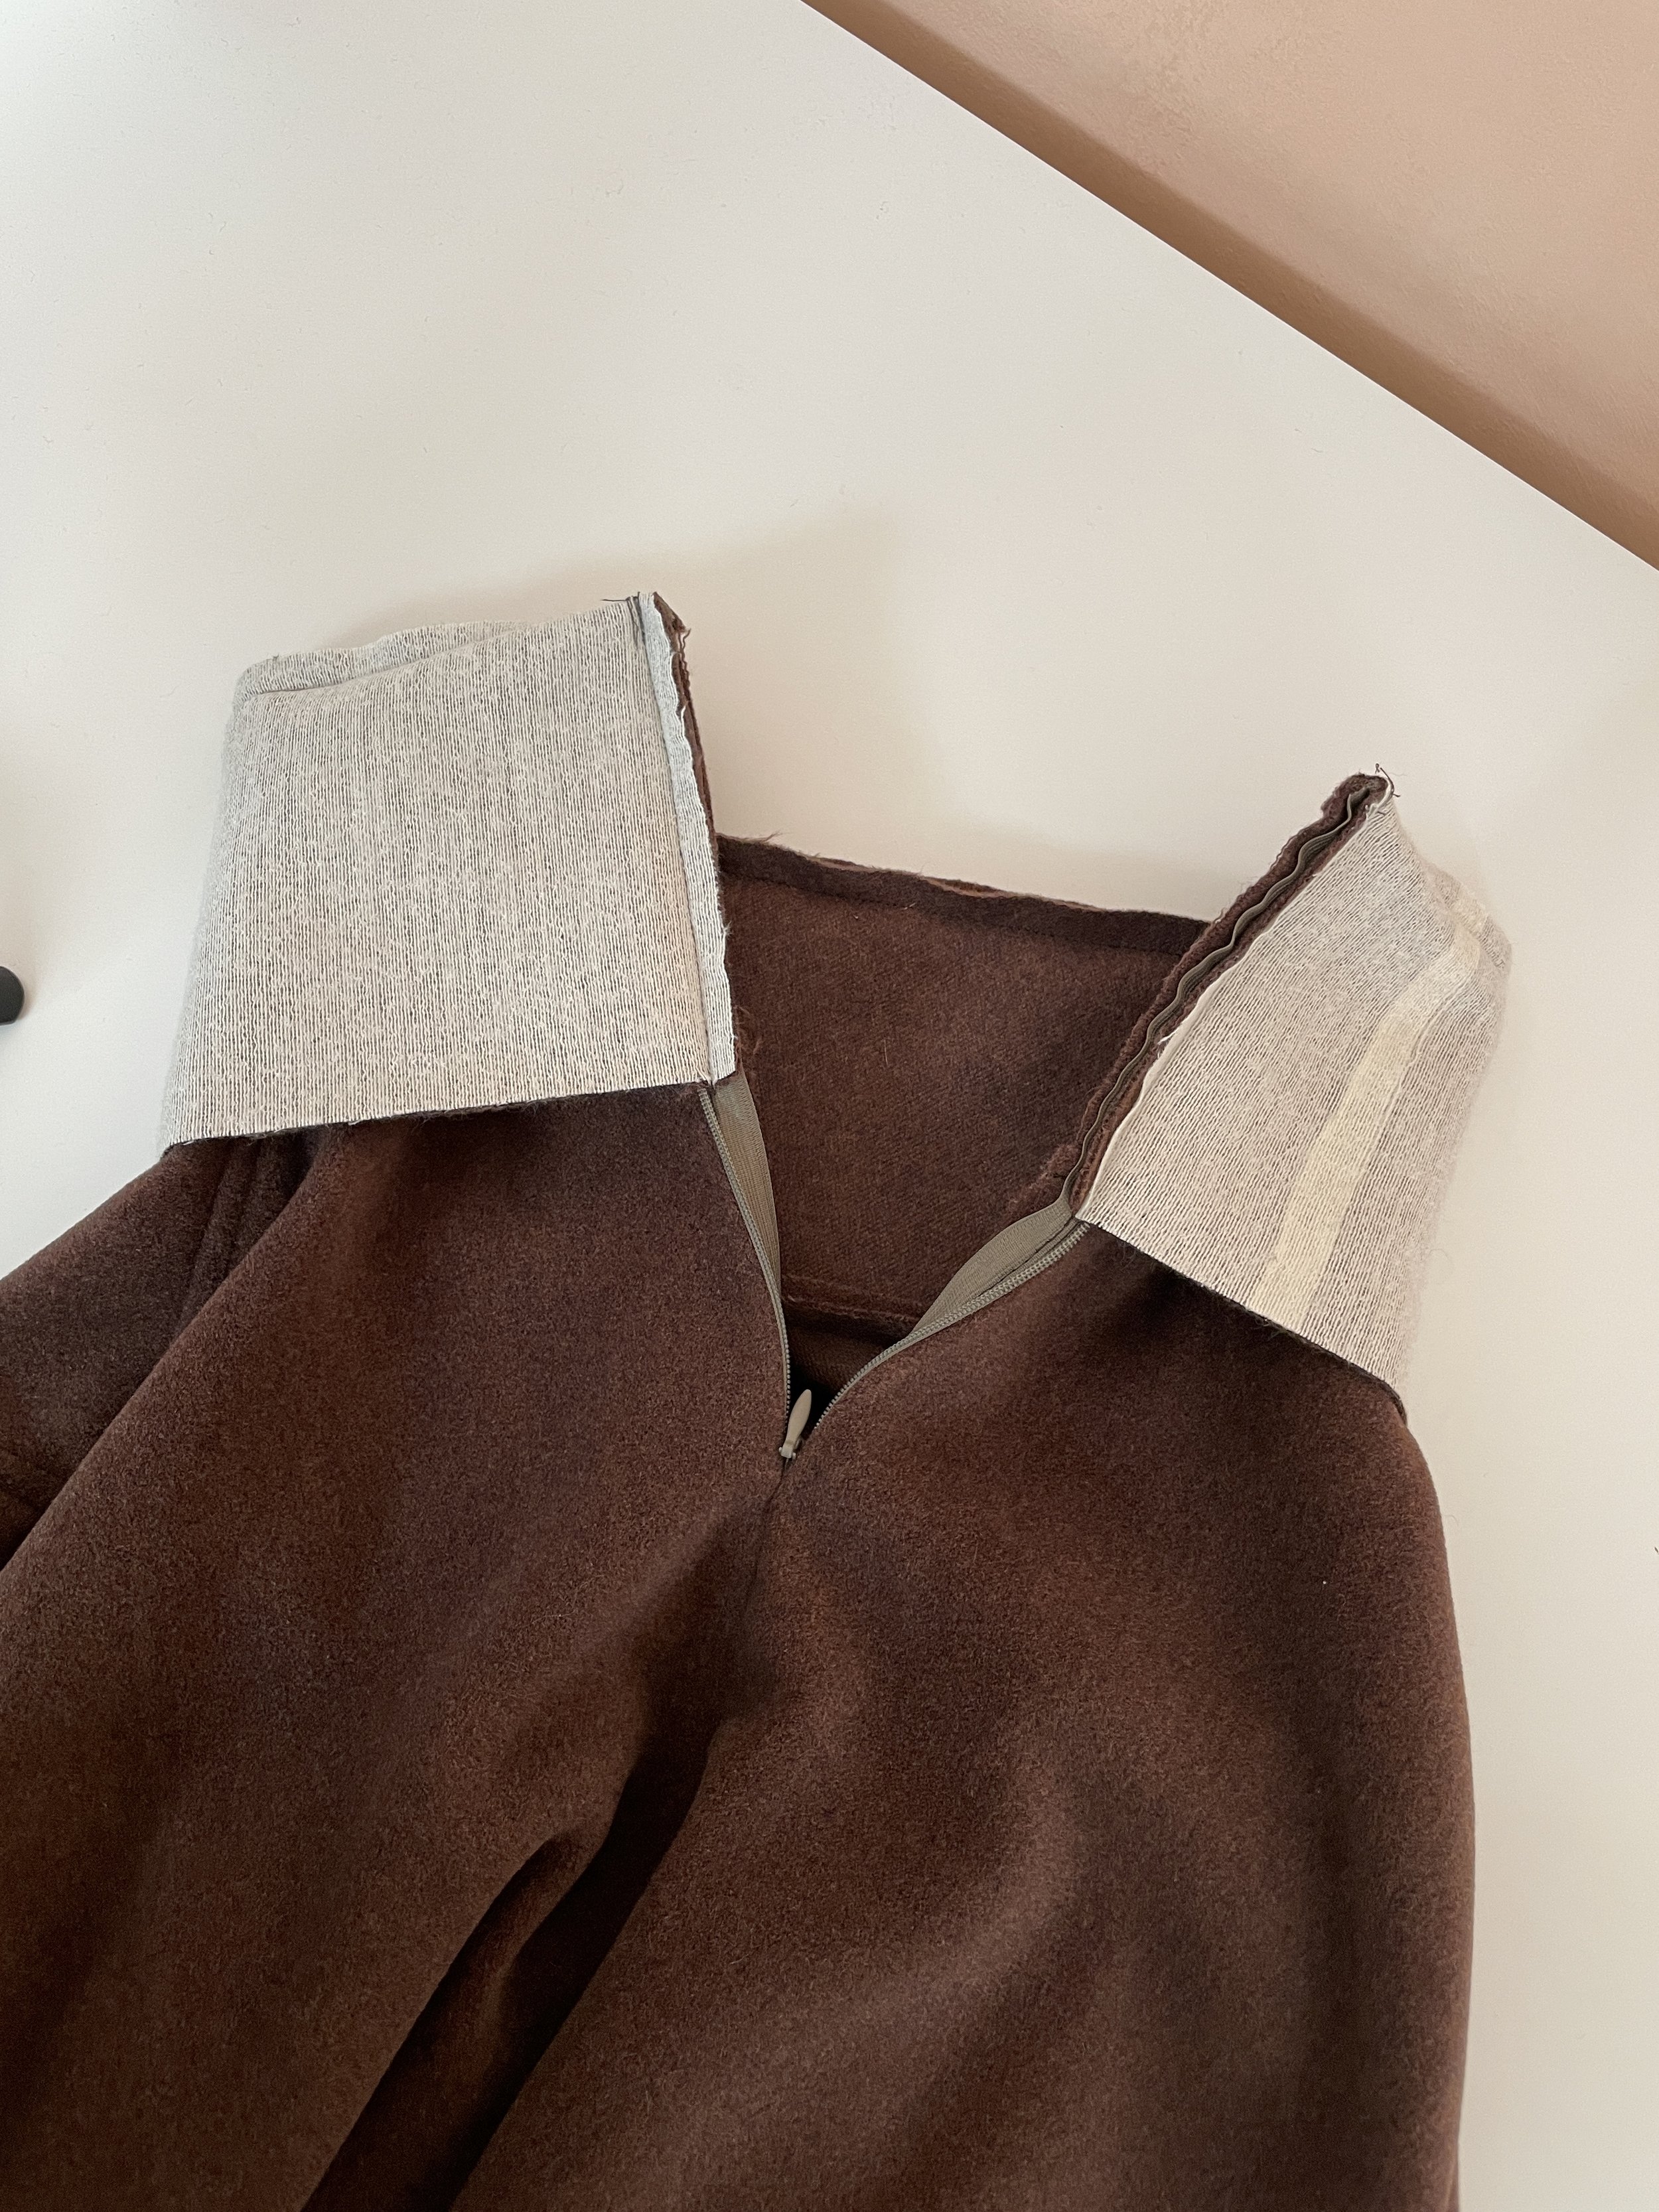
13. Add in the zipper, starting at the top of the collar down to the middle back. I used a basting stitch so I can make adjustments if the seams don’t align as I would like.
Sew it in place using a straight stitch.
14. Sew the collar lining in place, snip the corners to reduce bulk and flip right sides out.
15. Lay the inner collar flat, line up the seam allowance and top stitch it all the way around.


Sleeves:
16. Draft and cut two sleeves.
17. Sew the sleeves, right sides together.
18. Attach the sleeves at the shoulder using a small tacking stitch.
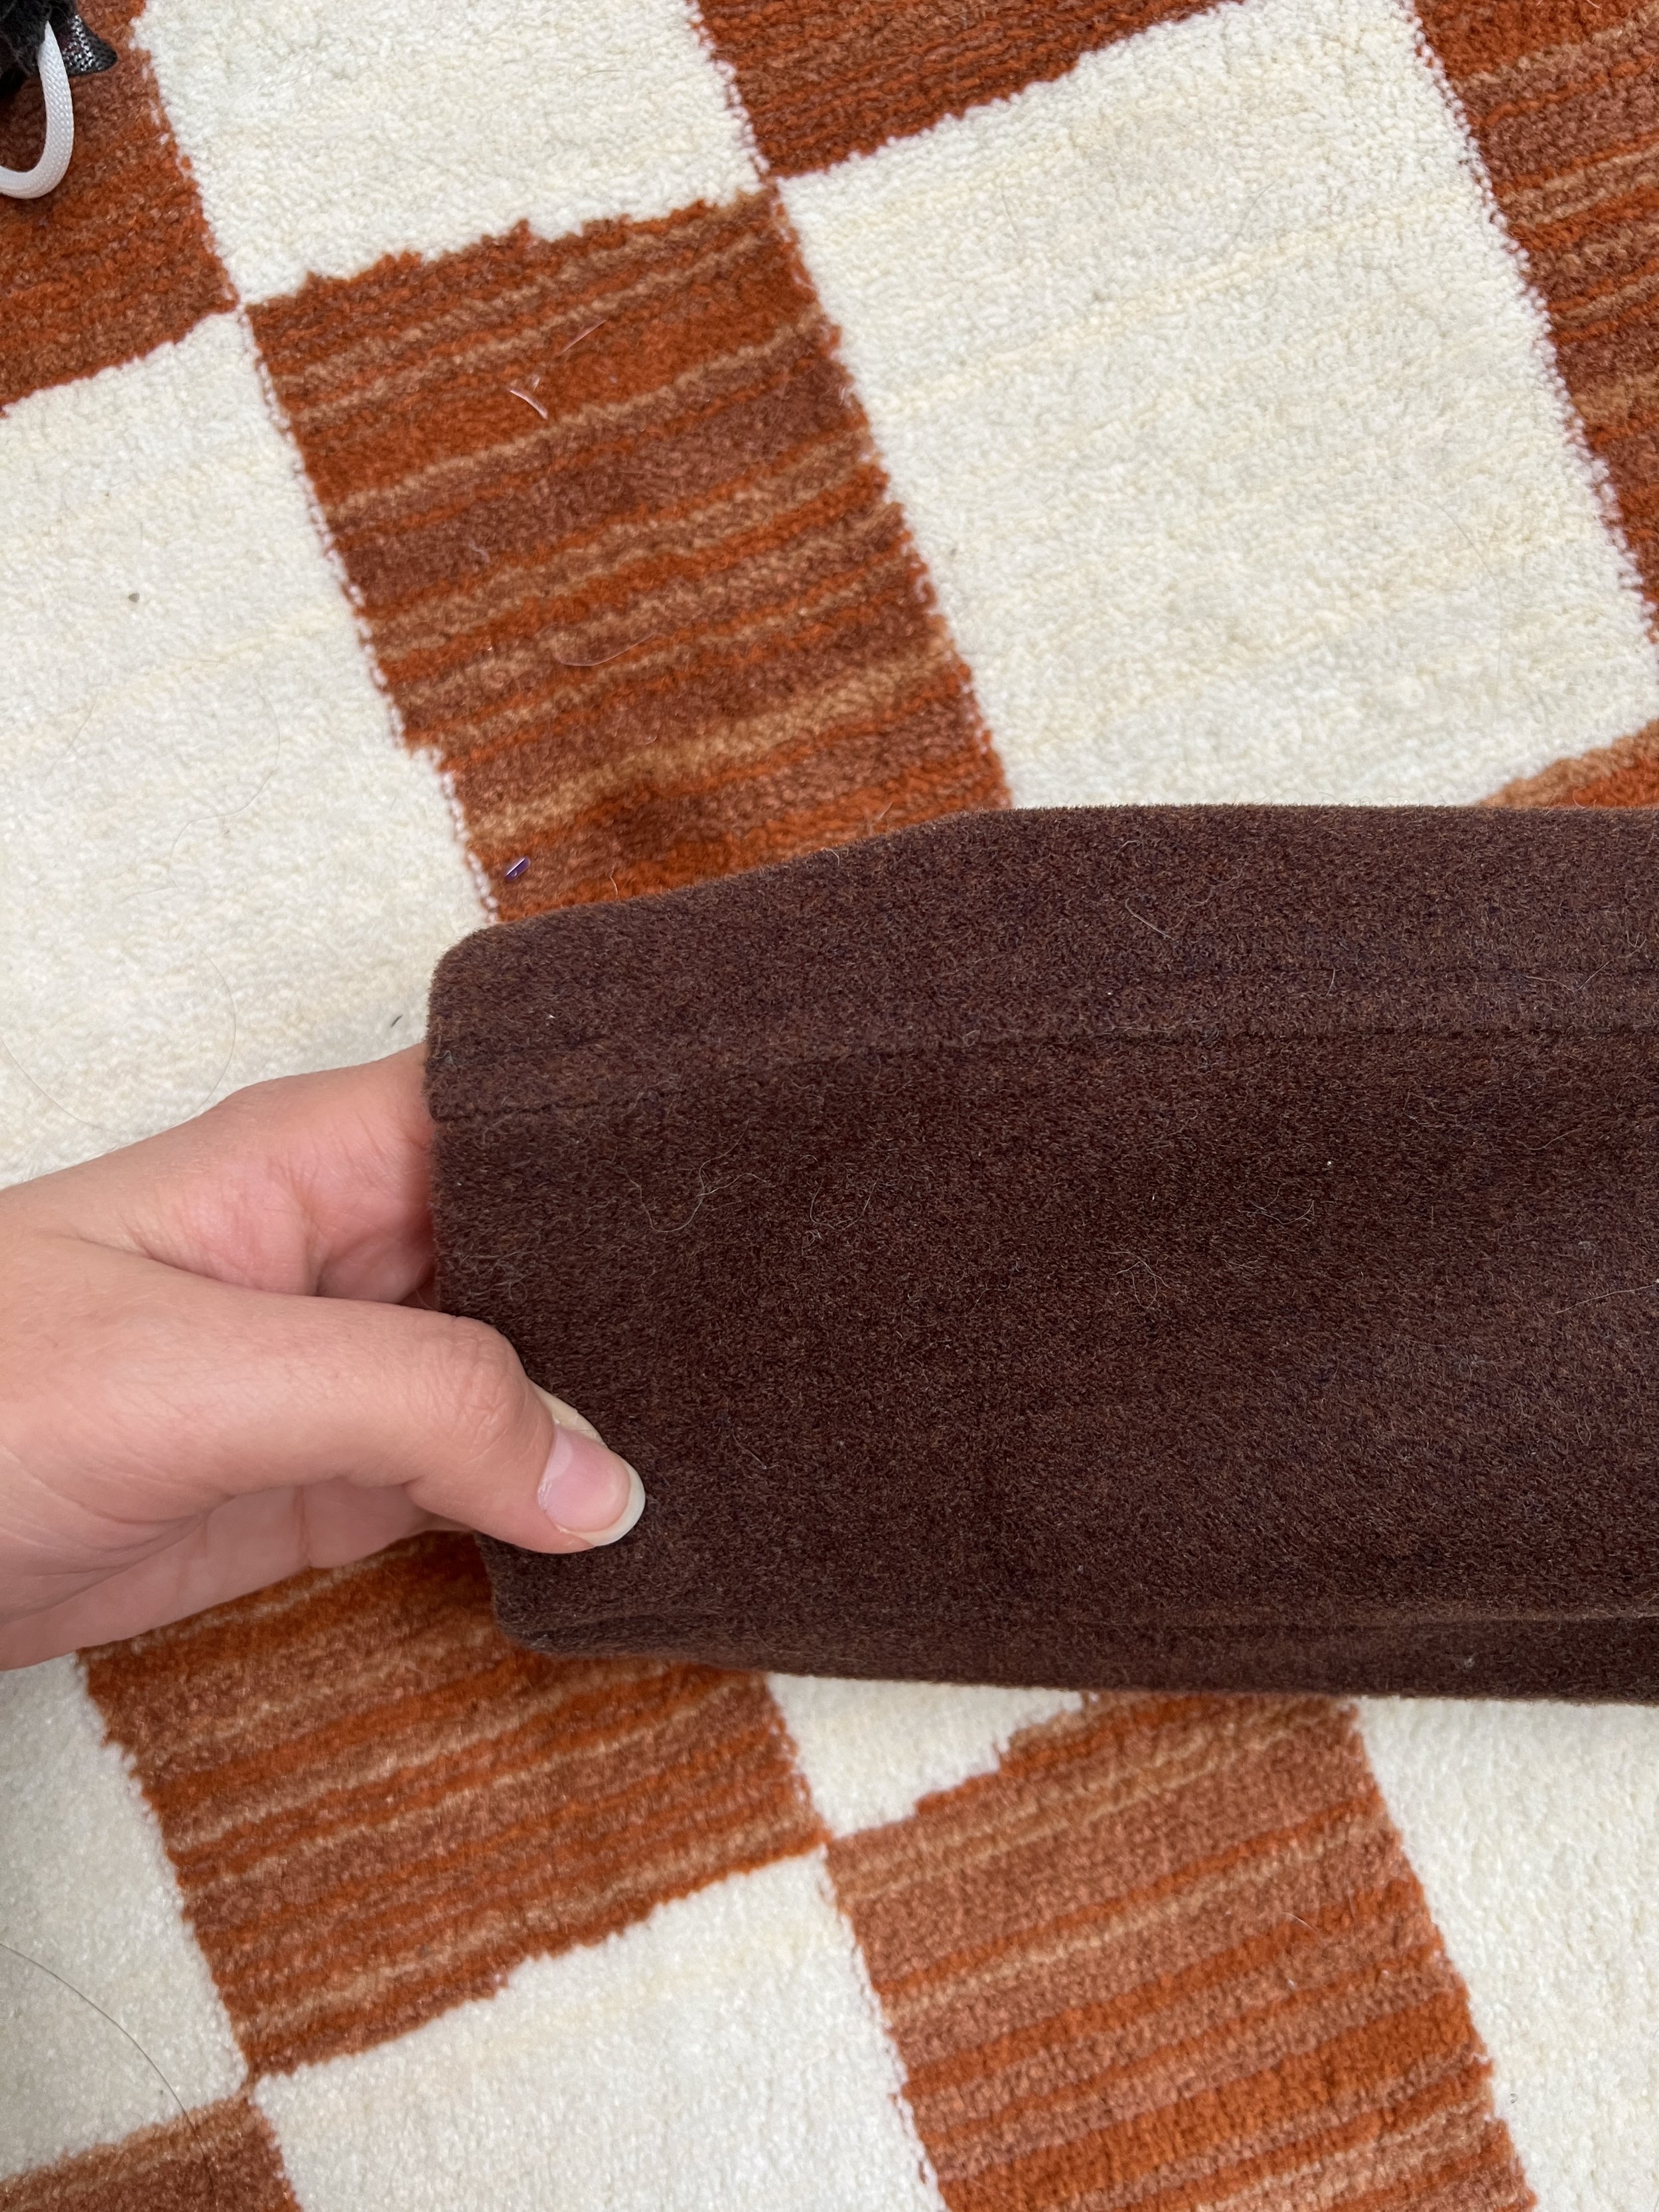
19. Sew the cuffs of the sleeves by folding the raw edge under, and sew it flat using a straight stitch. Press the cuff flat.
20. Cuff the excess material and sew the side opening of the top sleeve to the bottom sleeve to secure it together.
21. Hem the bottom of the top, all the way around.
22. Press the wool flat, using a cloth to avoid any napping.
Finished Look 1


Look 2
Louis Vuitton
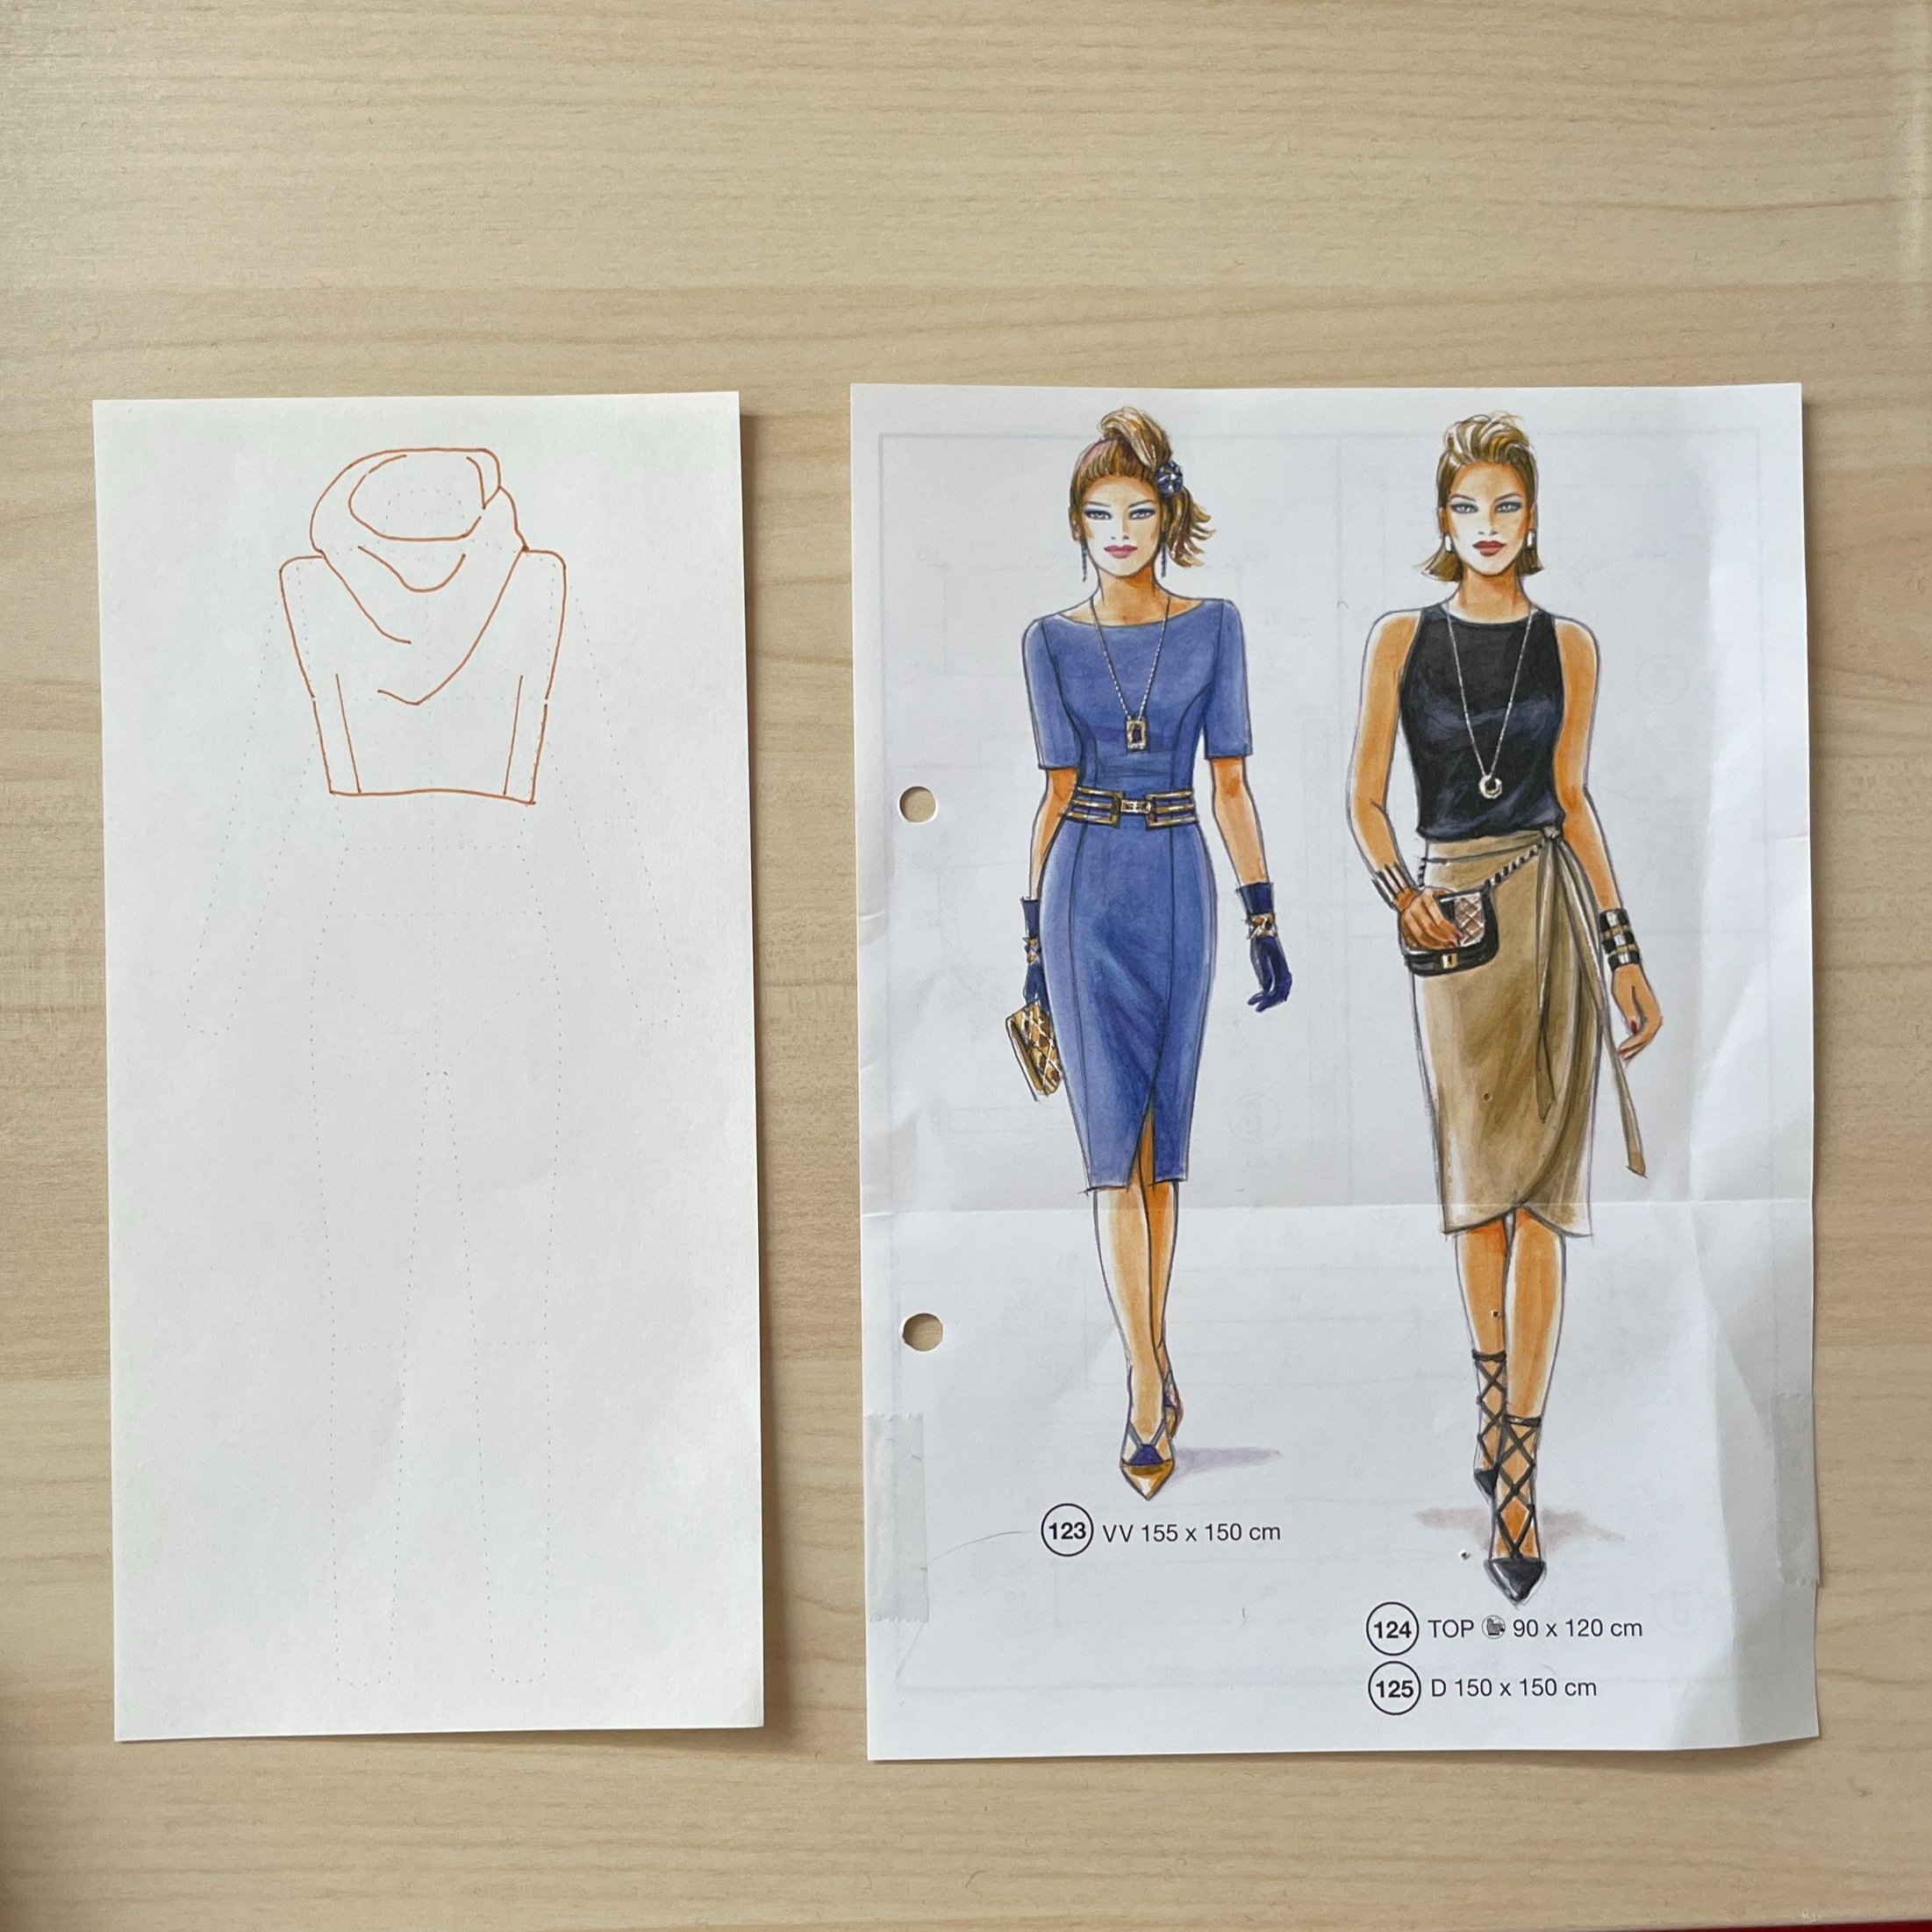
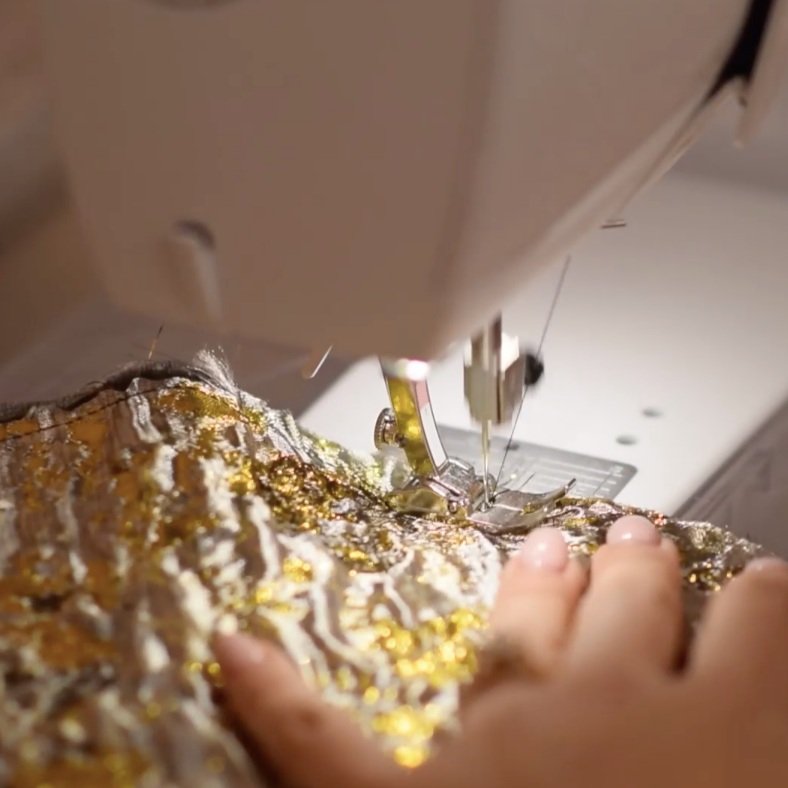
1. Using a pattern from my Lutterloh, I traced this blue dress pattern for the top as a good base template. This pattern has a wide neckline which gives us room to include this cowl neck addition.
2. Draw and cut the draft out on your mock-up material.
3. Sew the darts in the front closed.
4. Close the left seam and the top of the right seam, leaving an opening for a zipper.
5. Open the top up and sew from the shoulder to the top of the neck hole.
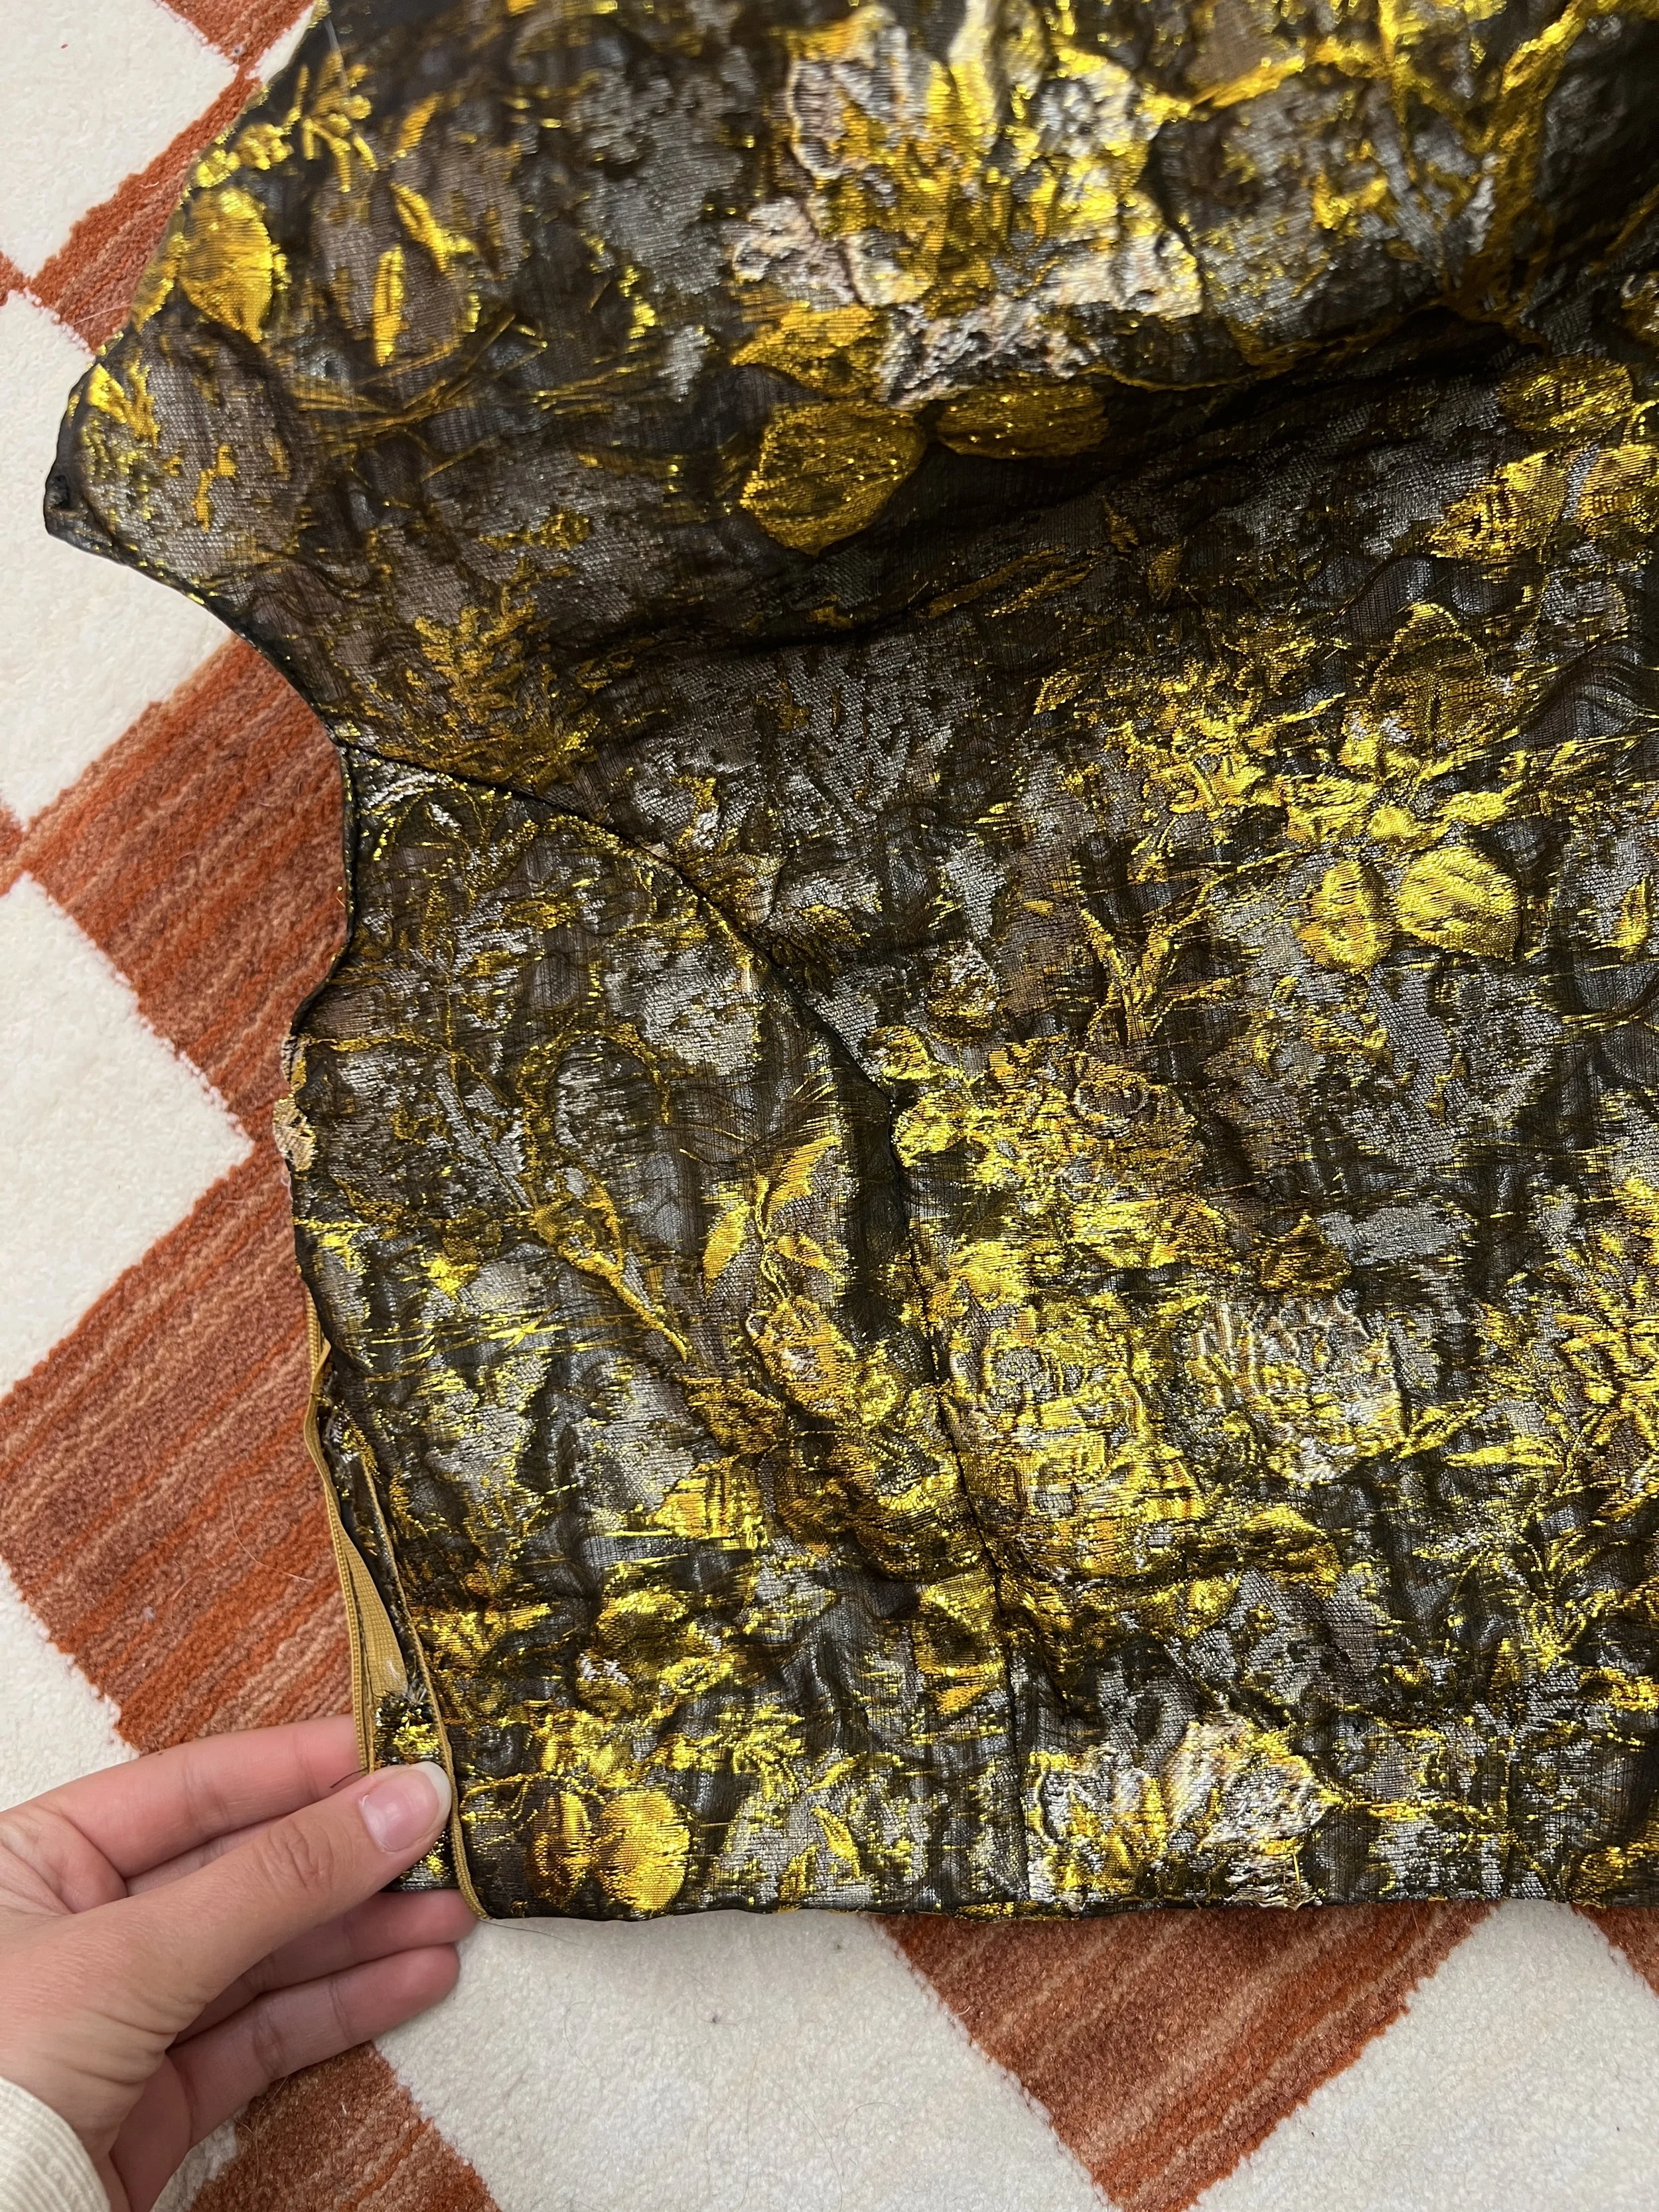
6. I adjusted the cowl neck in the back, taking some material away to reduce the bulk and widened the opening to make it easier to take on and off.
I also left more material on the shoulder to create a puffed look when folding it inwards.
7. Draw and cut the new template out on your material.
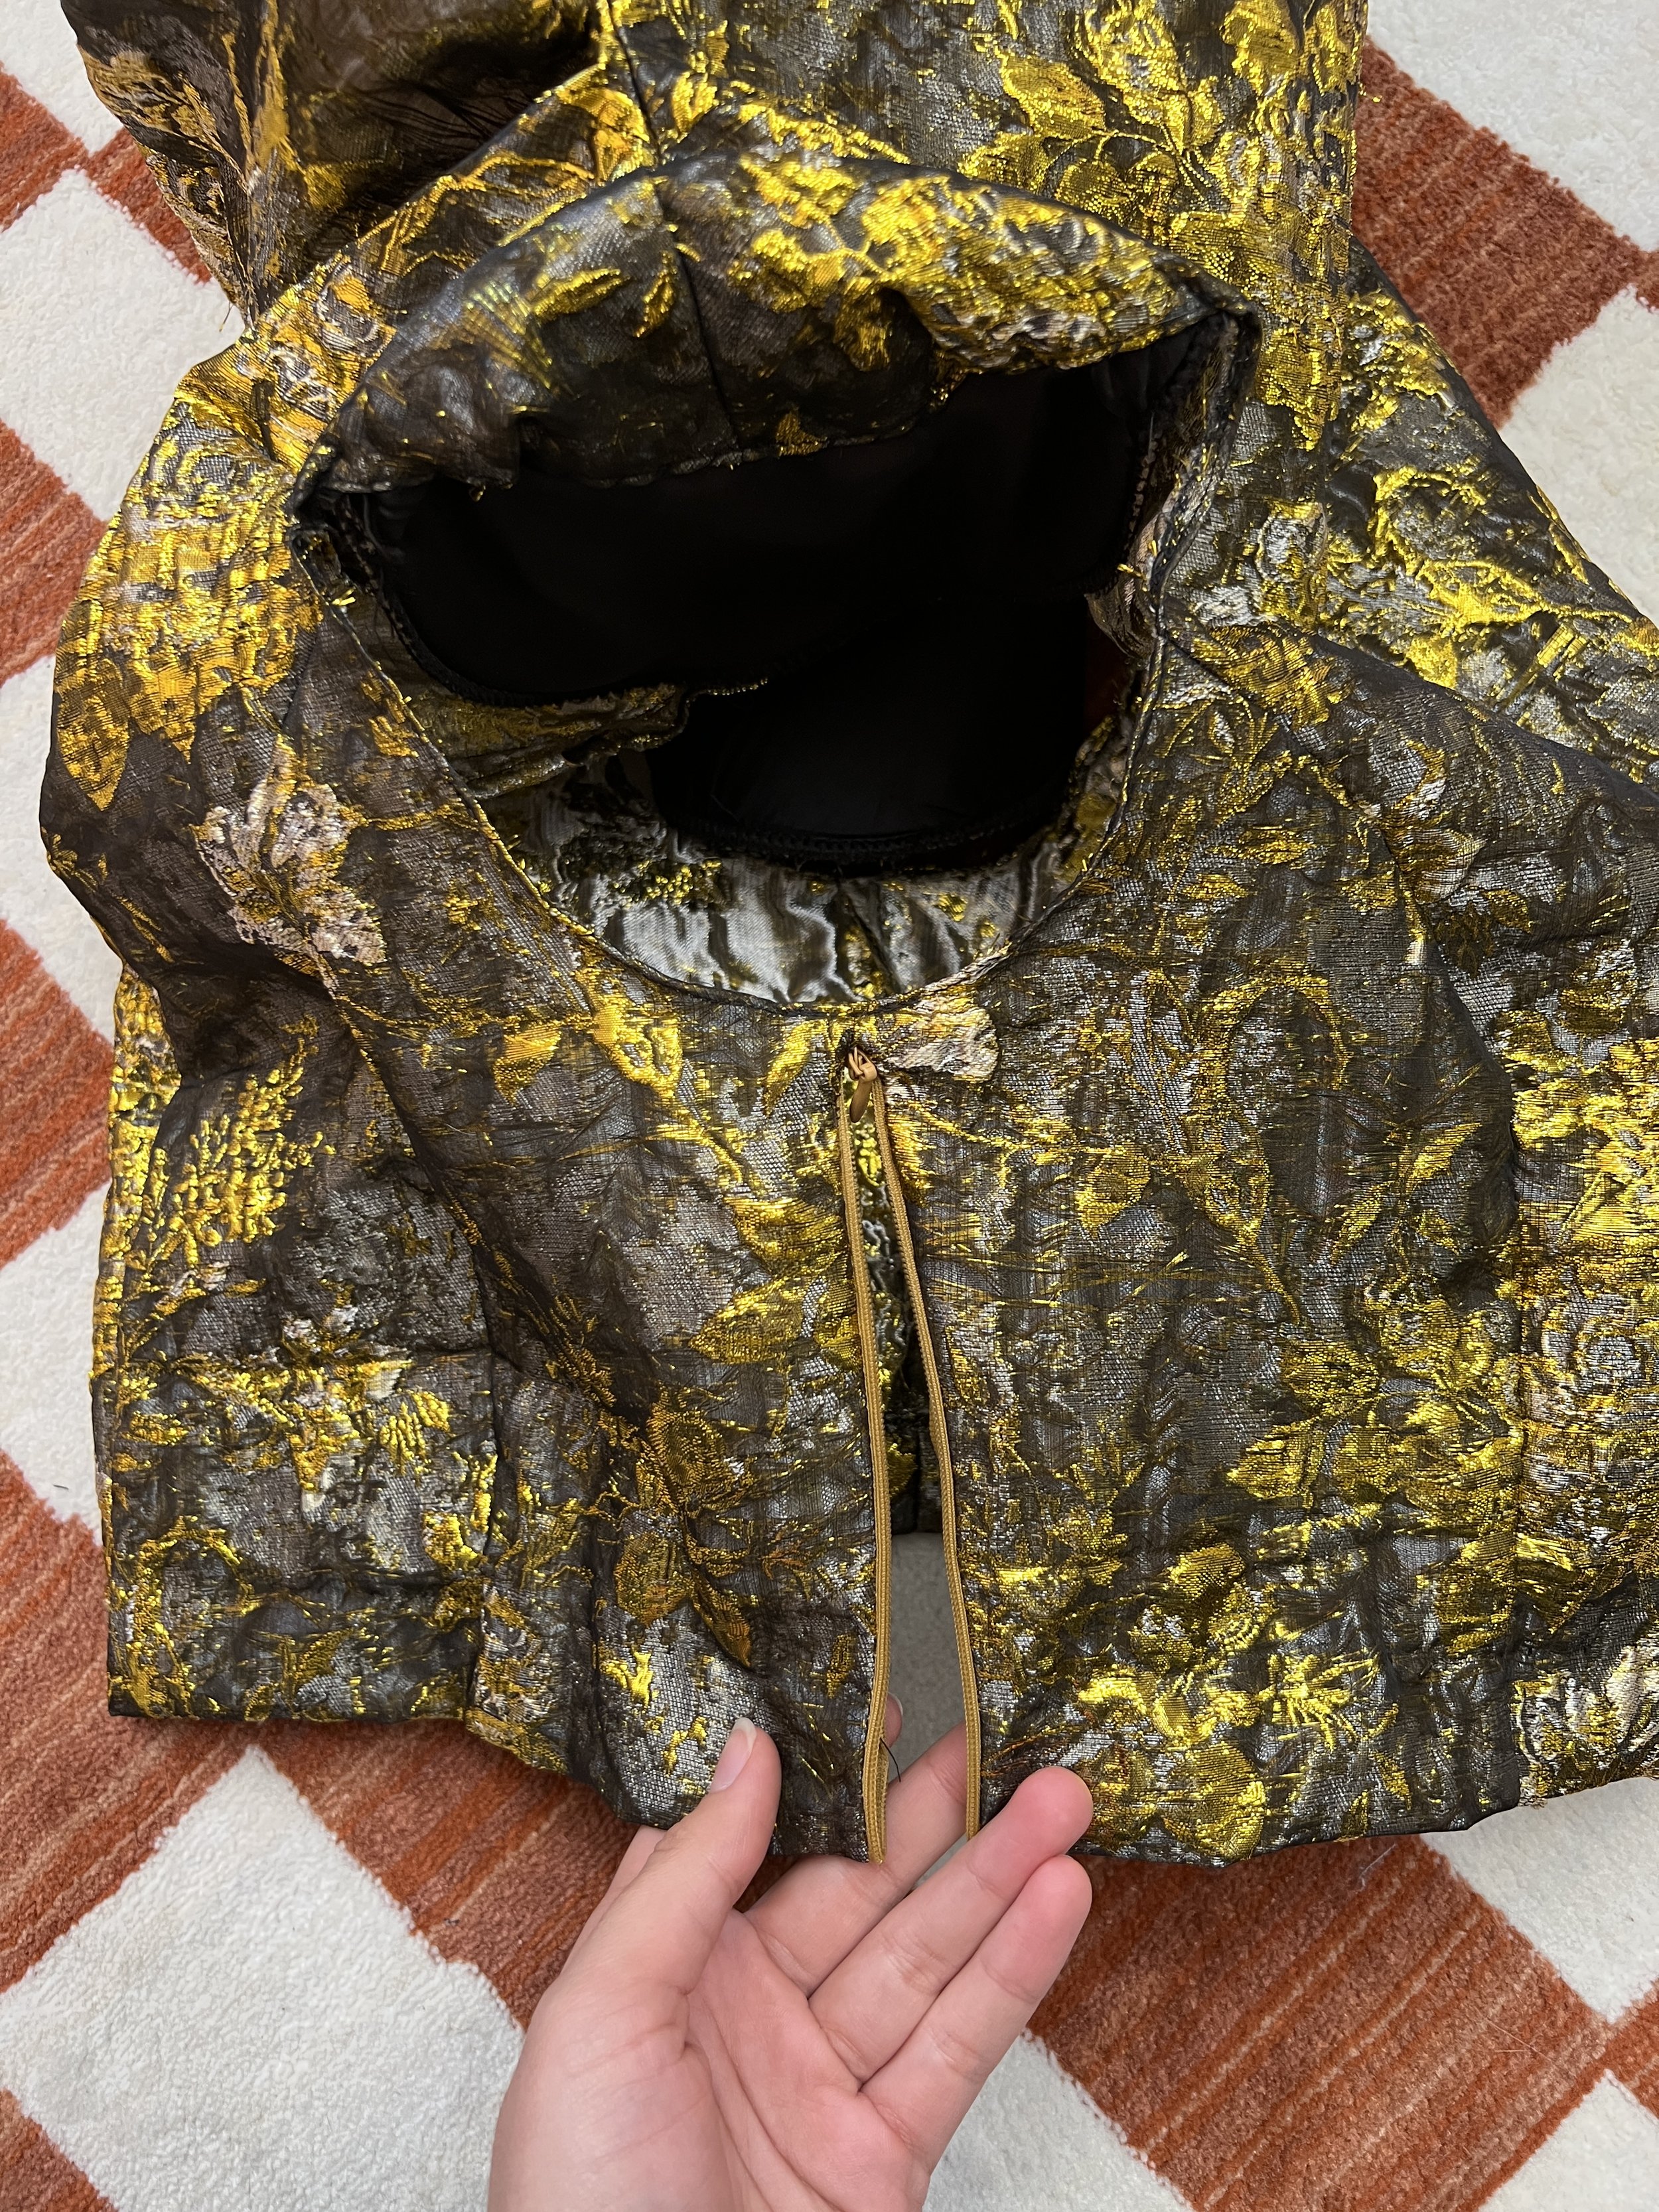
8. Pin and sew the darts and close the side seams, and right sides together, leaving an opening for the zipper on one side.
9. Open the top up, and sew the shoulder seam, and right sides together, up until the top of the cowl neck opening.
10. Sew in the invisible zipper in the side seam. Here is a link to more detailed instructions on how to sew an invisible zipper.
11. Using a blind stitch, close the top opening of the cowl neck hole.
12. Attach the shoulder pads to the shoulder, hemming the seam around the arm hole.
13. Blind stitch the bottom hemline on the machine.
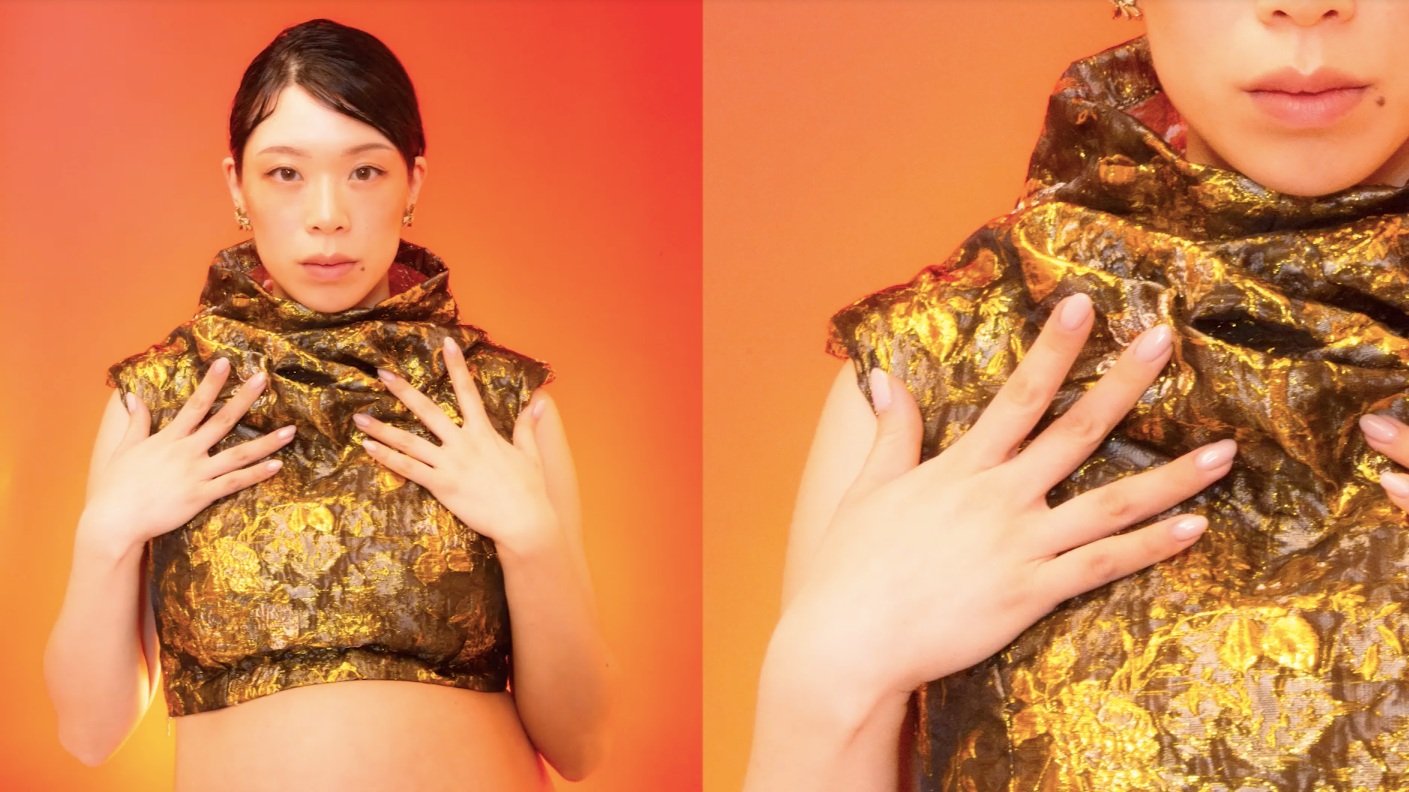
Finished Look 2


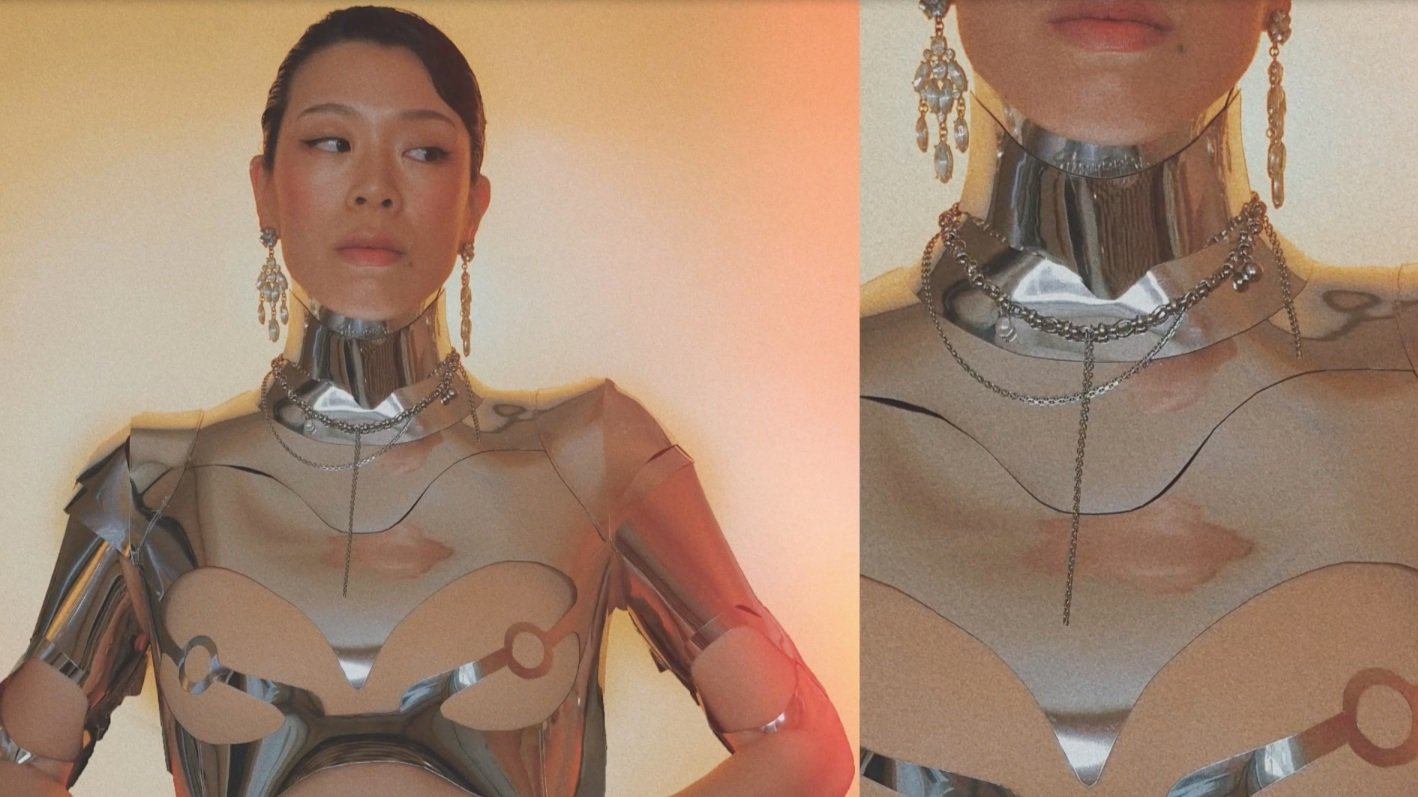
Look 3
Thierry Mugler
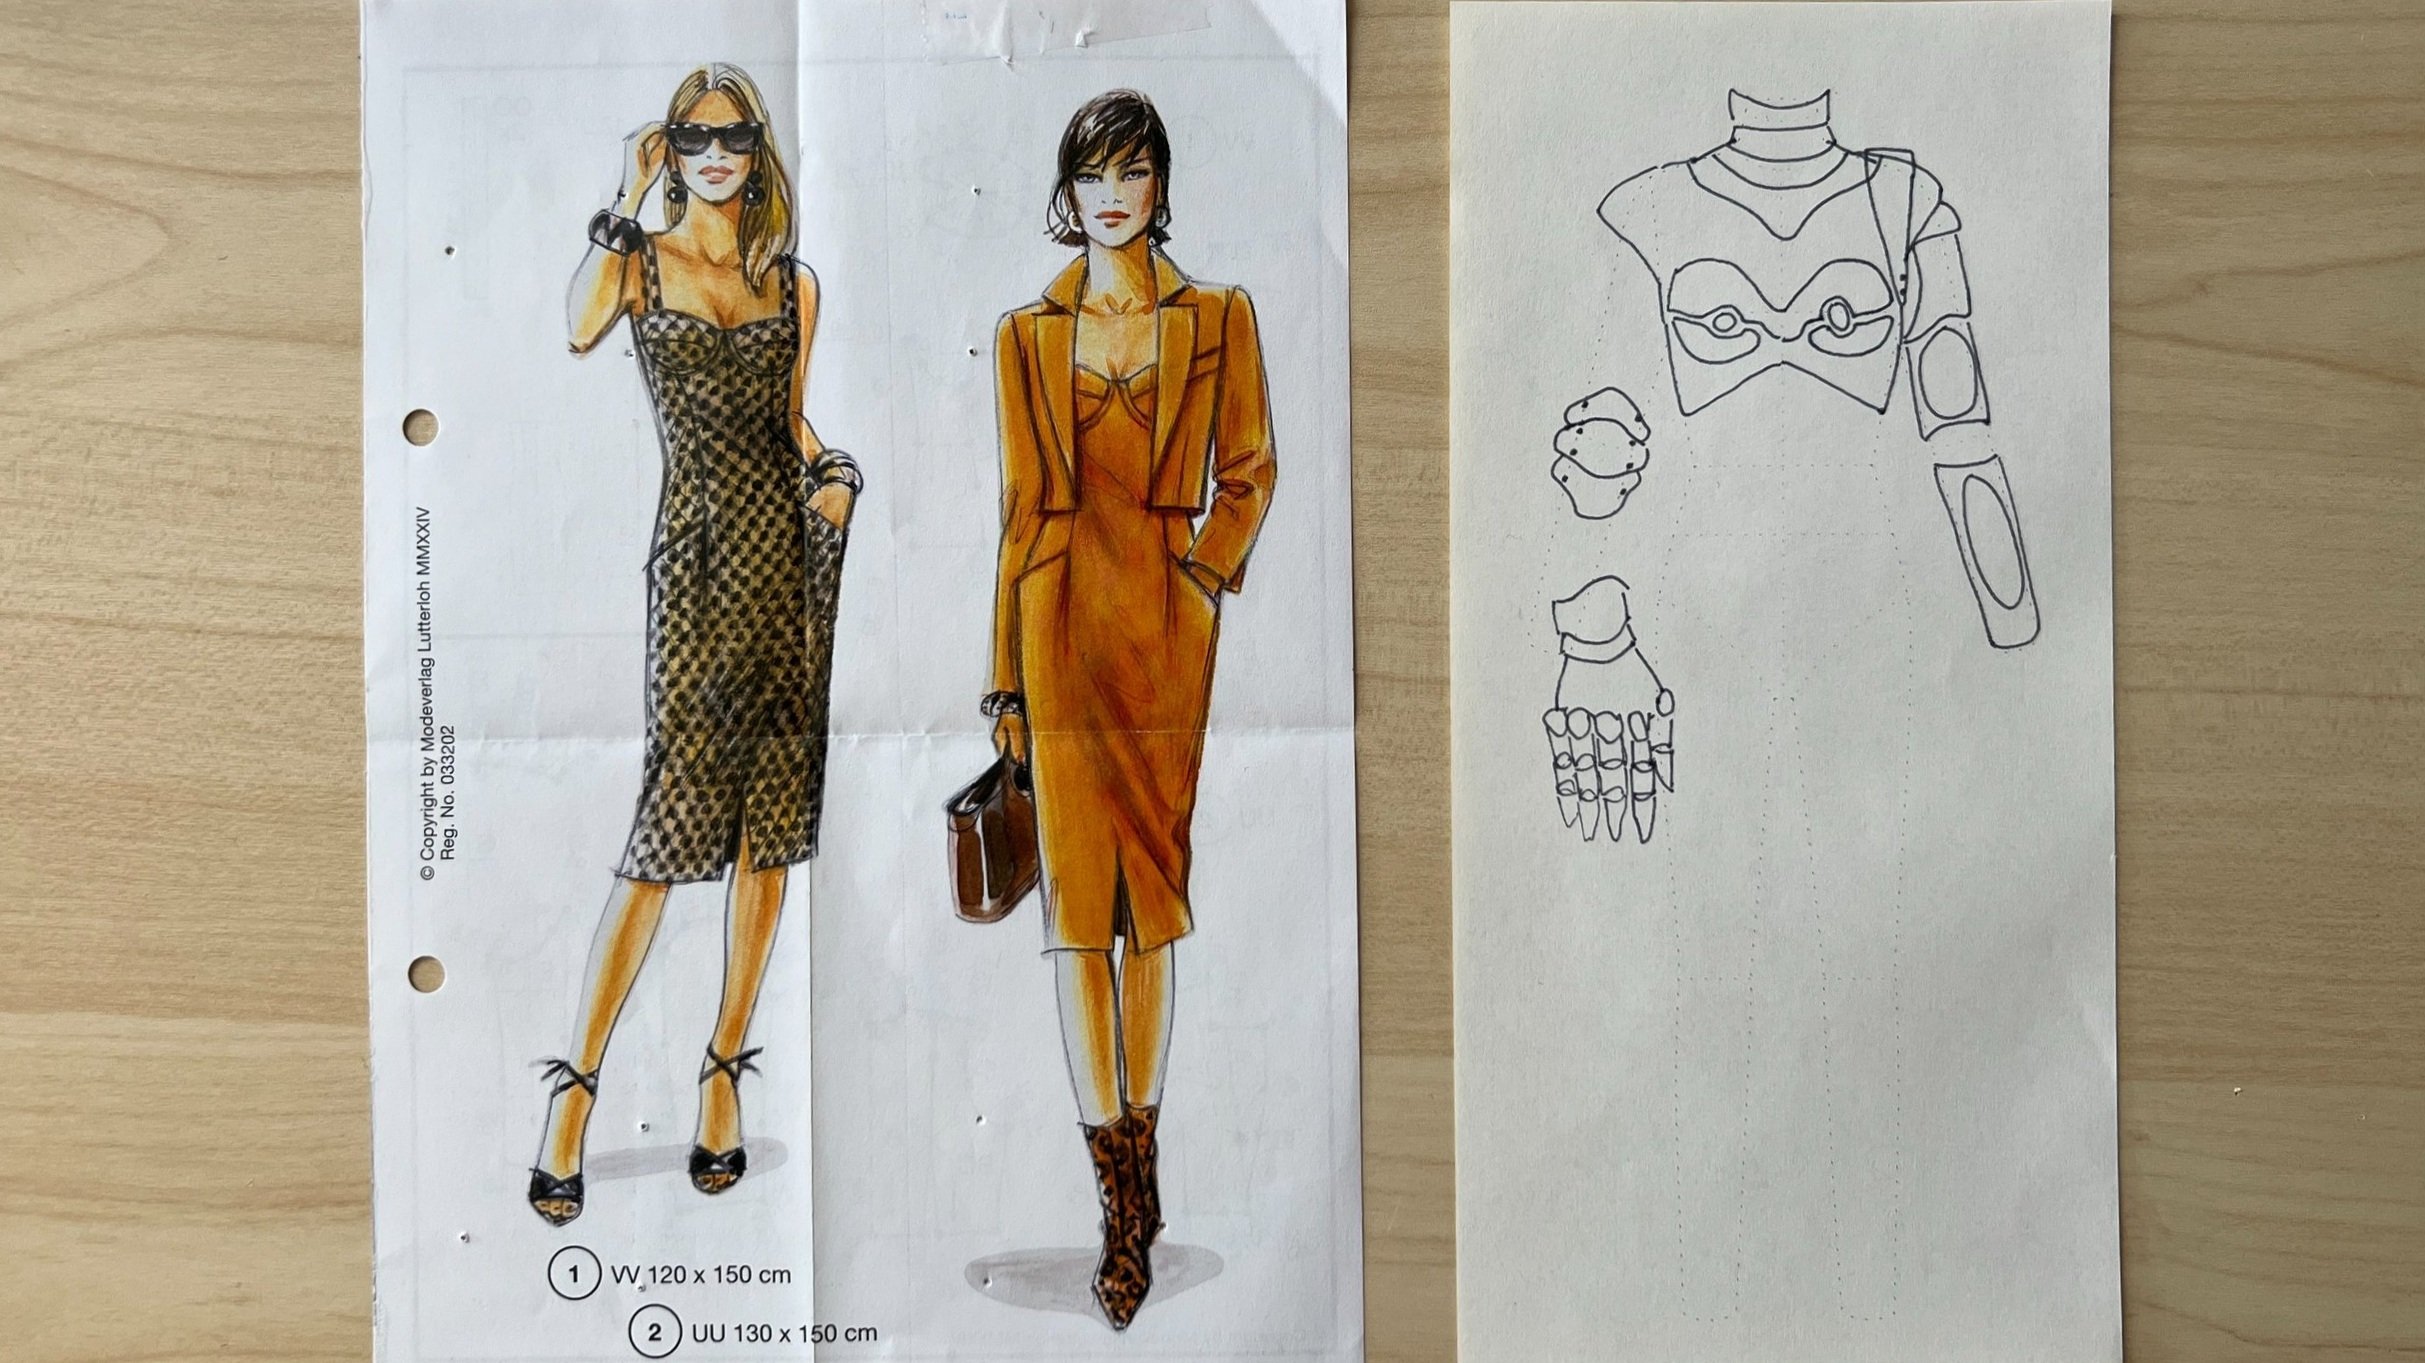

1. Using a pattern from my Lutterloh, I used a simple, tight-fitting bodice pattern meant for a non-stretch material as my base. I found one that only has a few darts in the chest since we are using vinyl as our material, we want to do as minimal piecing and sewing as possible.
2. Trace and cut the pattern from the mockup material.
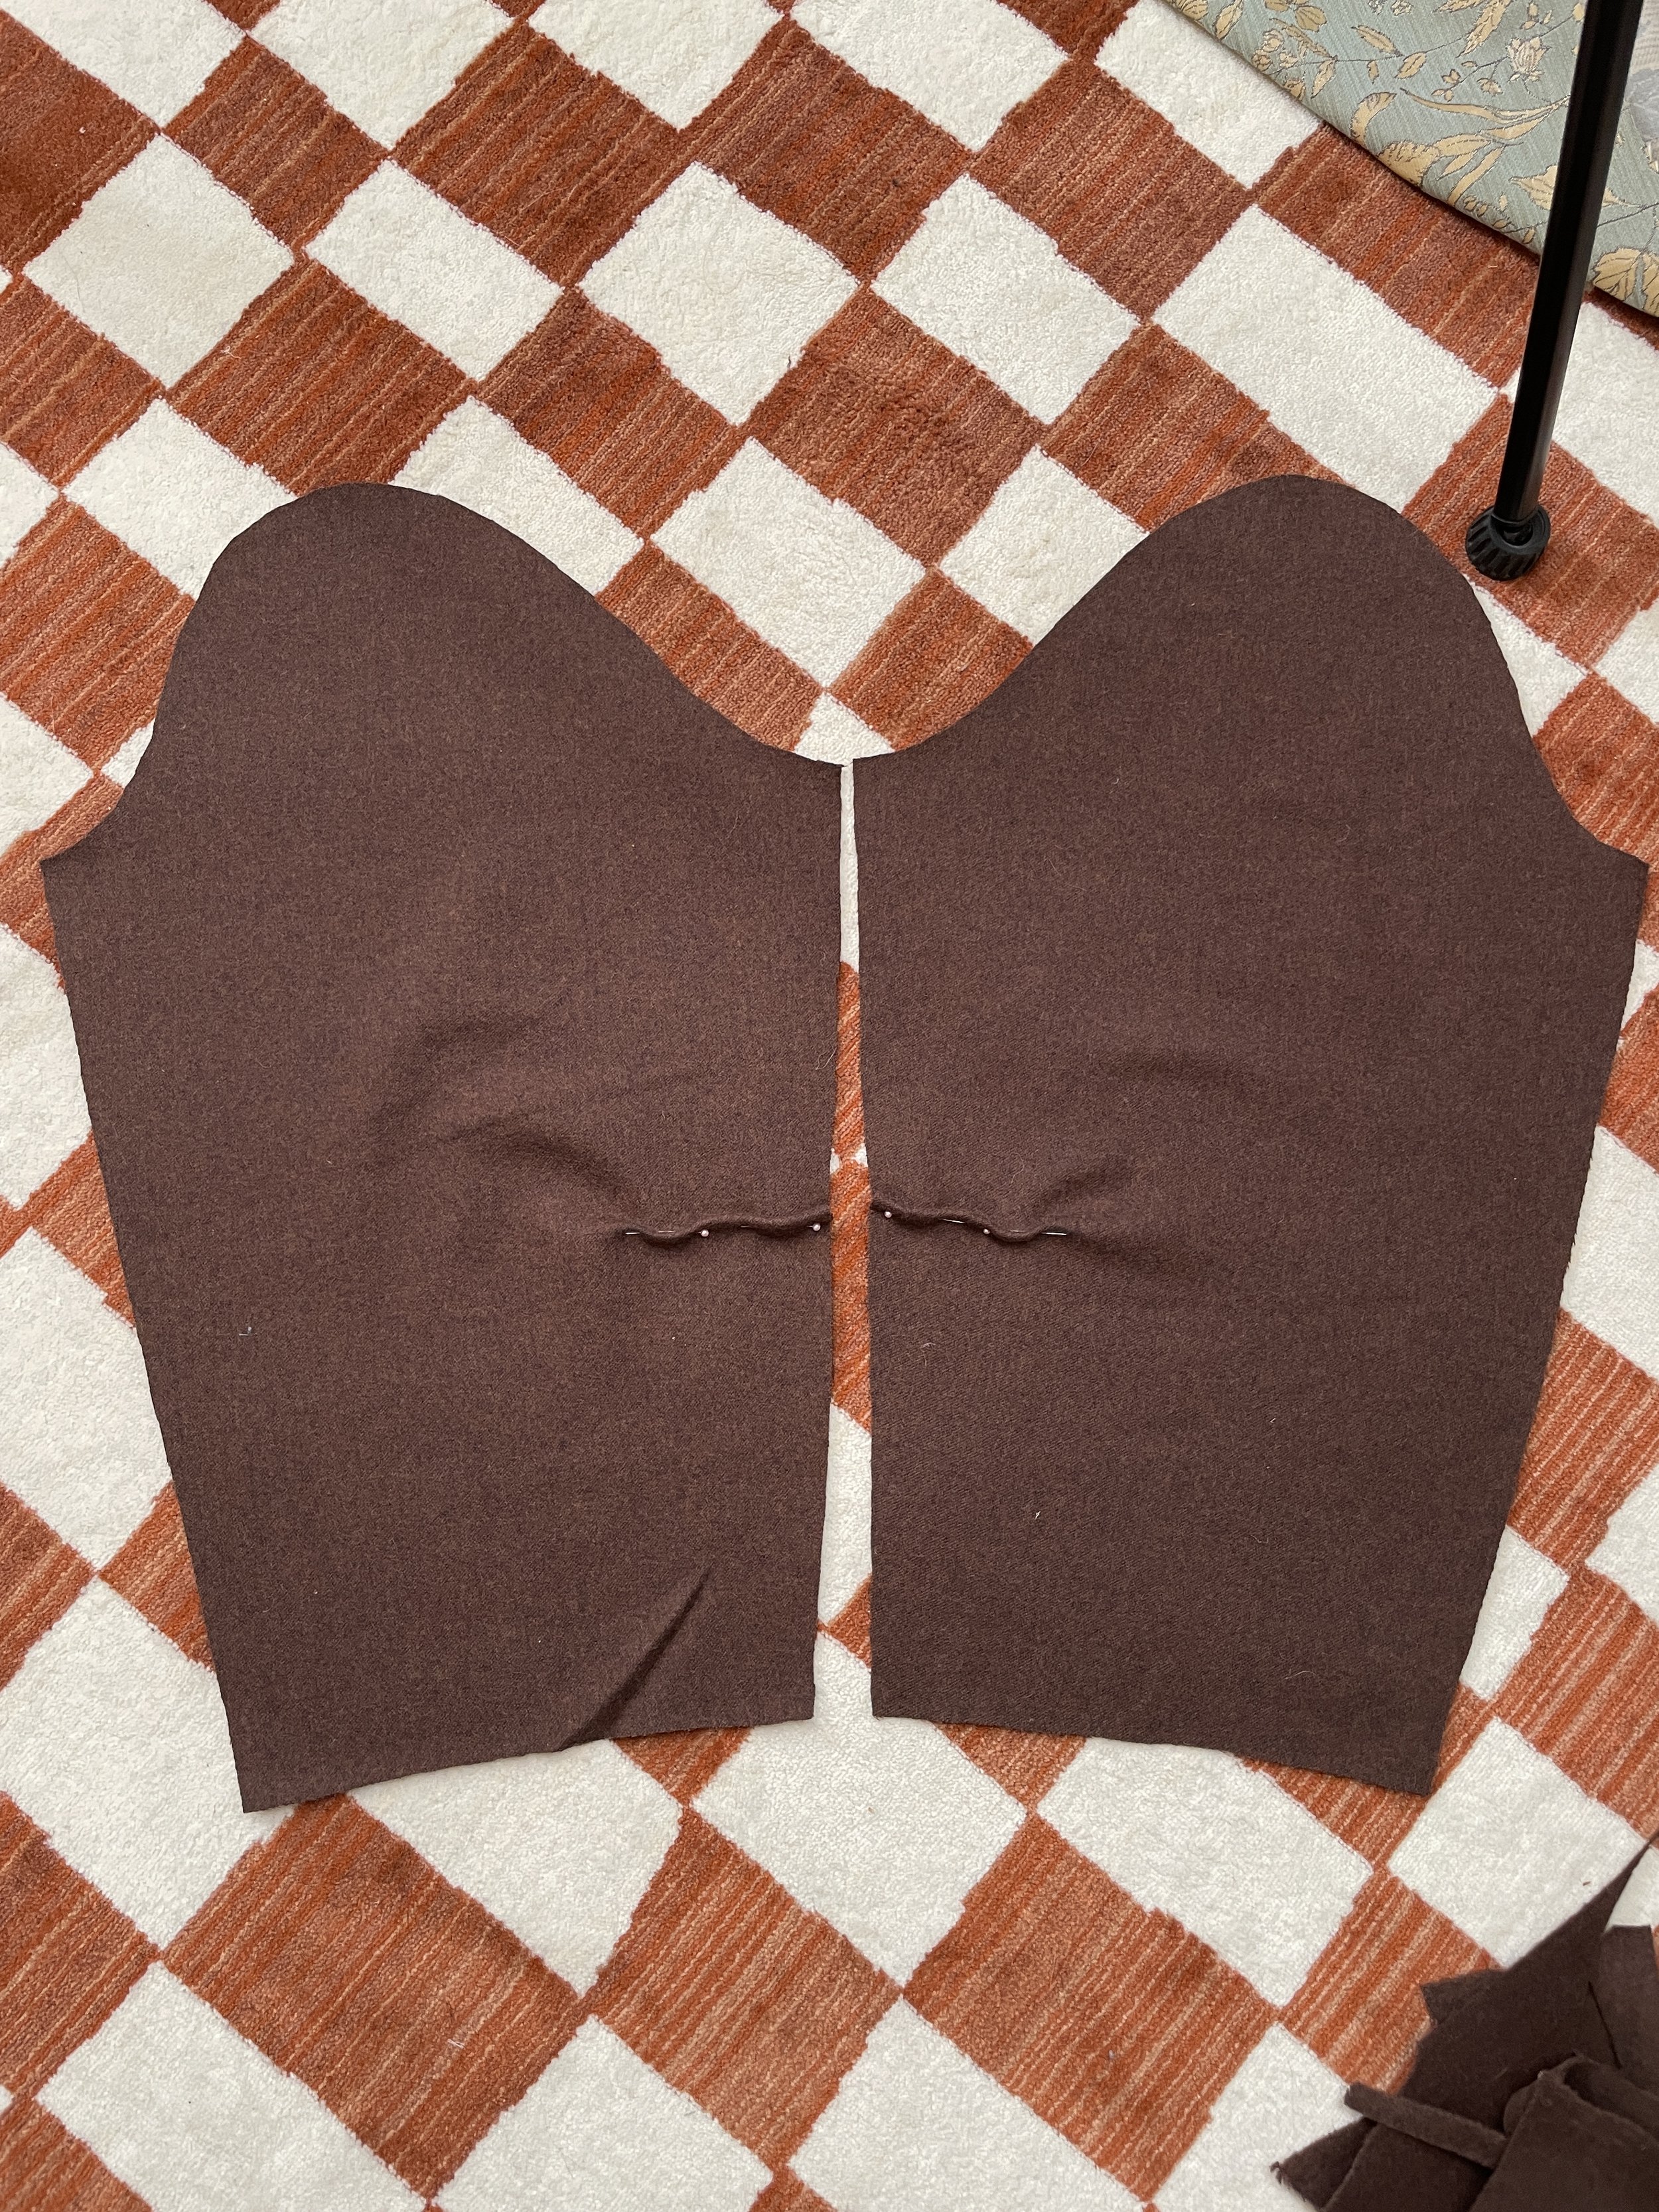
3. Sew the darts together on the chest and at the side and the shoulder seams, leaving the back open panels.
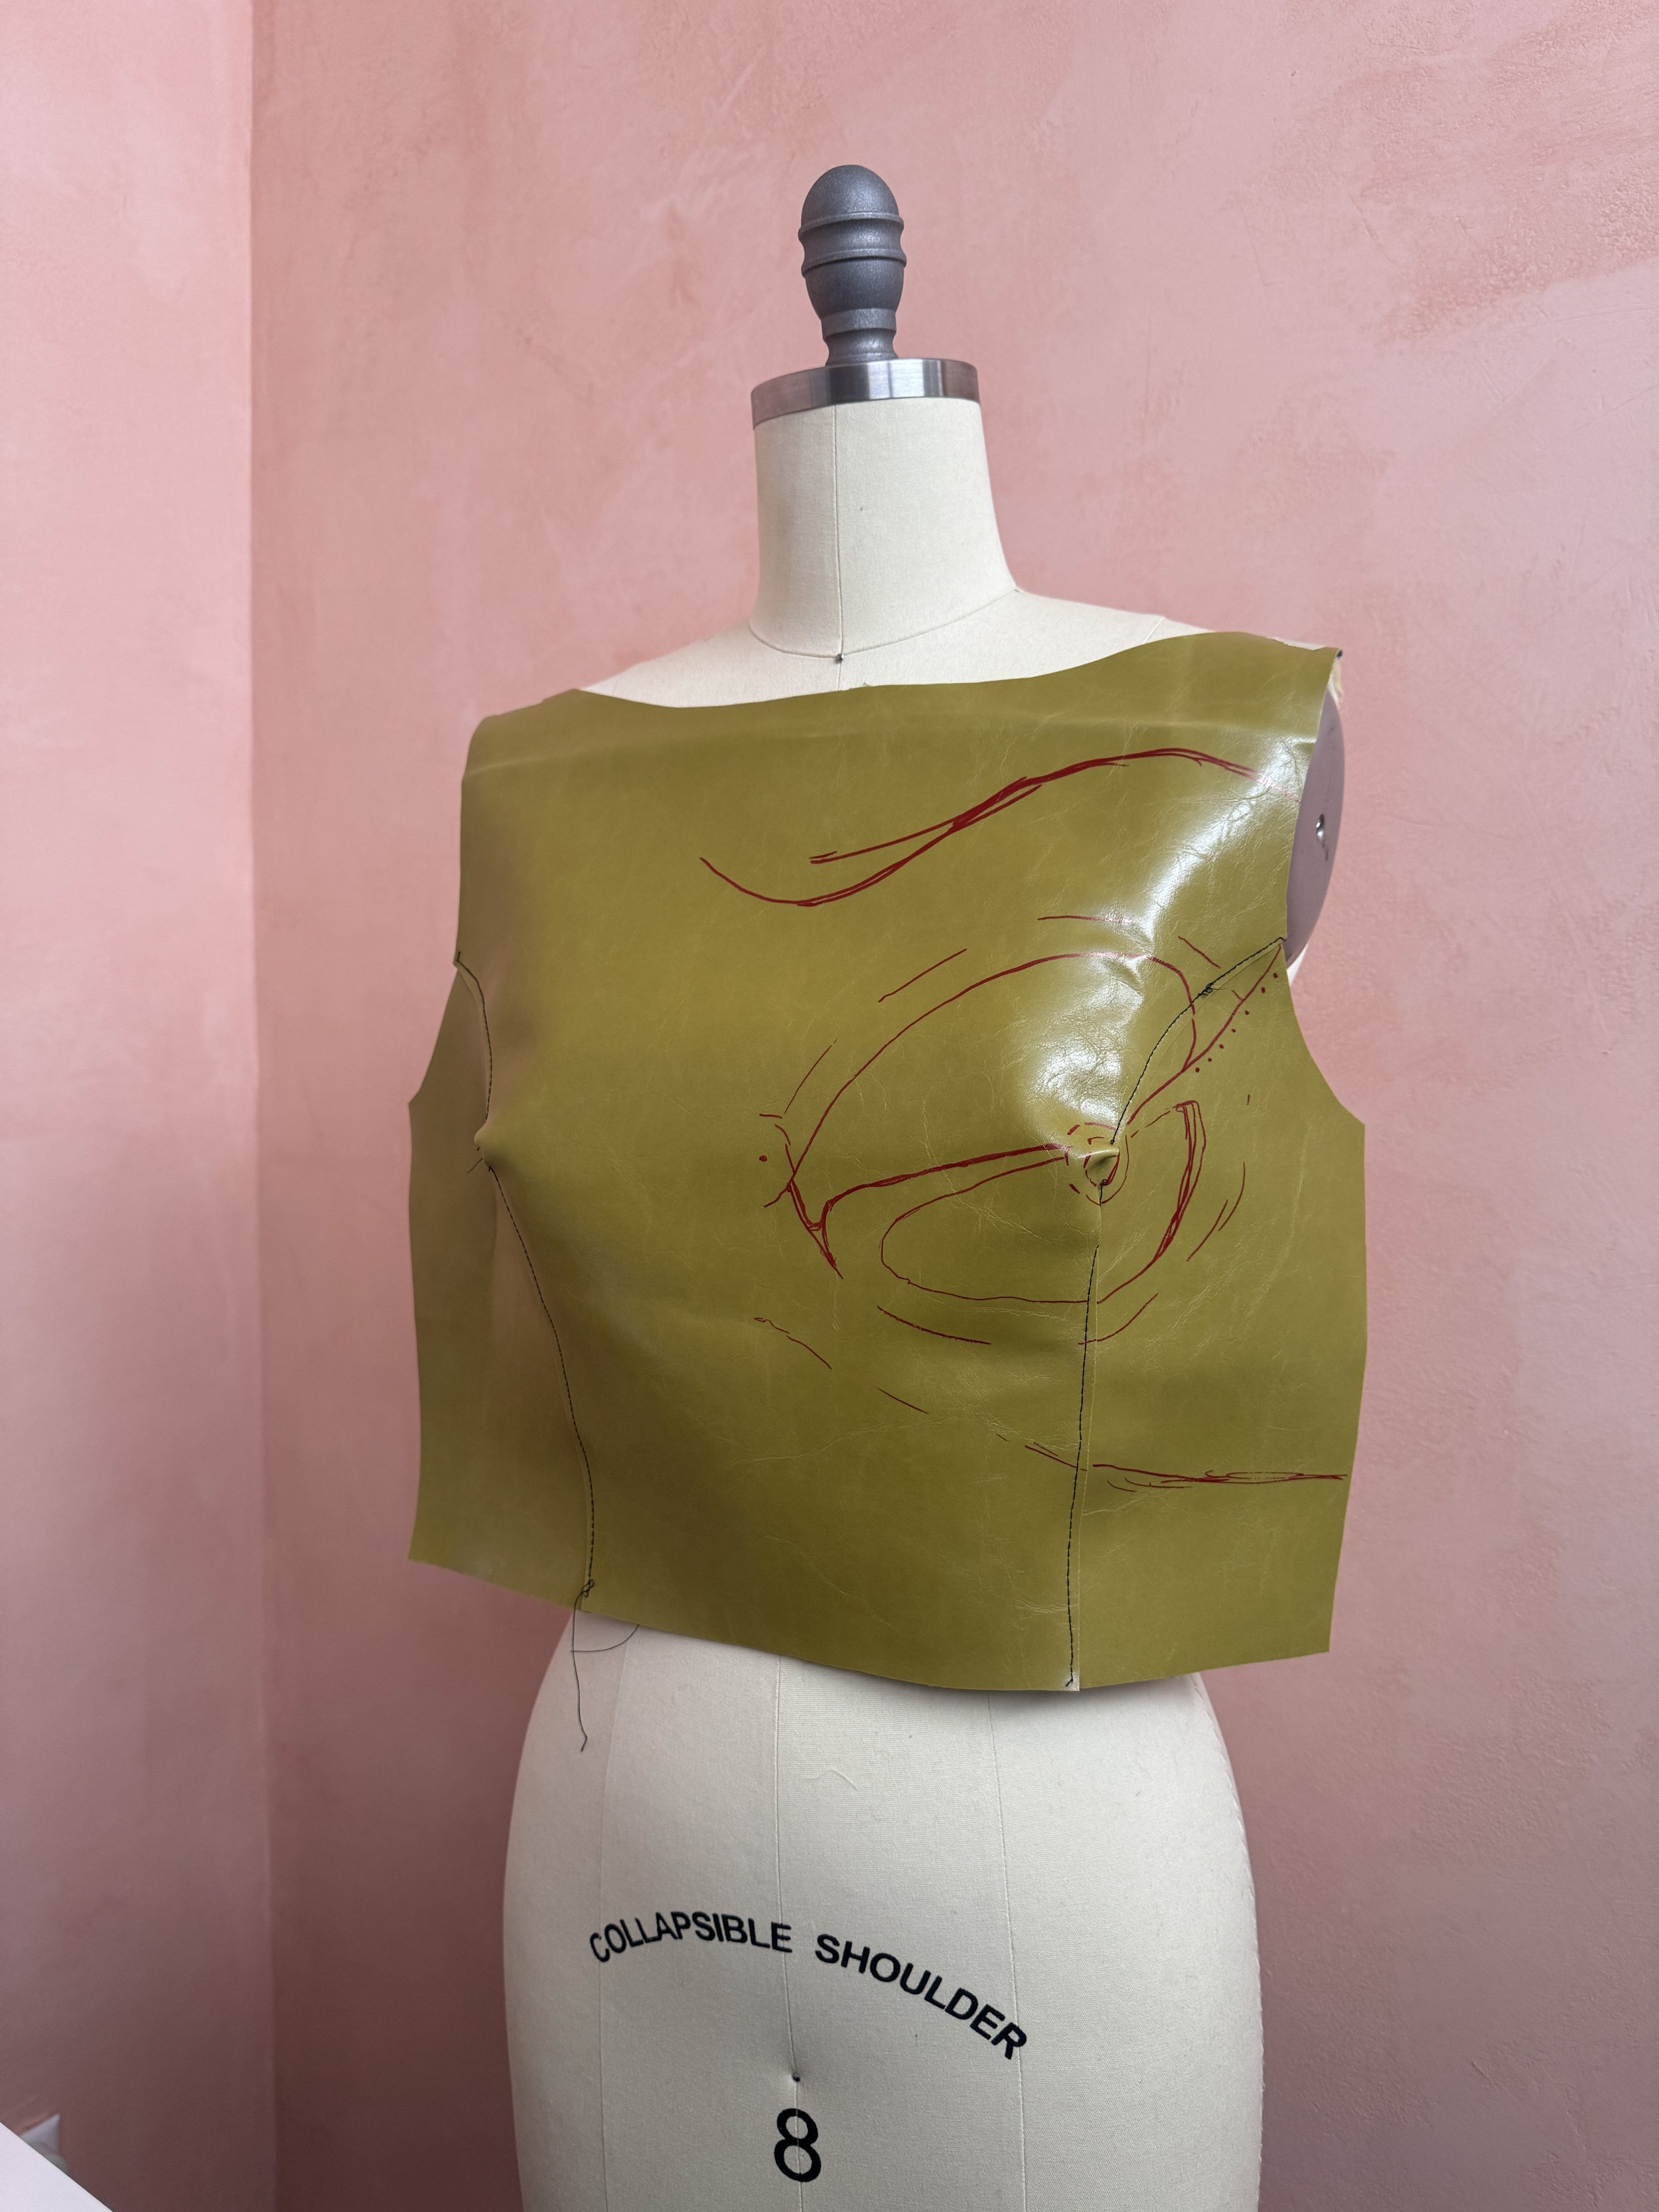
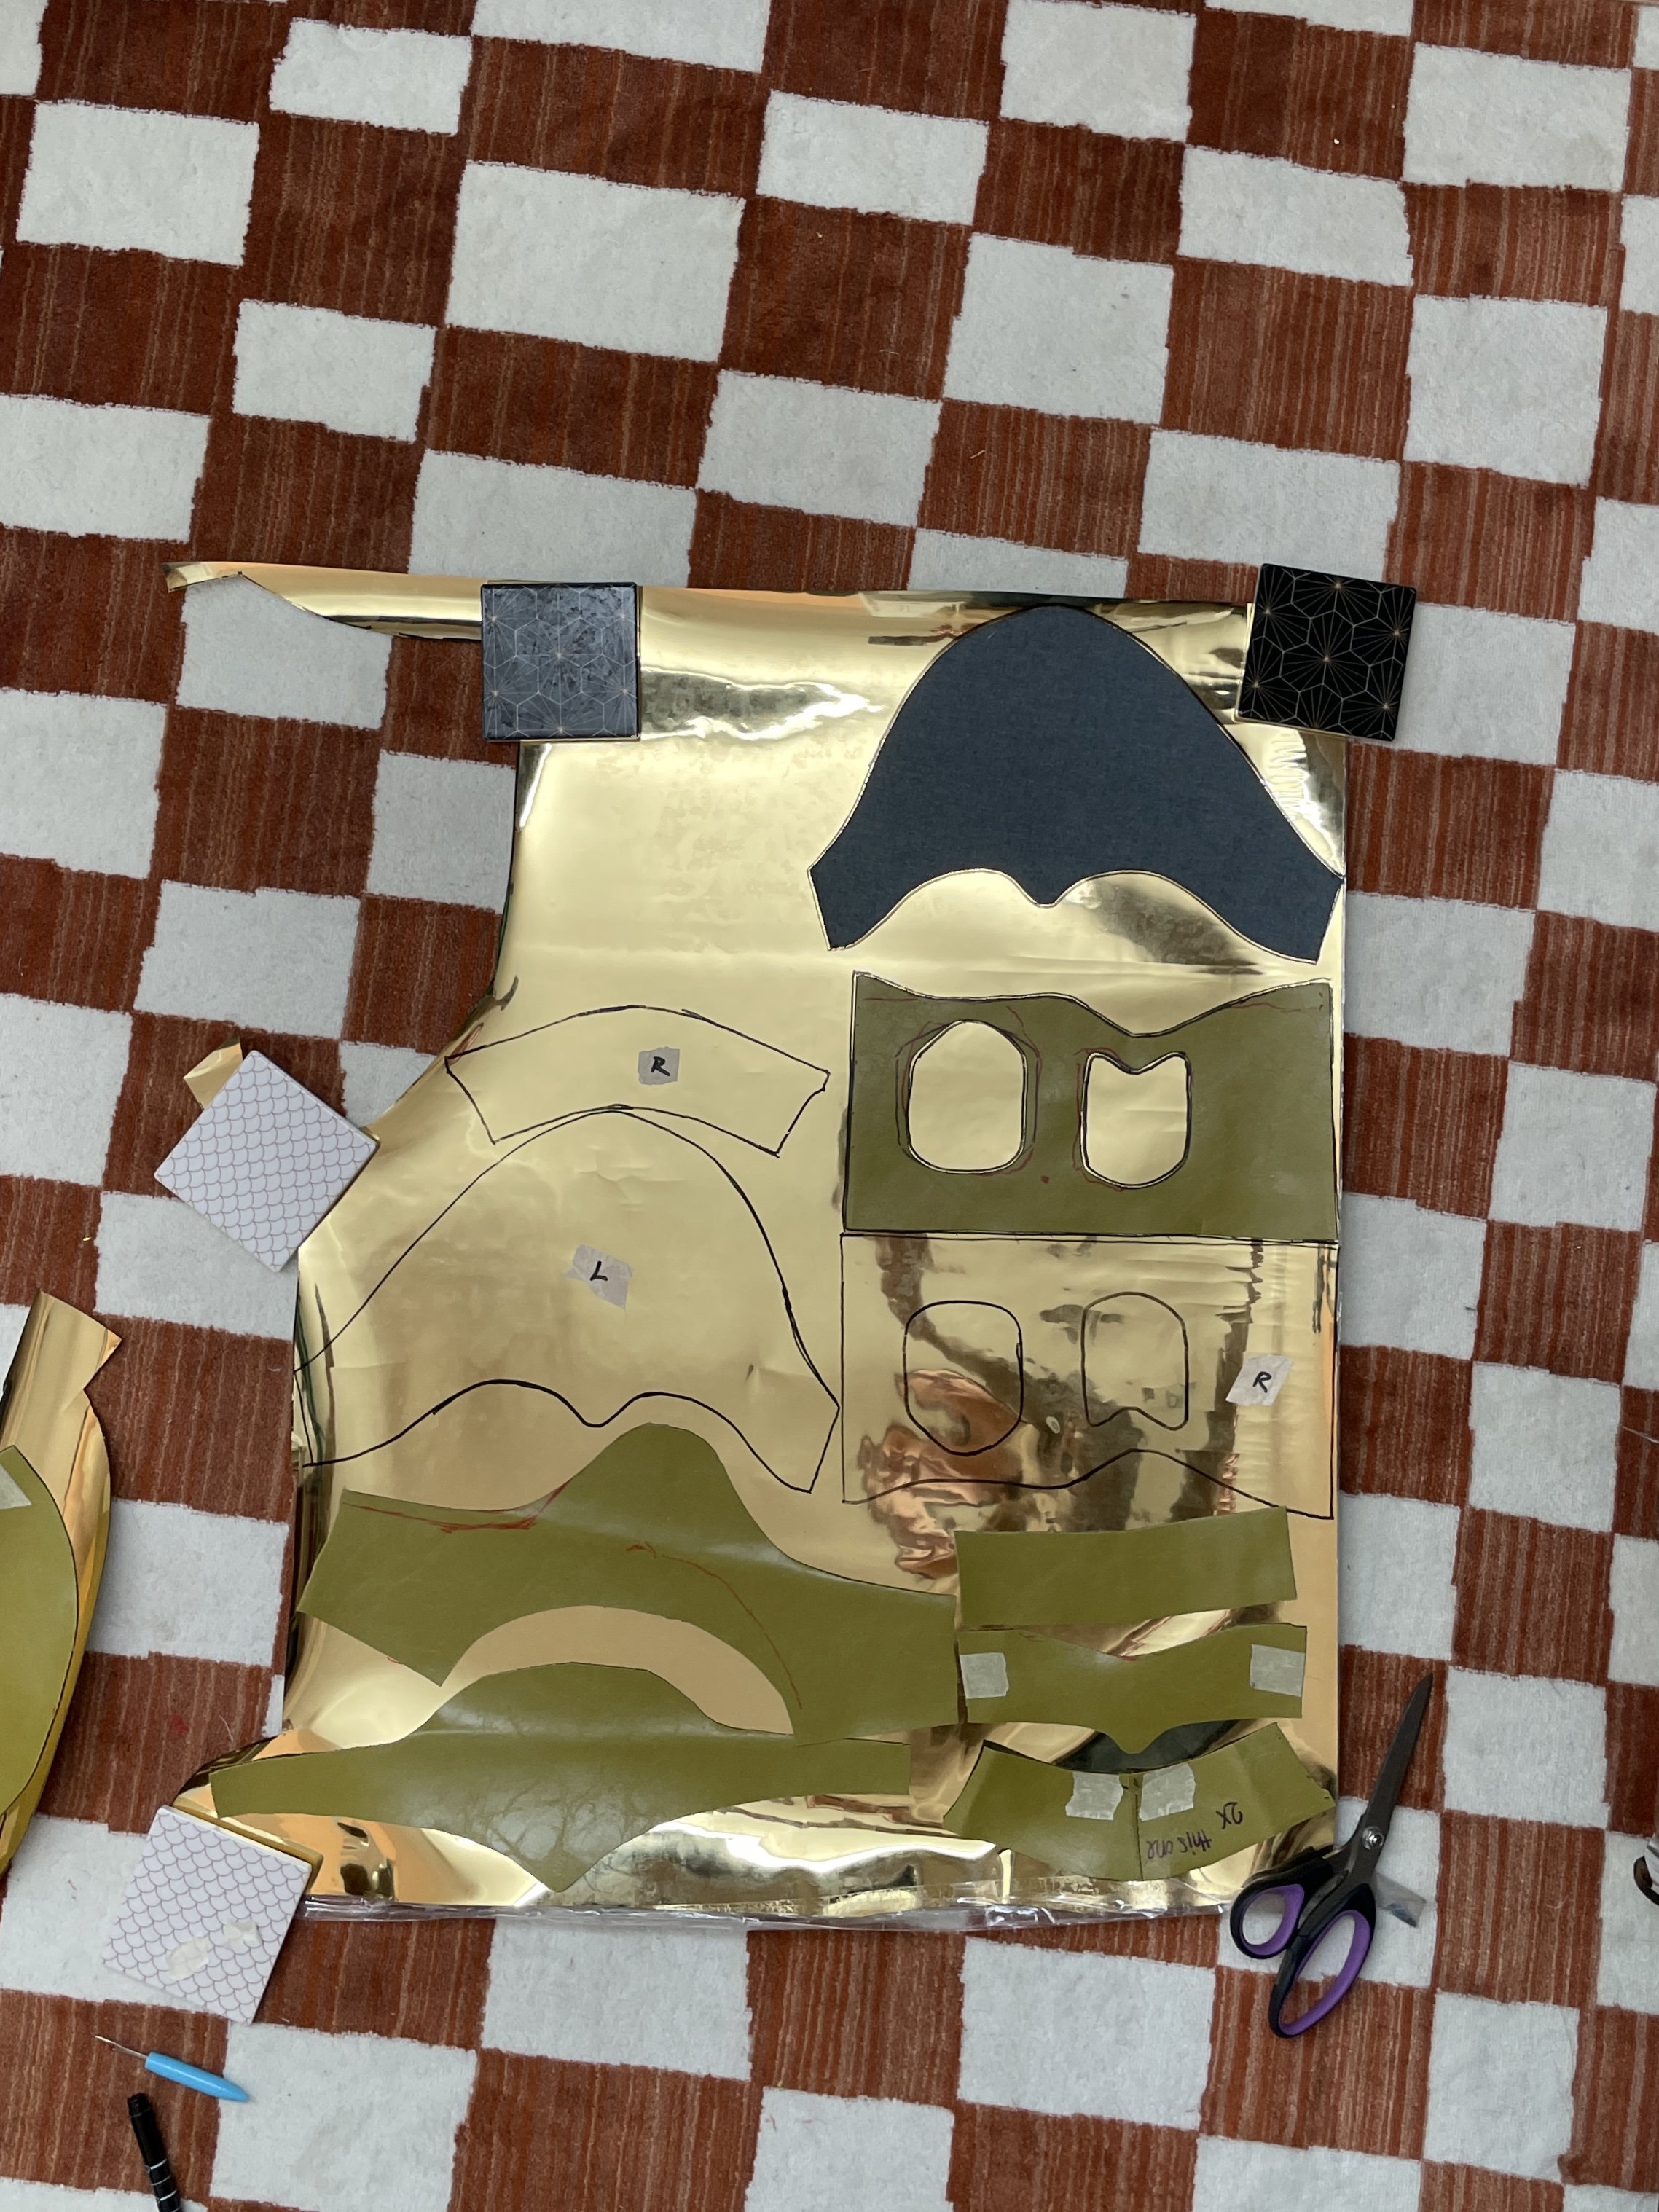
4. Begin drawing the pattern and shape of where the cutouts will sit on your chest. You can do this on or off your body.
5. Cut out your drawn shapes. (This is starting to form your pattern)
6. Draft the back piece, drawing out the areas you would like to cut out and where the centre back will meet.
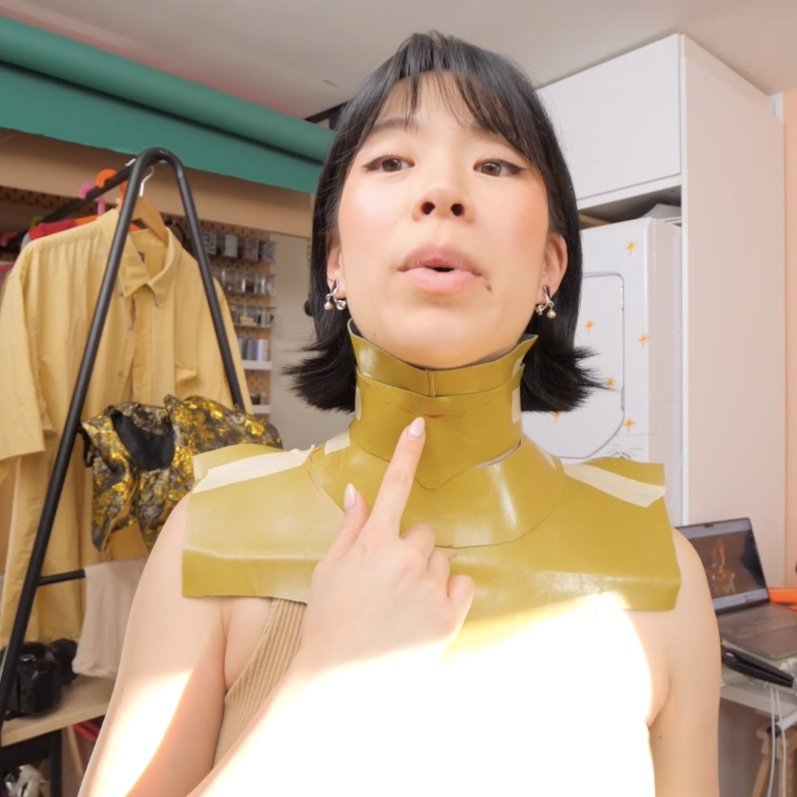
7. I then cut an upper chest piece that will begin the transition from the chest to the neck.
For the neck, begin cutting a curved strip to sit around your neck, slowly stacking more pieces and making adjustments as you go for comfortability and the most similar look to the original. I ended up stacking 3 rings as my neckpiece, marking out where I needed to add darts and trim down to comfortably fit around my neck.
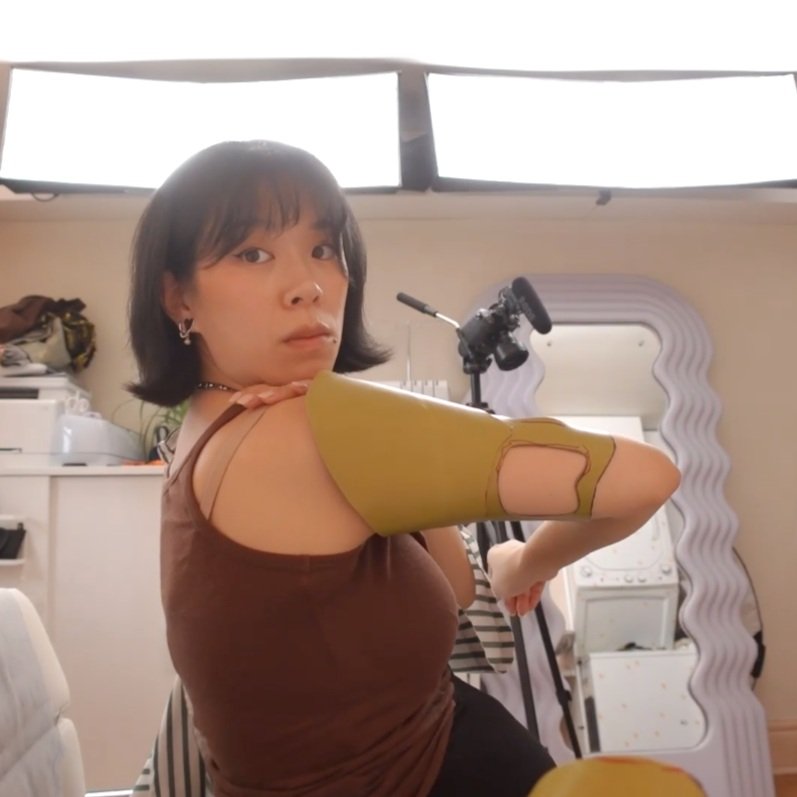
8. I then drafted arm and shoulder additions using the same stacking and cutting method as done with the neck. Sew your drafted arm cuffs together and make adjustments as needed.
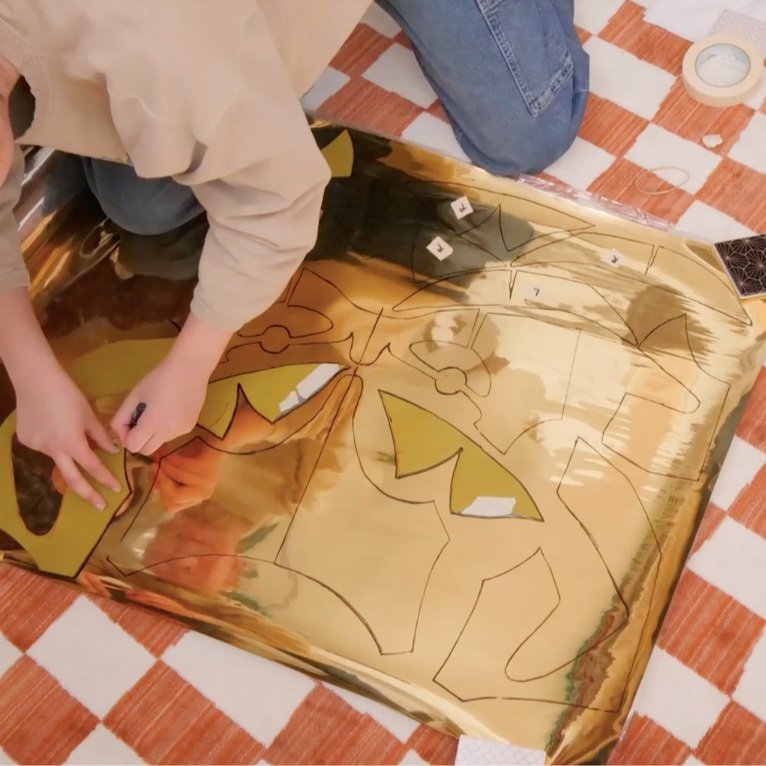
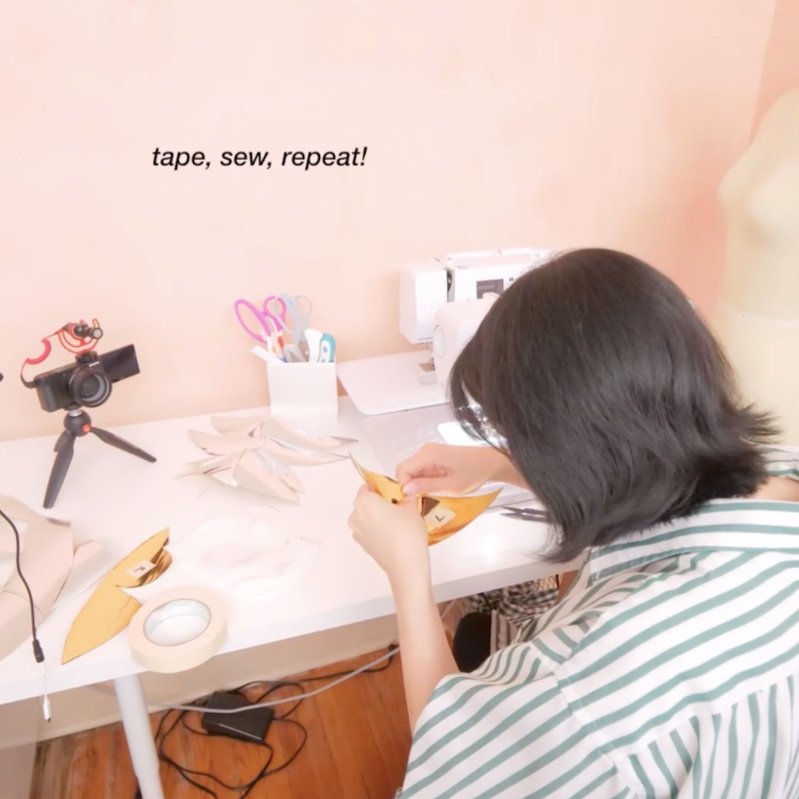
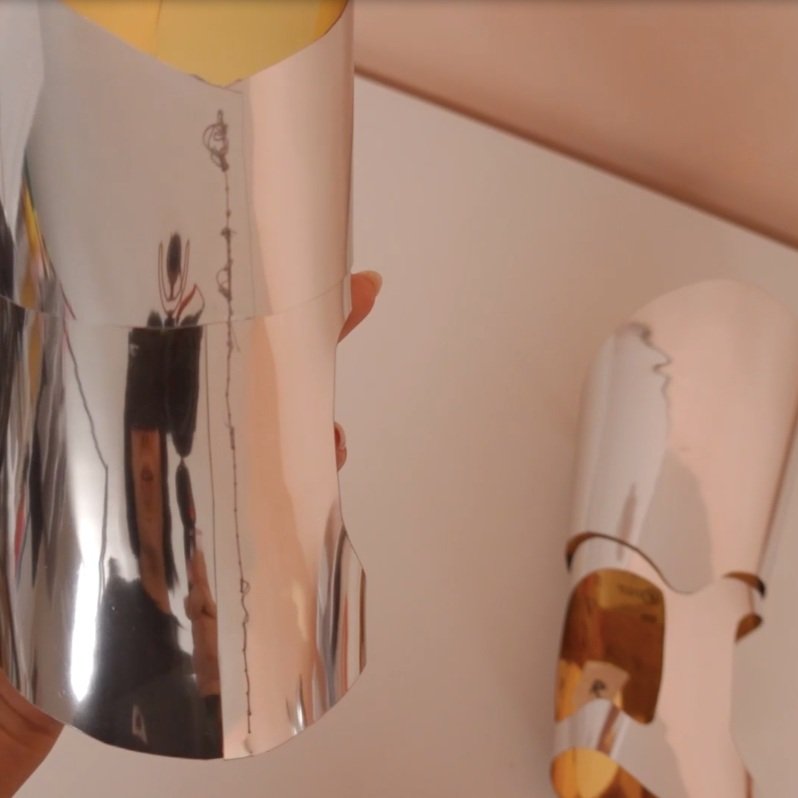
9. Once all my pattern pieces felt ready, I then seam-ripped all the stitches and laid out my drafted pattern on my material, tracing each section and cutting them out. Ensuring the cut out of the vinly was smooth and precise as the raw edges will be seen.
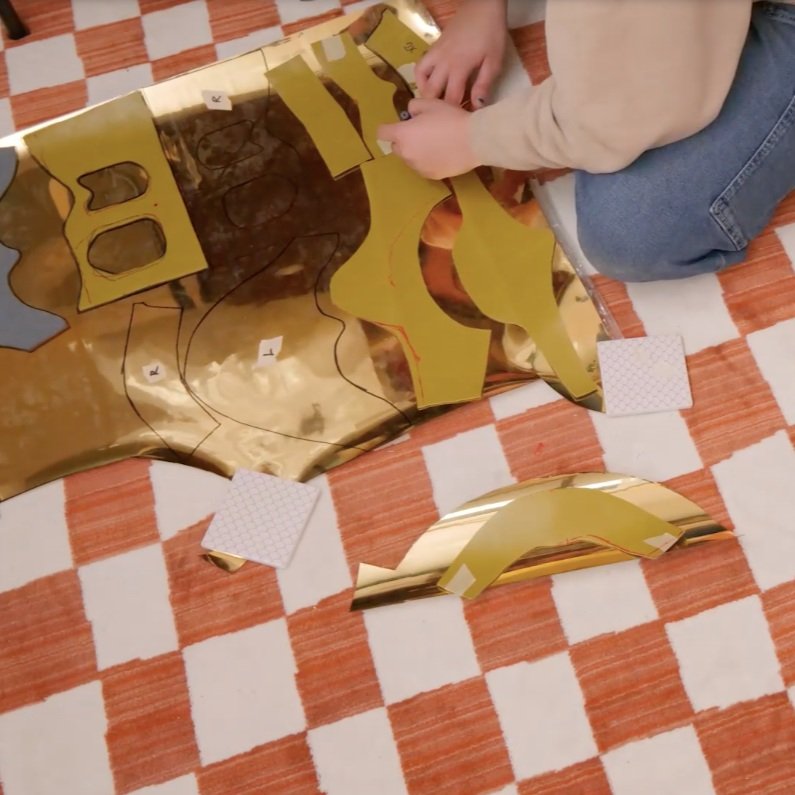
10. I sewed my cut pieces out of the vinyl. Sewing the 2 arm cuffs, the bodice darts, shoulder and side seams, the darts in the neck pieces and the shoulders.
I found using a piece of masking tape to hold the seams together and running a tight stitch to hold the two sides together, creating a smaller seam was the best way to sew the vinyl.
Using a shiny silver tape I had in my sewing supplies that matched perfectly with the suit, I used it to help me close the back of the bodice and the neck pieces for easier access to take it on and off.
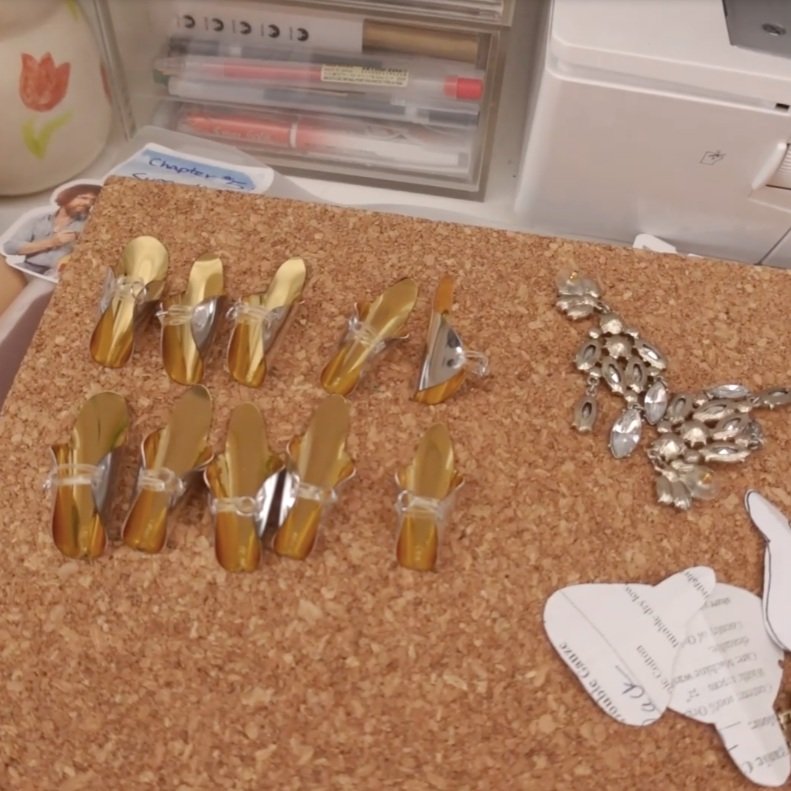
11. For an added touch, I cut out finger covers to make up for not getting to the full gloves, creating a pointed nail shape and attaching jump rings and small clear elastics to ensure they stay on my fingers.
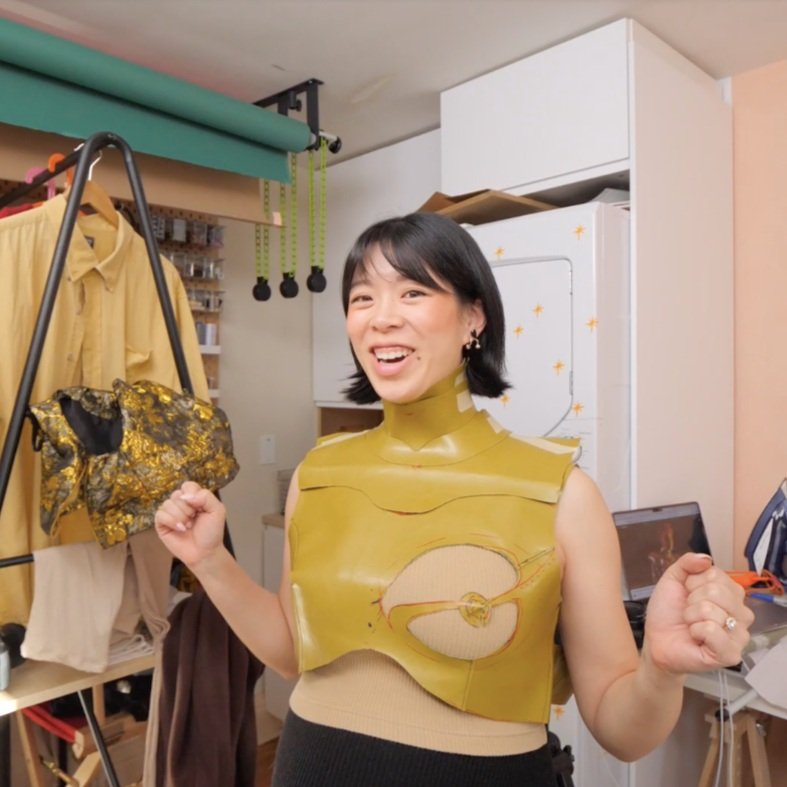
Finished Look 3


Even just a year ago, I don’t think I had the skills to draft this fit. It has been so rewarding to see my own growth in skills and hard to conceive the ways i’ll grow in the future. I’ll be taking a short break when this new baby comes, but we’ll be back together in this sewing studio soon. <3
Thank you for following along, I’ll see you all soon.
