
Thrift Flip
… the one worth thousands.
In a less-than-desirable economic environment, I took a trip to my local thrift store to find some pieces I could turn from being worth $50 to $2000 in value (hopefully)…
Here are some *fancy* things you could make with a dress shirt, plain black dress, and cardigan you could find at just about any thrift store around!

I’m going to start with the lowest ROI so we can work our way toward the most recession-proof thrift flip
Flip #1

Ballet Wrap top from AYM

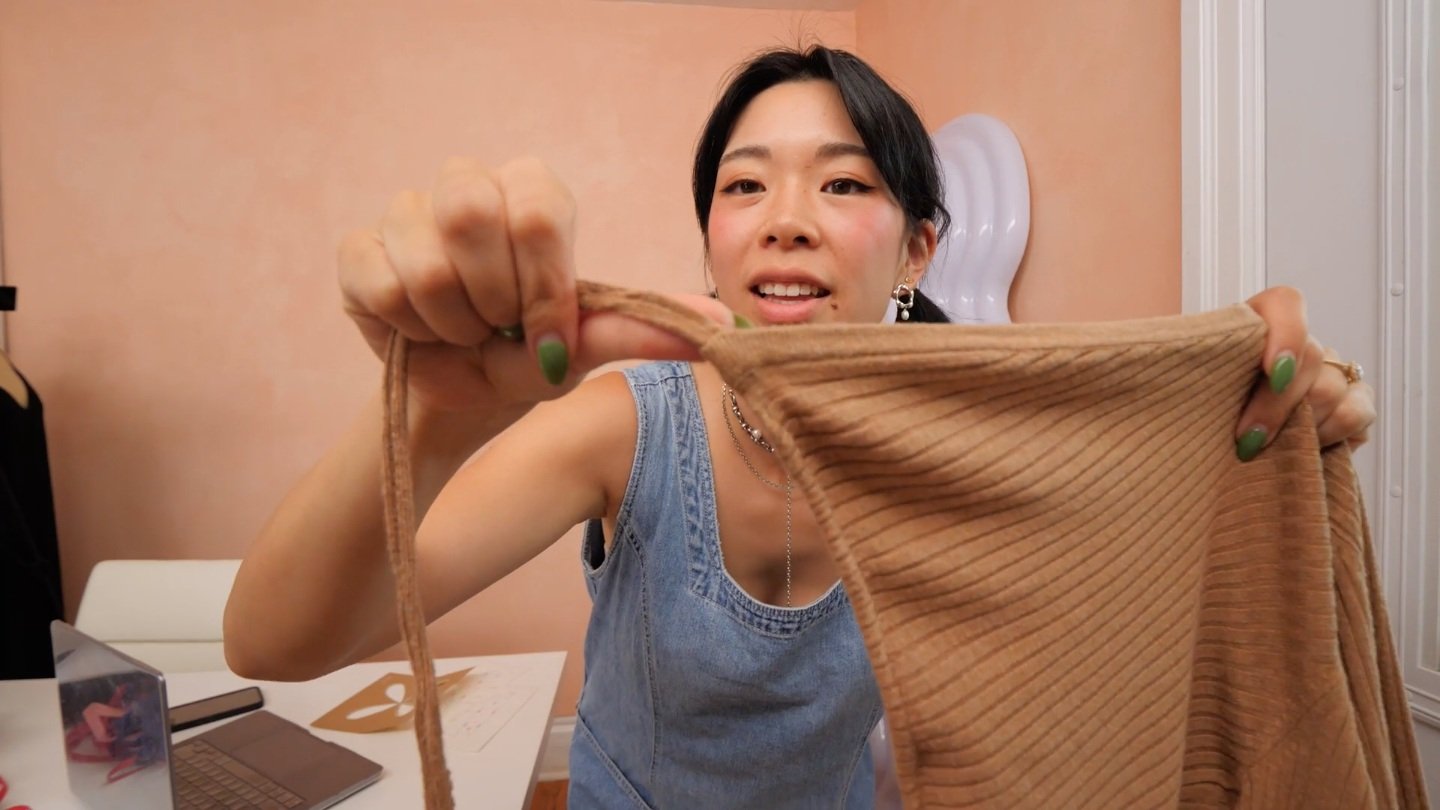
The cardigan we’re working with…
What you’ll need…
Cardigan - $6.99
4 spools of matching thread - $13.51
1/4” Elastic band (optional, I had this one already) - $5.68
The features I’m looking for in my cardigan are a straight opening, no buttons or closures, long sleeves, a long waist, and a ballet-core color scheme.
1. Determine where you would like the top to sit on your body, as well as the wrap-around front, pin where you will need to cut. Mine will sit right above my waist!
2. Cut the waist.
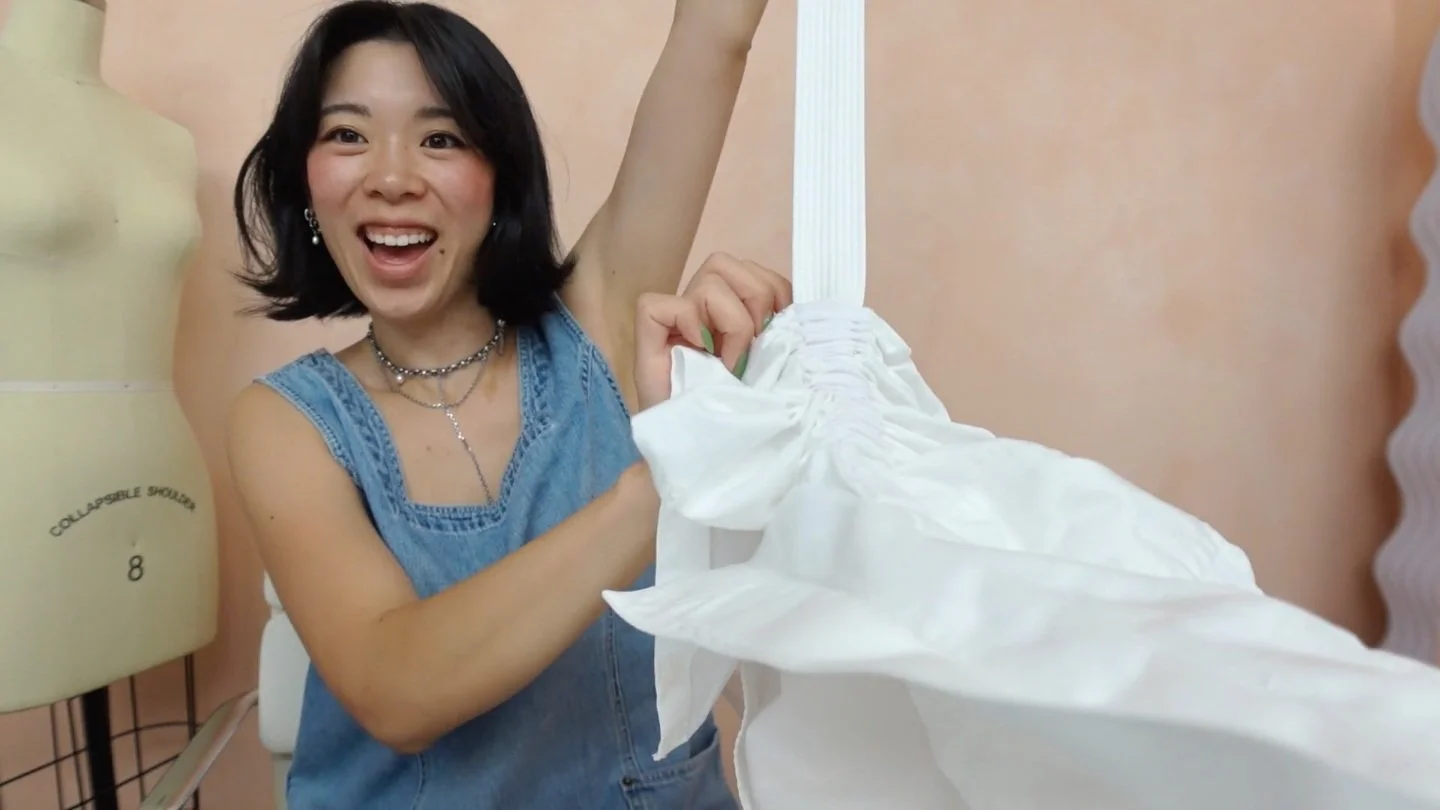
3. Hem the raw bottom edge using 1/4” elastic to help keep the hem sitting flat. Lightly pull the elastic along the edge and sew it in place using a zigzag stitch. (Don’t pull too hard or it will create some ruching, but keeping it too loose will create a lettuce hem).
4. Fold that edge in, and sew it closed using a zigzag stitch.
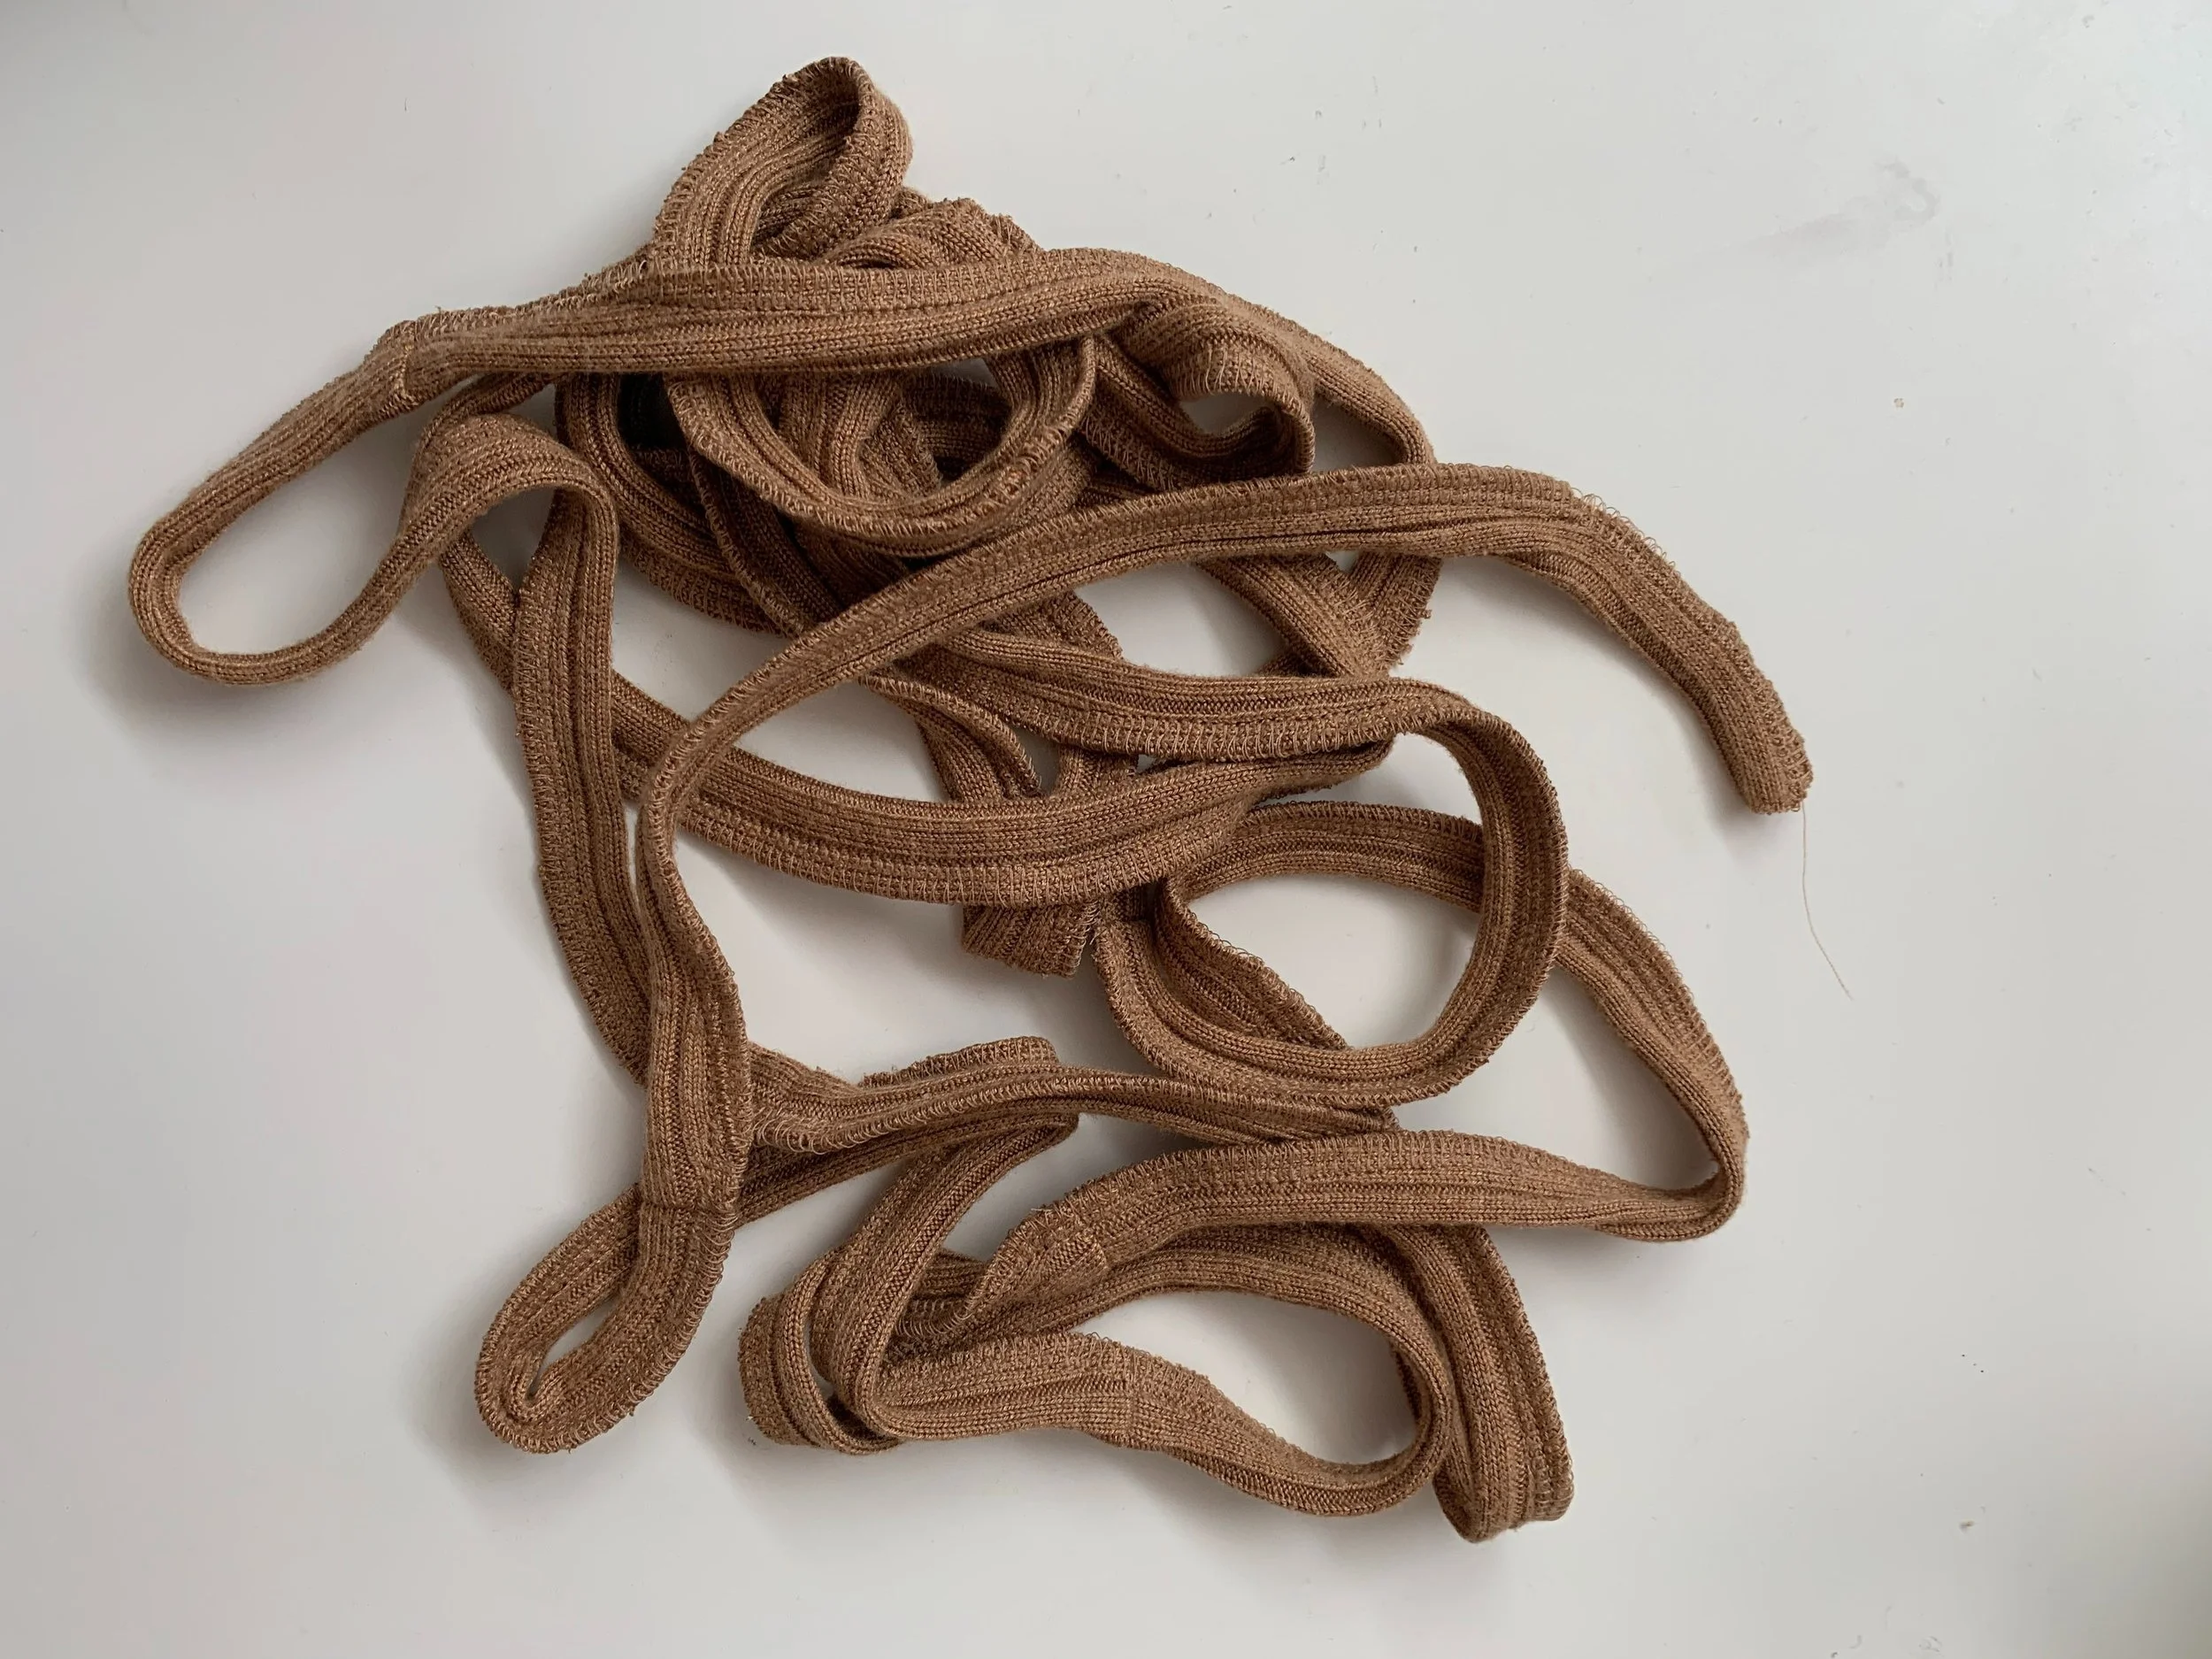
5. Taking the excess cut waistline, fold it in half.
6. Offset the edge of the material by 4 ribs creating a slant, so that when the stip is cut it creates a continuous long line. (If your material is not ribbed like mine, offset by the thickness you’d like your strip to be).


7. Using a basting stitch, sew the top raw edge of the folded material.
8. Overlock the top edge and take out the basting stitch.
9. Begin cutting your material starting from the longer end of the offset tube and continue going around, cutting it into one long strip.
10. Fold the raw edges within the strip, and sew closed using a zigzag stitch.
11. Snip the seams in the center and fold the flaps away from one another to create less bulk in the strip.
12. Zigzag stitch the end of the strip to close it shut and prevent fraying.
13. Cut the strip in half and sew it in place at the bottom edge of the wrap top.


The original inspiration cost $136, mine cost….

… Making this a 7x improvement!
Flip #2

Petal Dress by J.Kim

The dress we’re working with…
Petal Dress by J.Kim - 19x
What you’ll need…
Thrifted dress - $28.99
Bias tape - $17.64
WENDY_10 for 10% off Fashionary
Matching thread (optional, I color-matched what I already had!) - $31.99
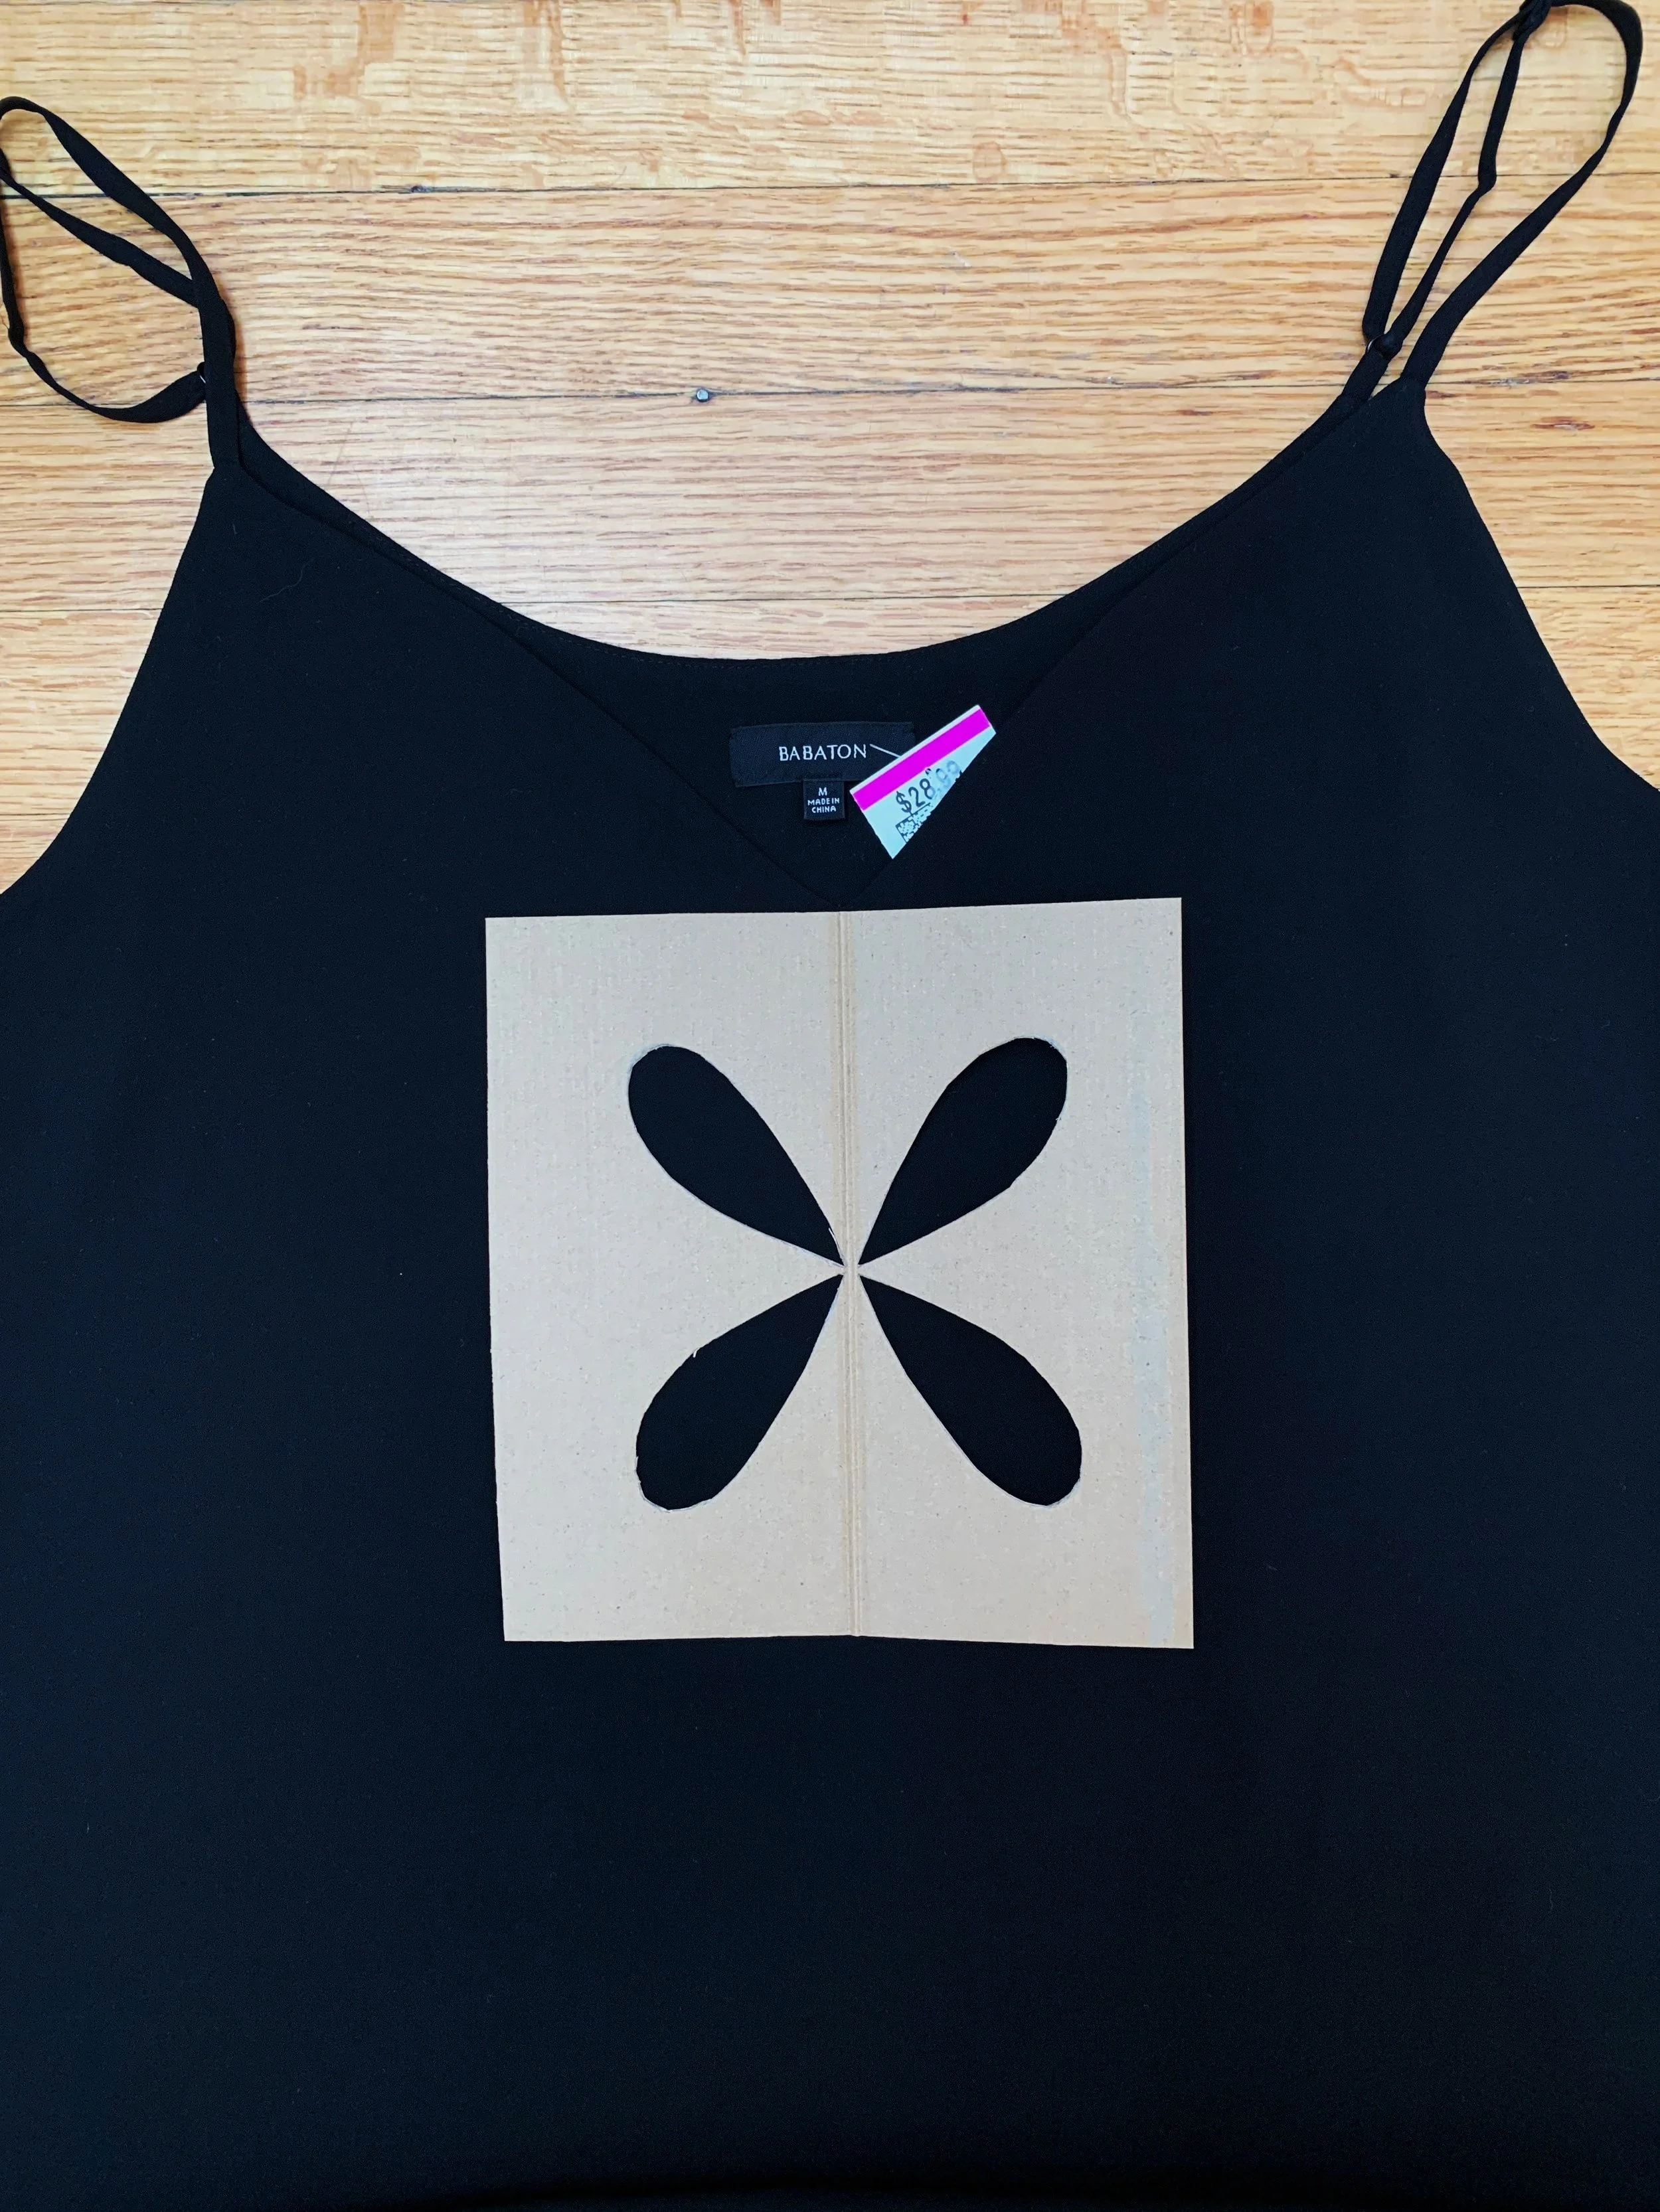
I was lucky enough to find this black Babaton dress at the thrift store that had a lining inside!
My color scheme was inspired by this Chanel fall/winter dress so that I can wear this piece throughout the seasons.
1. Using my Fashionary, I drafted out a pattern for my dress on where I would like the flowers to sit as well as the placement of color for each flower. (This is a great time to cover any stains or holes on your dress since we will be cutting it out!)
2. Draw your flower petal shape and transfer the design to a scrap piece of cardboard (you will be using this to trace so make sure it is sturdy!)
3. Begin mapping out where each flower will go and trace out each petal using the template.
4. Cut 4 equal-length bias tape per flower (17 cm petal + 23 cm hanging = 40 cm per petal)


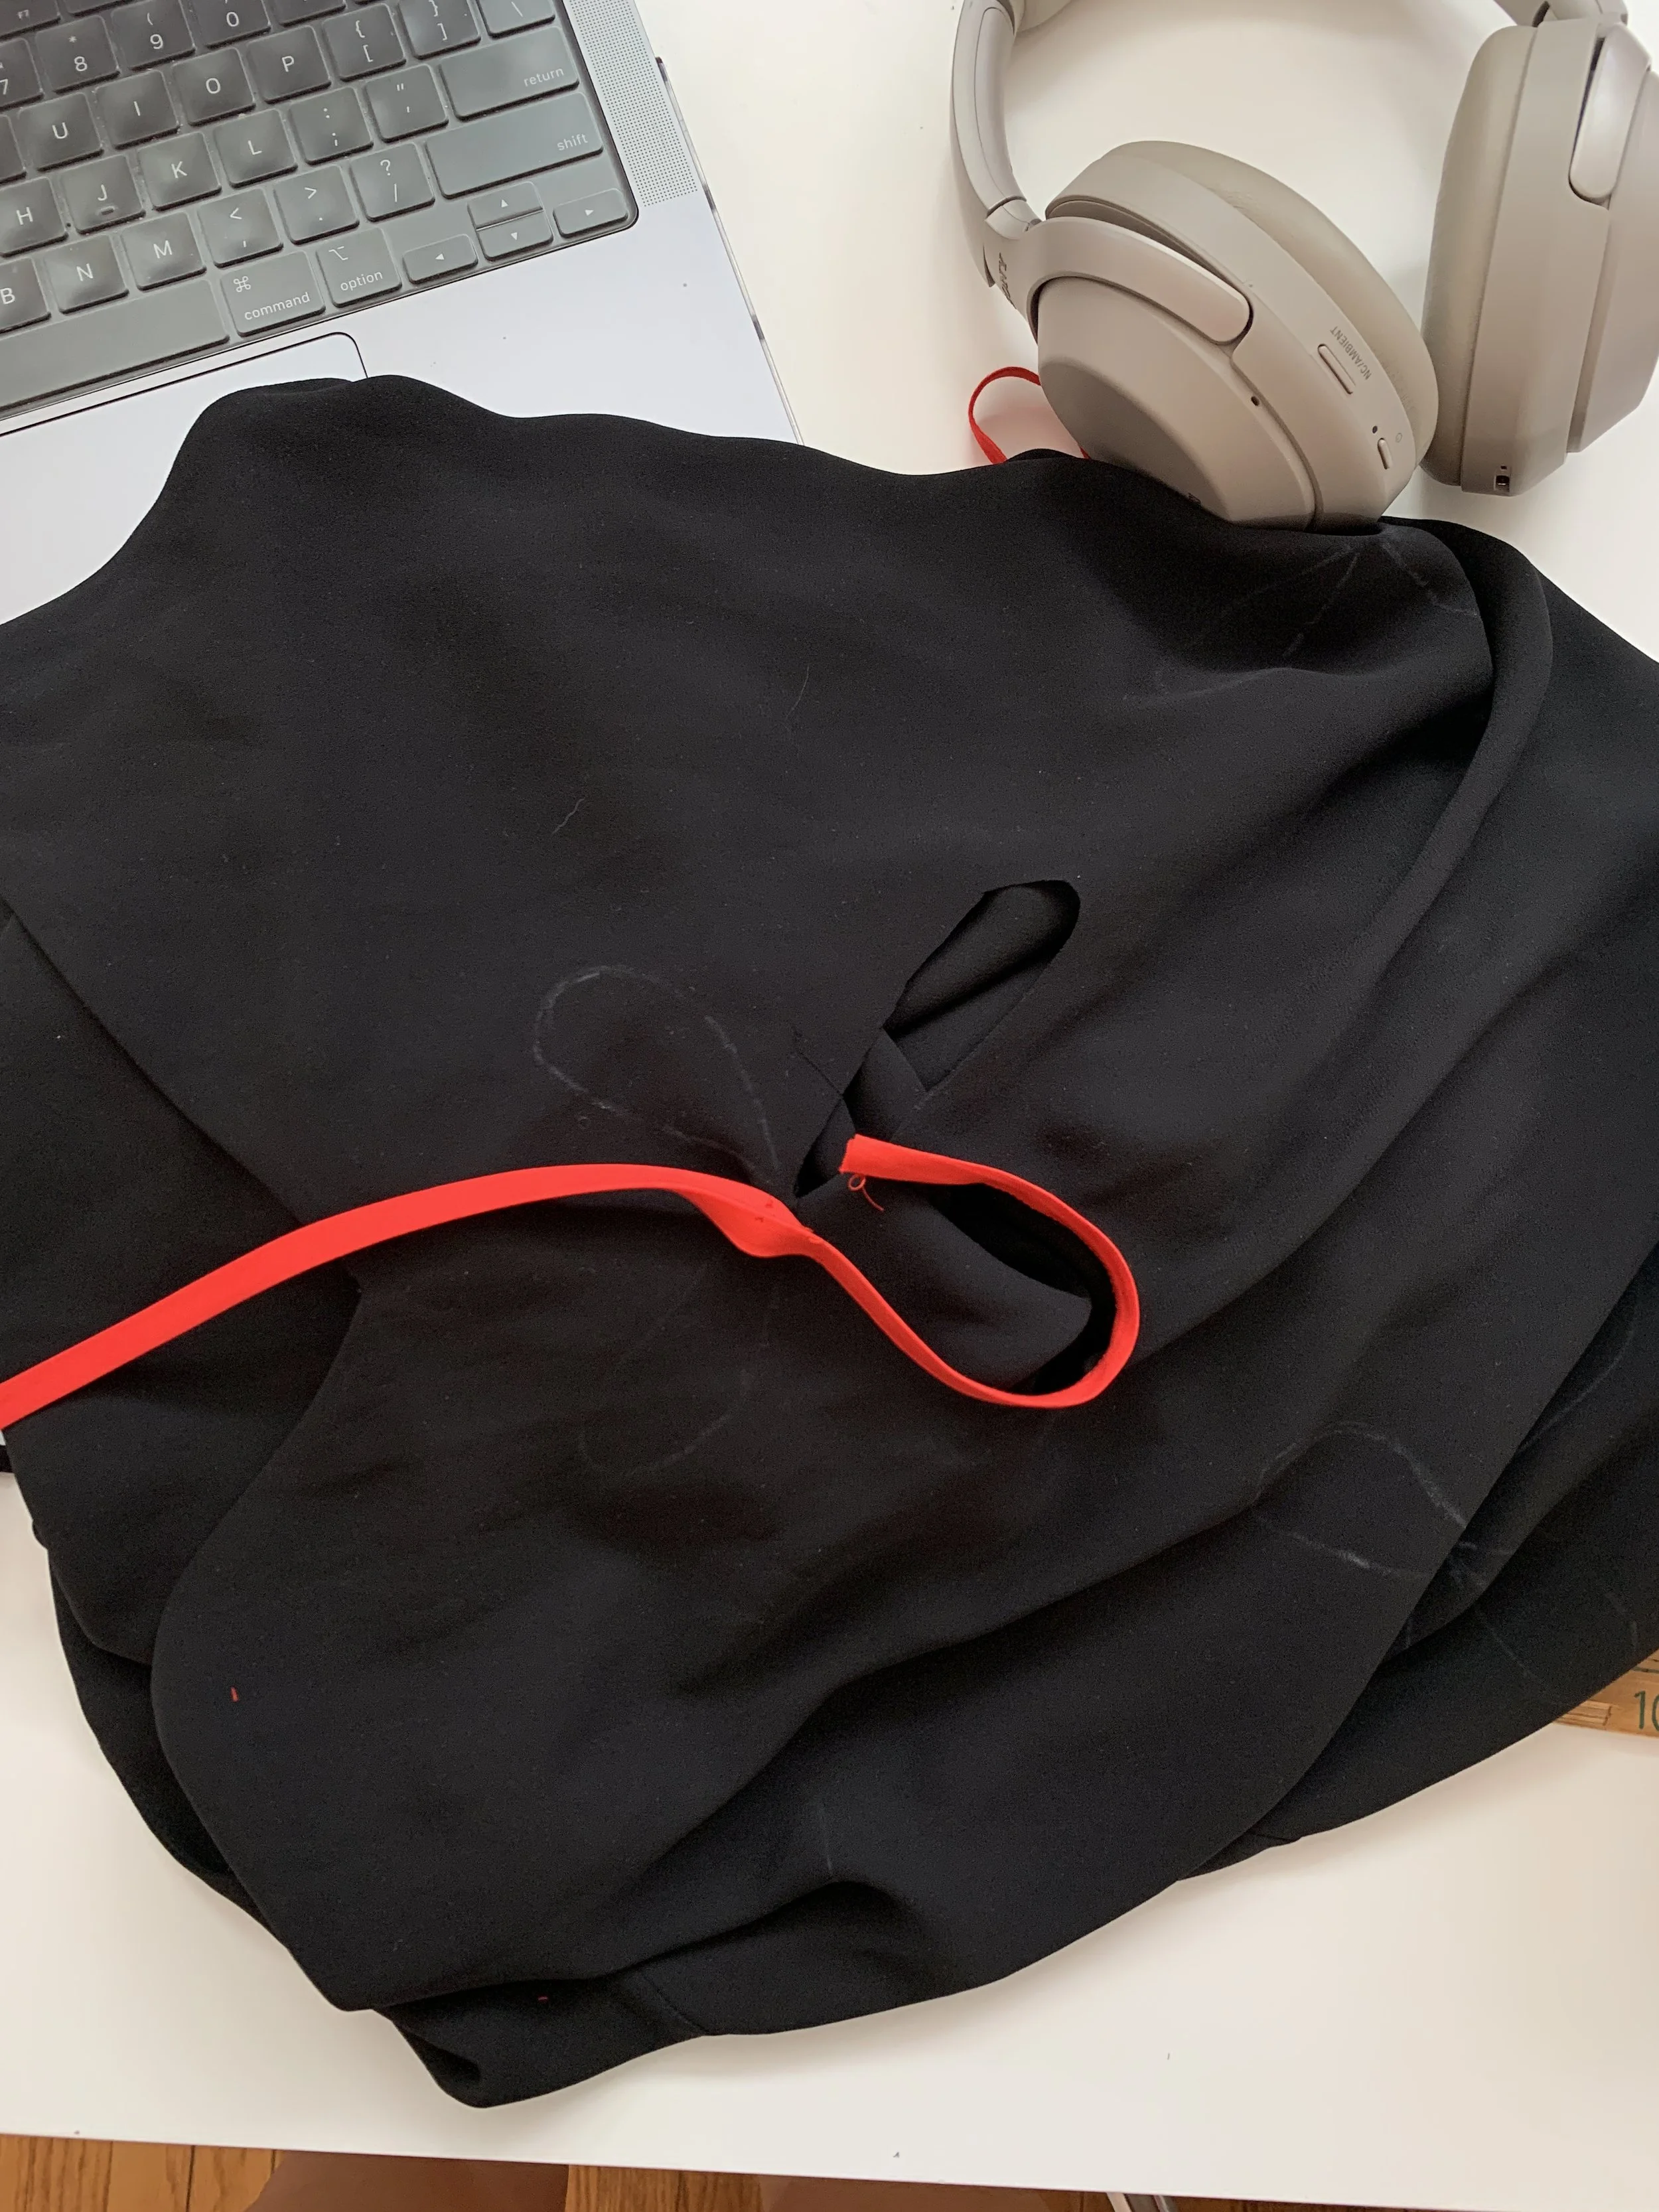
5. Cut out the first petal. I only cut the top layer of my dress, leaving the lining to show through the hole.
6. Sew bias tape to the wrong side of the fabric
7. Give the raw edges a snip around the curves to help it lay flat.
8. Fold the bias tape over and sew the bias tape to the right side fabric using a straight stitch as close to the edge as possible, hiding the raw ends.
9. Straight stitch the length of the tie on the end of each petal, hemming the ends within each one as you go.
10. Repeat these steps for each of the petals, ensuring you hide the shorter end of the bias tape within the start of your petal as you go.
11. Repeat for all flowers, cutting each petal open one at a time.


The original inspiration cost $905, mine cost….
… Making this a 19x improvement!
Flip #3
Cinch Strap Shirt by Simone Rocha
What you’ll need…
Thrifted button up - $13.79
Webbing - $5.22 (Link to something similar)
Extra fabric - $1
Slide buckles - $3.39 (Link to something similar)
Picking a simple white button-up made finding webbing and buckles that matched super easy!

Cinched Shirt by Simone Rocha

The shirt we’re working with…
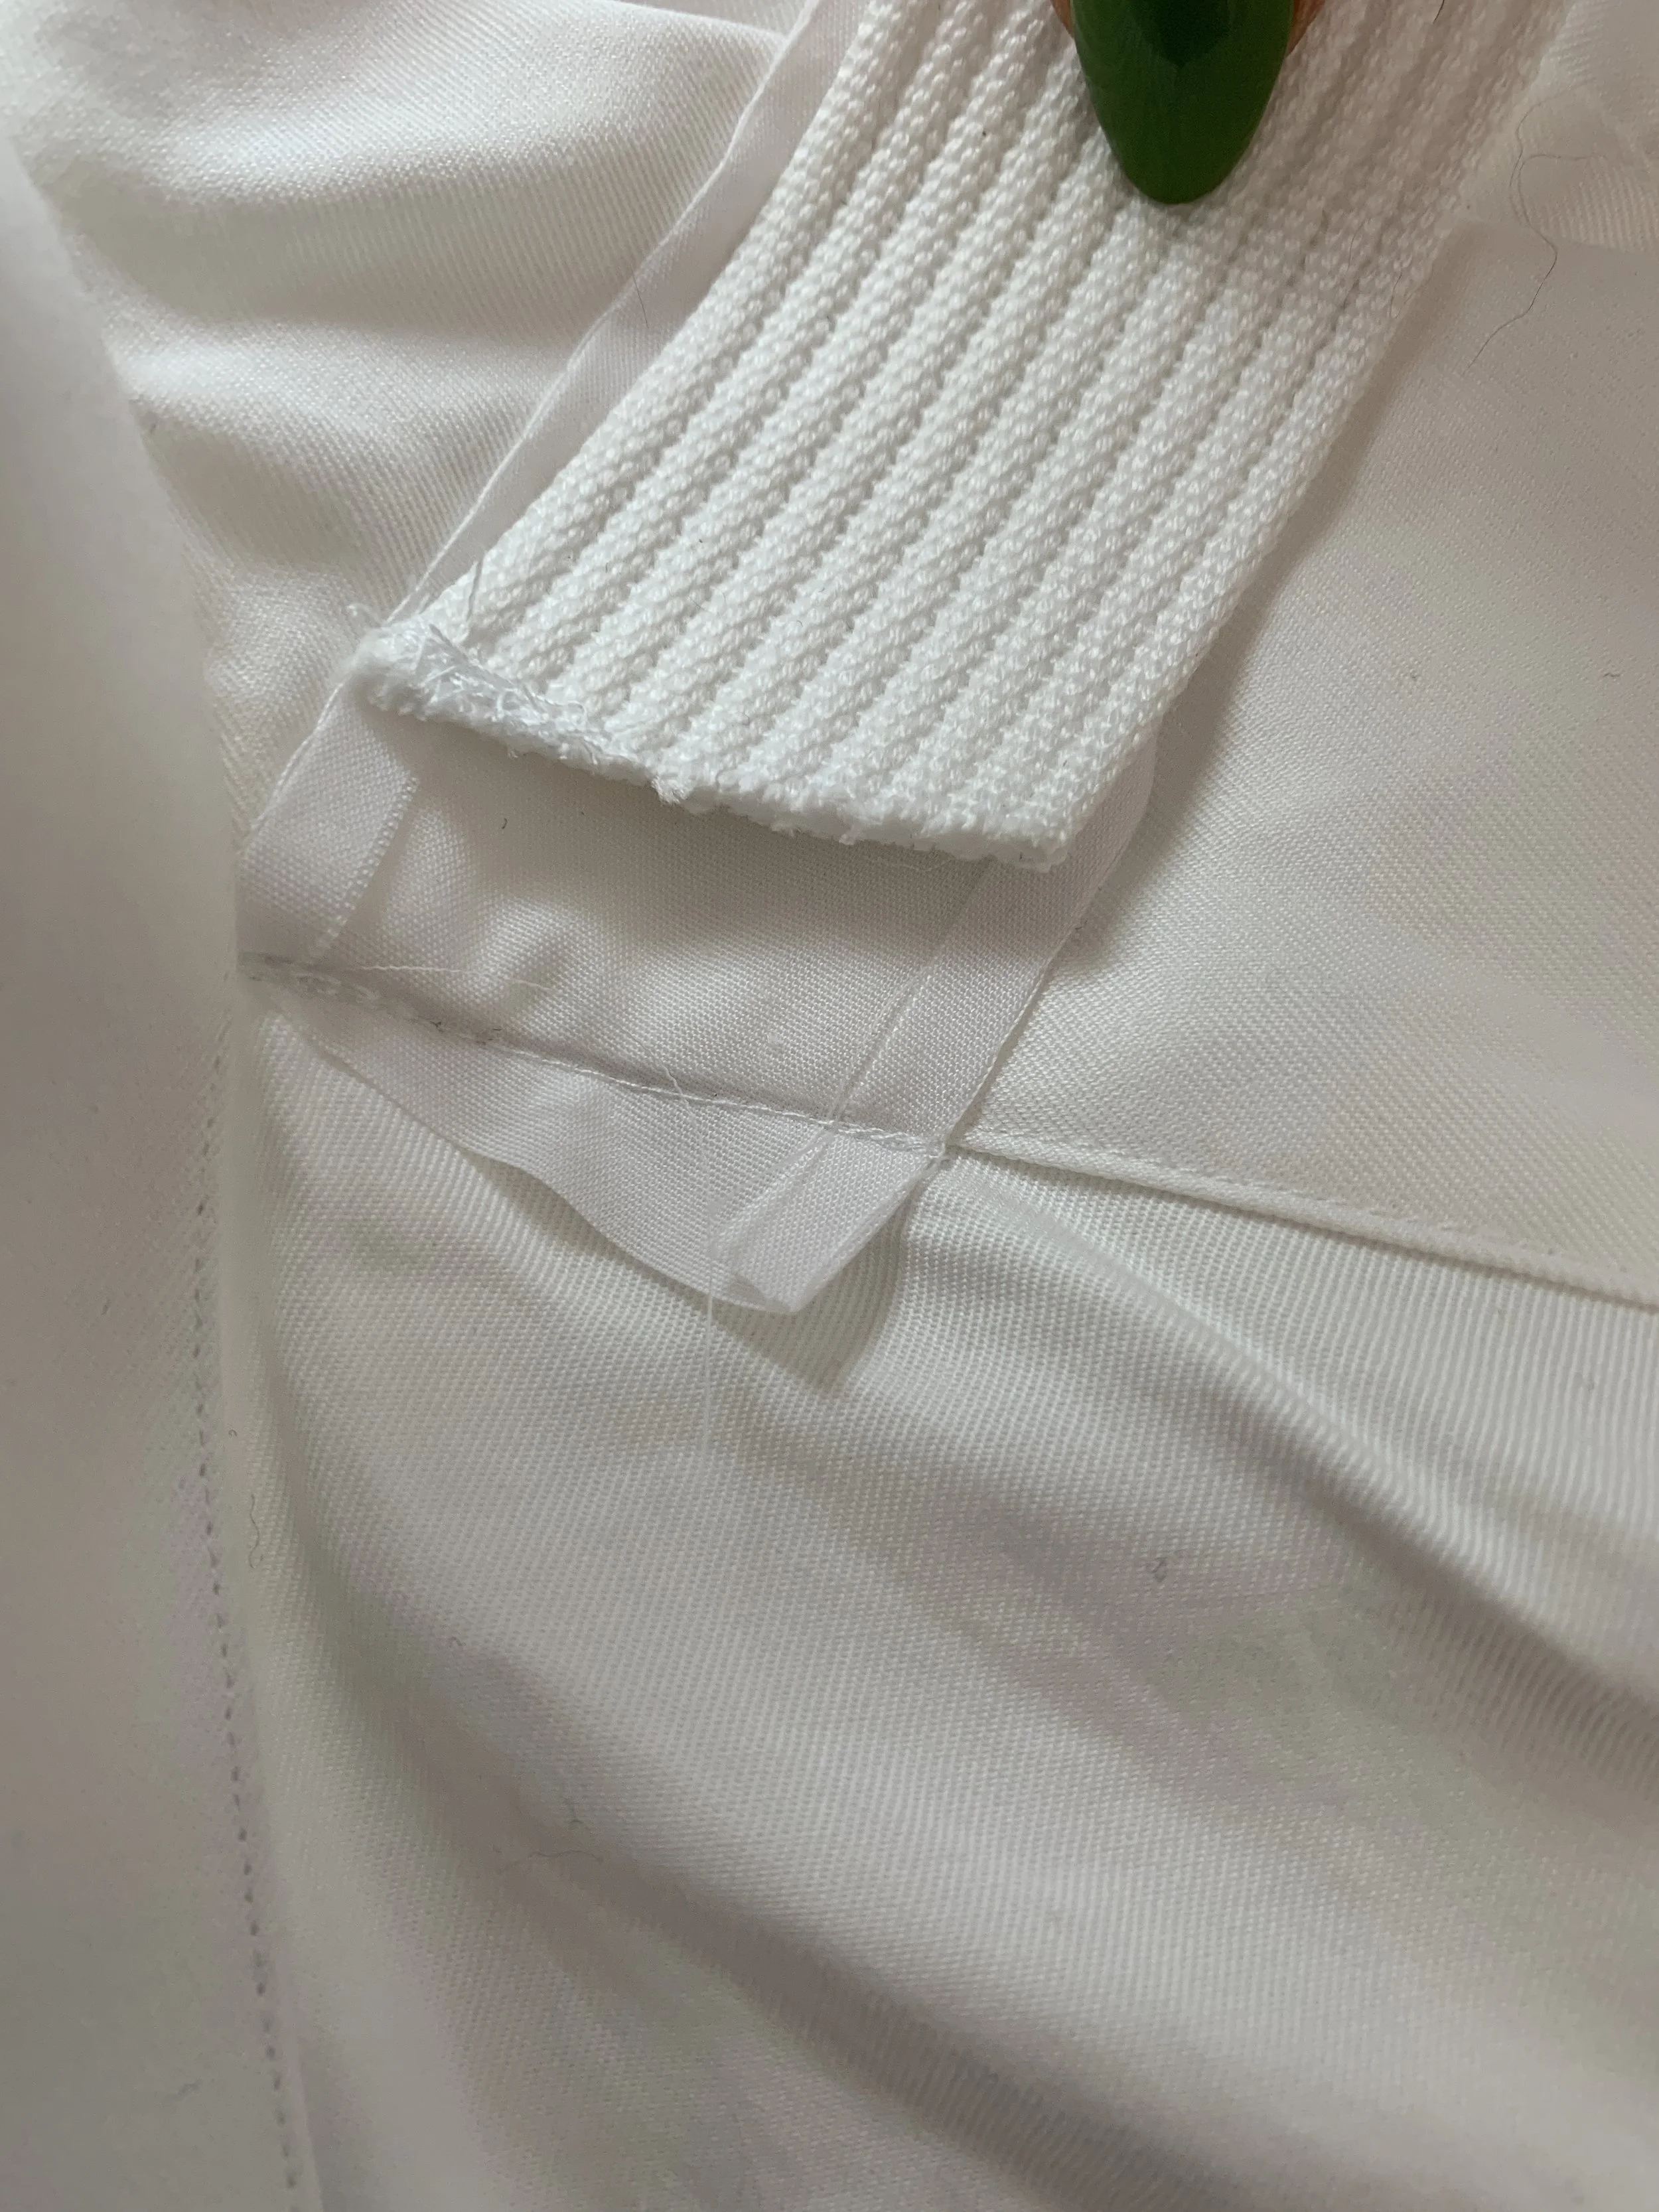
1. First I am cutting two casings for my webbing to sit in on either side of the shirt. I cut my casing to be the width of my webbing + 1.5” or 4 cm seam allowance.
2. Using a basting stitch, I sewed perfectly 1/4” from the edge to help press the raw edges in, giving it a nice crisp crease.
3. Mark out where the straps will sit on your shirt, taking into consideration areas that will curve when worn. (The goal is for it to sit perfectly straight and aligned on either side).
4. Sew the top of the casing, with the right sides together using a straight stitch, keeping the stitches close to the shoulder seam. Flip the straps down. (Your casing should have no visible stitches on top).
5. Hem the bottom of the casing, hiding the raw edges inside.


6. Sew the webbing to the shoulder seam using a zigzag stitch.
7. Sew the length of one side of the casing, keeping the stitches close to the edge and ensuring not to sew over the webbing inside. Repeat on the other side, pushing the webbing to the opposite side.
8. Mark out where your bottom webbing will connect with the top, lining it up for a seamless connection.
9. Overlock the bottom edges of the webbing, then finish them off using a top stitch box pattern.
10. Attatch the buckles to the bottom webbing, using a straight stitch.
11. Sew the bottom webbing to the bottom of the shirt.
12. Thread your top webbing in the buckles to finish it off!


The original inspiration cost $1090, mine cost….

… Making this a 47x improvement!
Let’s take these looks to the streets…


These thrifted finds are almost unrecognizable after these simply changes but look like they came this way! So happy with the way these turned out…
